
My nephew married a Peruvian woman in Philadelphia five years ago. They had been together for some years before, but the decision to marry at that time was logistical so that he could get onto her health insurance when she started a job in the UK. My sister Sanna threw together an impromptu wedding in her living room, another sister’s daughter went online to get legal credentials to officiate, and a week later they were married. It was quickly arranged, but wonderful, and it had everything but the bride’s relatives. The bride and groom promised that there would be a wedding in Peru someday, and someday came in early January this year. My husband and I accepted an invitation from the groom’s mother, my sister Sanna, to join her and another of our sisters for a couple of weeks of tourism in Peru, and some of that tourism involved a trip into the lower Andes. We rented a car and drove it from Lima up into the mountains, where we stayed in a couple of towns that rarely see tourists from the United States and Europe, in order to see attractions described glowingly on the websites. There were reasons why those towns rarely see tourists from the United States and Europe, because there actually wasn’t anything much to see there.
But the view from the rental car made a big impression on us. This will become relevant.


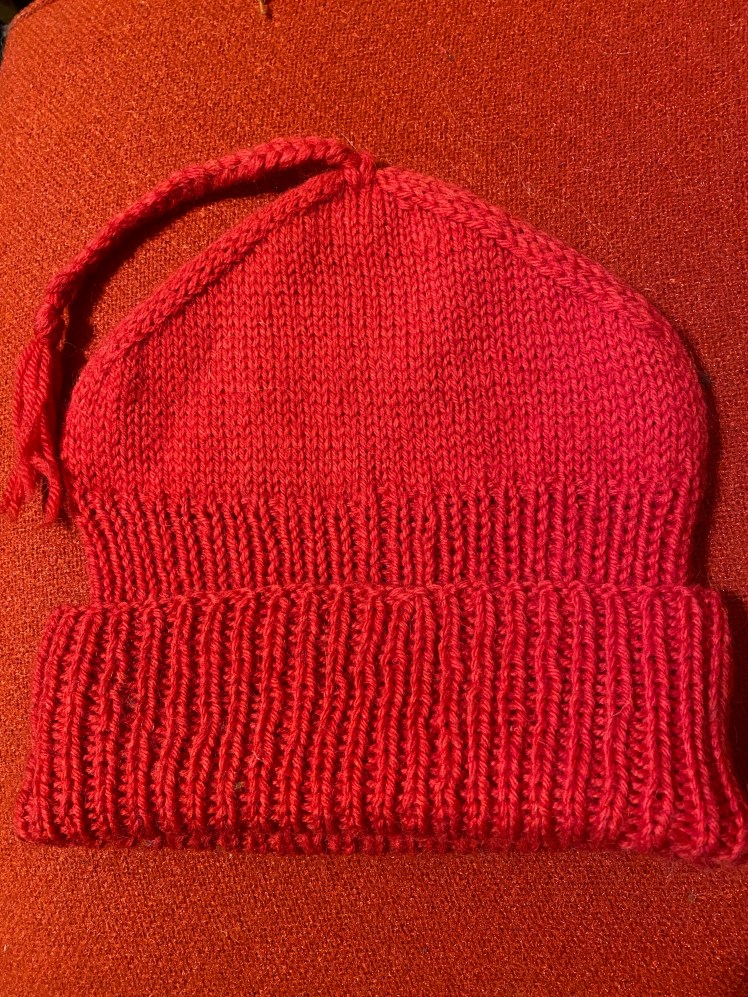
When we came home, I got to work on January Swatchathon. One of the projects was the red hats inspired by Norwegian resistance against the Nazis, whose pattern was a fundraiser to support Minnesota’s immigrant community against the attack the Trump regime’s Immigration and Customs Enforcement (ICE) thugs was inflicting on it. I really liked the orange-pink undertone of the red yarn I was using, so I got enough for a sweater.
I had a hand knitting pattern in mind for it, Hechima Collar Sweater by Noriko Ichikawa. This was a short, wide pullover with a big shawl collar. I thought it would adapt well to machine knitting on my mid-gauge LK150, and its plain stockinette fabric was an invitation to modify it with patterning as I pleased. My eye fell on my 2025 Swatchathon tuck stitch scarf, and I decided to use a simple bubbly tuck stitch in the red yarn as a modification to this pattern.

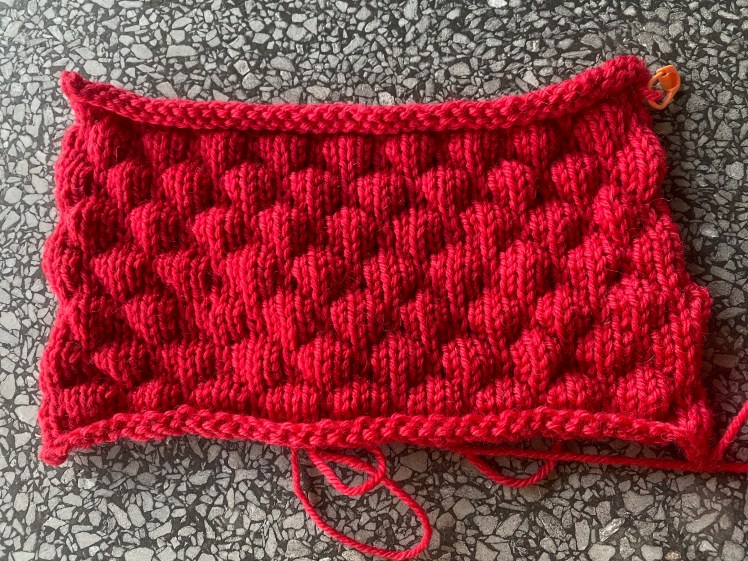
Using the stitch and row gauge numbers from this swatch, I decided which size I wanted to knit and highlighted the numbers for that size in the pattern. Then I read the pattern over and over and over again and added up the number of rows I needed for each stage in the construction and how many stitches I should have at each increase row. I wanted to be very careful about these numbers. The pattern has a European dropped back shoulder, which means that the back has all the short rows for the shoulder shaping and is shorter than the front, which has extra length to drop over the shoulder onto the back, and I haven’t yet learned the concept of this construction well enough to disregard instructions and do it on my own. It took me days to read the pattern accurately and work out the numbers. That’s because of me, not the pattern, whose numbers were accurate and expressed clearly for hand knitters. I like the line that the short rows and dropped back-shoulder line create across the back of the garment, and I like it when patterns emphasize it in some way. This pattern doesn’t emphasize it, so I did so on my own, by knitting four rows after the cast-on and catching the fourth row in the needles to form a welt.
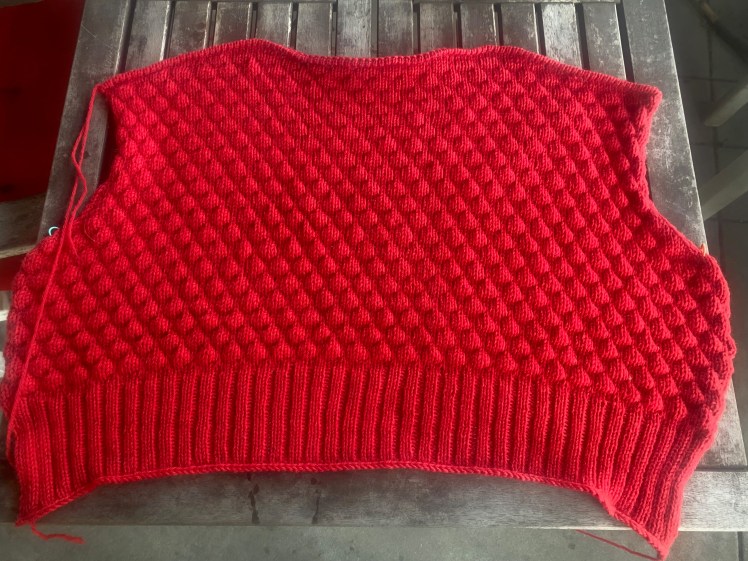
When I decided to embellish the design with 4-stitch, 4-row texture patterning, I wasn’t totally mindful of the fact that now I had to do some extra mathematical thinking to make sure the patterning matched up where the fronts and seams joined up and the front and back ended on the same row. I managed that feat well enough where it really counted, at the join between the front pieces at the bottom of the neck opening, and I got the rows at the armpit and the hem to align at the seams. I’m not sure if I got the bubble shapes to match up all that well, but the seams distract attention from these minute details.
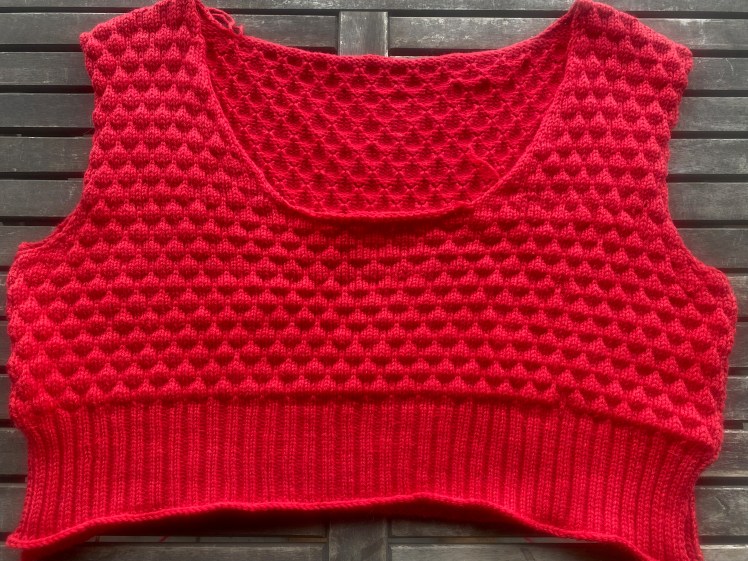
One thing about the pattern that most non-Japanese bodies would need to modify is how very short the garment is as written. It calls for 5″ of knitting from the bottom of the armhole to the start of the ribbing for the hem, which is an additional 4″. I like my sweaters on the short side, but that is way too cropped for me. I added several more inches of length in the bubble patterning, then knitted 4″ for the ribbing, which I executed by laddering down one stitch out of every three and reconstructing it with the latch tool. When front and back were knitted, I picked up stitches for the sleeves along the slightly shaped armhole. Once again, the pattern gave a too-short measurement for the sleeve length, and I added a few more inches to the length. The cuffs required decreases all around the fabric, so I took the knitting off the machine and did the decrease row and the cuff ribbing by hand.

The last bit of knitting was the collar. The pattern called for 166 stitches to be picked up around the neck opening, which exceeded the 150 needles of the LK150 needle bed, so I hand knitted it. It was a long and boring task that took the better part of a week, but it taught me the concept of how to build and shape a shawl collar that crosses over the opening at the base of the collar.
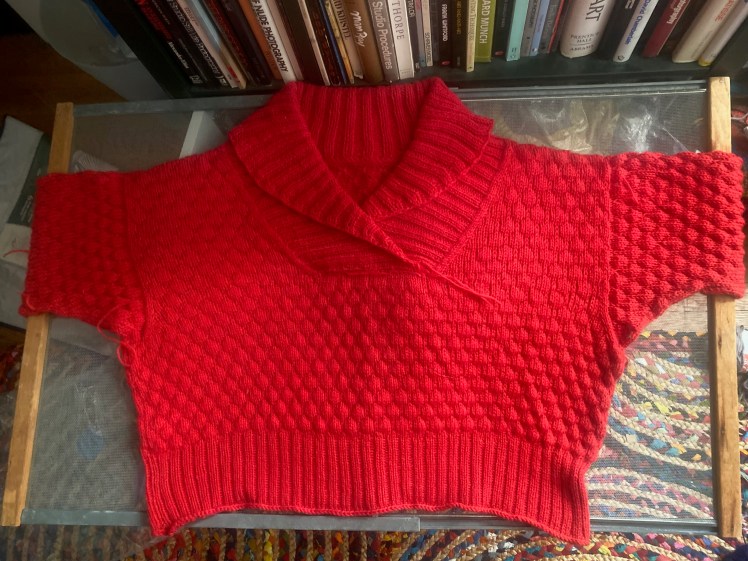
In the end I had a lovely pullover that didn’t look right on me. I tried to talk myself into liking the fit, I took photos and posted the best one on my Ravelry group The Interior of My Brain. I wore it to the yarn shop and got kind reactions. But there were too many reactions that confirmed my suspicions: something was wrong with the collar. The bad photos that I won’t show anyone told me the brutal truth, that the collar was both too loose and too skimpy, and the sweater was too short for me. There really isn’t anything wrong with the collar, which I knitted exactly according to the instructions, but it needed to be worn by someone else. I didn’t realize it while I was making it, but I was actually making the sweater for Sanna. It’s exactly right on her.


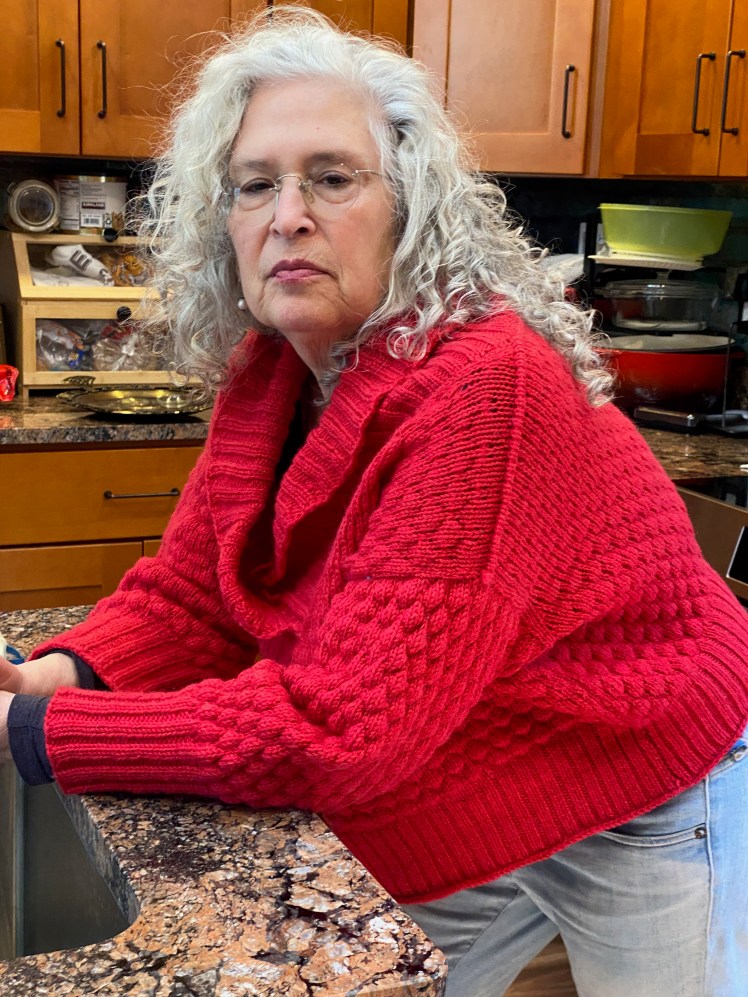

After Sanna tried on the sweater and agreed that it suited her, I took it back home with me for a while so that I could refer back to it while I worked out a second version that would really be for me. I had a big pile of heavier leftover yarn in neutral colors, a lot of it from my First Knitting Era in the 1980’s and 1990’s, and I was envisioning filling in that big blank space of plain stockinette with random, interrupted stripes and splotches of close tones and sharp contrast colors using the LK150 again and the intarsia carriage. In fact, when I first bought the Hechima Sweater Collar pattern, I thought I would do that using a big collection of heavy yarn in reds, oranges, fuchsias, and purples. I might make yet a third version in a red-spectrum colorway, but at that moment I forgot about the reds and visualized the neutrals. The first, too-skimpy version had provided me with the numbers I would use in this second version, which would not be too skimpy when knitted in the heaviest yarn the LK150 can handle.
For ease of knitting this thick yarn, I put the tension dial on 9, the loosest tension that can be knitted on the LK150 without skipping needles, which produced a holey, flaccid fabric with an enormous gauge. That was when I decided I would felt the sweater to fill in those holes and bring the finished sweater to the right dimensions. Using the intarsia carriage and my palette of whites, beiges, browns, and grays, I improvised jagged lines and wedges in gradients and sharp contrasts. When I got the first part, the back, off the machine and looked at the front side, I realized what I had been doing: depicting an abstractified representation of the colors and shapes I had seen from the back seat of the car Sanna drove through the sharp twists and steep inclines of narrow roads on high, rocky cliffs and no guardrails, through gravely washouts, up, up, up into the Andes mountains.
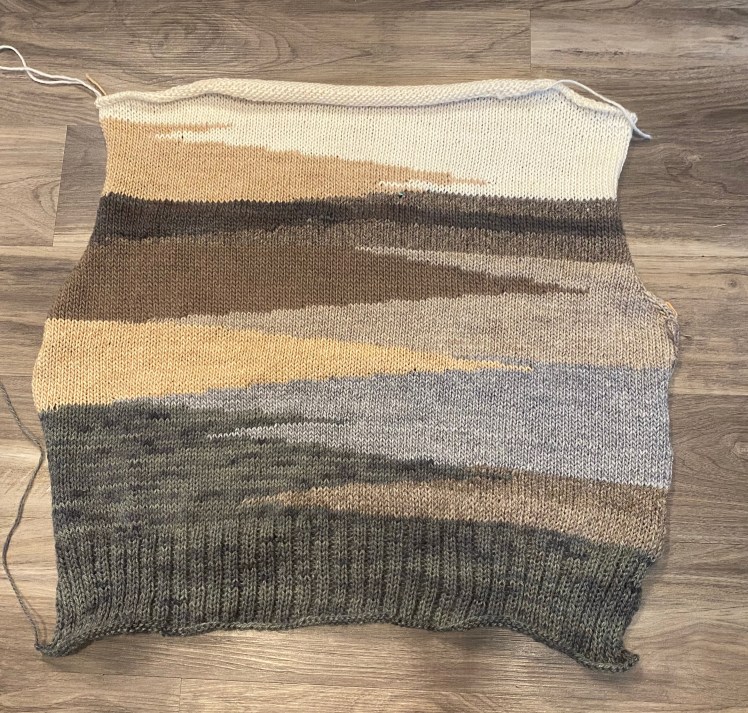
When I knitted my first version of this pattern, I knitted the back down to the hem, the front down to the hem, re-formed the rib stitches with the latch tool, knitted the sleeves down to the decrease for the cuffs, which I completed by hand, and knitted the collar by hand. That was a lot of hand knitting. I tried something different for the second version. After knitting the back piece on the machine, I machine-knitted the first side of the neck shaping, knitted it off onto waste yarn, and did the same with the second side of the neck. Then I knitted the first half of the collar on the machine. In the first version, I felt that the pattern’s instructions produced a collar that was simultaneously too loose and too skimpy, so I decided to see what would happen if I knitted it on the machine’s 150 needles, 16 less than the 166 picked-up stitches that the pattern instructed. It made the surrounding fabric pucker, but I decided to take my chances that it would all come out in the wash.
When I had knitted enough of the collar to cover the join between the two sides, I took it off the machine and completed the short rows that would make the collar fold over in a curve that covered the bottom half of the collar. I used an ancient skein of off-white Brown Sheep Lamb’s Pride. but I must have used bits of it long ago, because I ran out just at the point where I needed to take the knitting off the machine, so I found bits of other yarns that I could combine in gradating marls. I put the knitting onto a circular needle that was lying around, U.S. size 6 or 7, and reconstructed the stitches to form a 2×2 rib. The pattern didn’t have instructions for a 150-stitch collar, but the concept was to place the short rows three stitches apart. I knitted short rows until I had enough fabric to generously cover the bottom half of the collar, while adding new yarns to my gradated marl with spit-joins. It took two or three days to complete this hand knitting, as opposed to about a week when I did the entire collar by hand. Then I put the two front halves, with the completed collar, back onto the machine, and cast on the stitches to join the two halves. It would have been clever if I had thought to pick up stitches from the outer half of the shawl collar, but it either didn’t occur to me or I chose to do that by hand later so that I could have more control over the result. If I do a third version, I will give that a try.


When I got to the front, I found some additional colors in my stash that were compatible with the concept, a blue gray that I used in thin partial rows, and a mossy green that blended with the green-gray that I was using for the ribbings. I might have been hedging against running out of that green-gray, but I also found that it worked aesthetically and thematically. I used that mossy green in a gradient in the cuffs that progressed from brownish gray to greenish gray to mossy green. When I got to the cuffs, I took the sleeve off the machine, hand-knitted the decrease row, and put it back onto the machine to knit the length of the cuff and reconstruct the ribbing stitches with a latch tool.
As I had planned, the sweater was excessively big when all the knitting was done, by about four to six inches in all directions. The neck and collar weren’t lying right yet; the reduced number of picked-up stitches around the neck caused puckers and lopsidedness in the surrounding fabric. Even after seaming, it still looked pretty rough, although I knew theoretically that it couldn’t be judged until it was wet-blocked. I washed it and let it dry until it wasn’t sodden any longer, and then I threw it into the dryer until it was completely dry, knowing it should be fine, since it takes a lot of heat and agitation to felt things and there was plenty of room to spare.
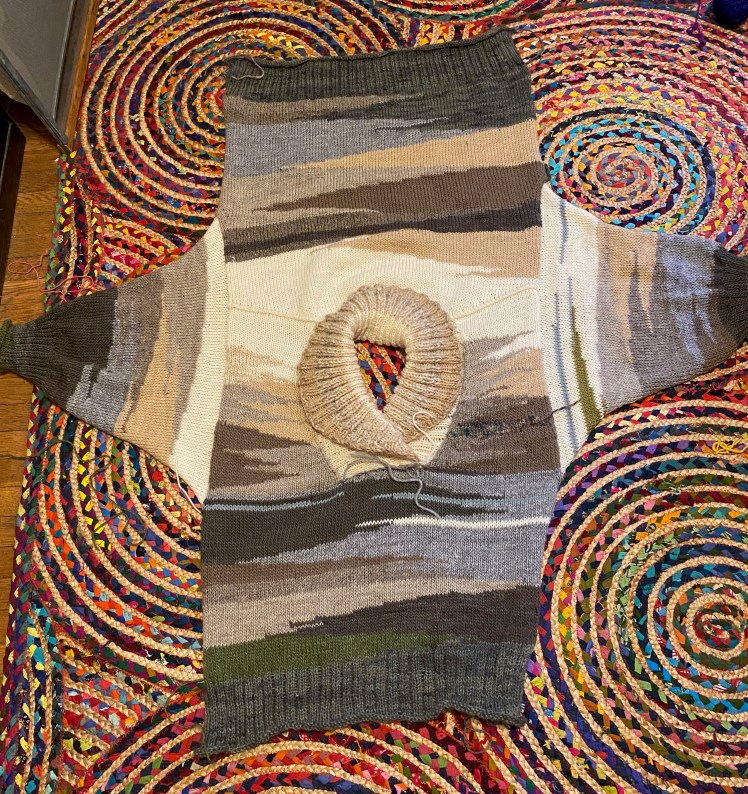
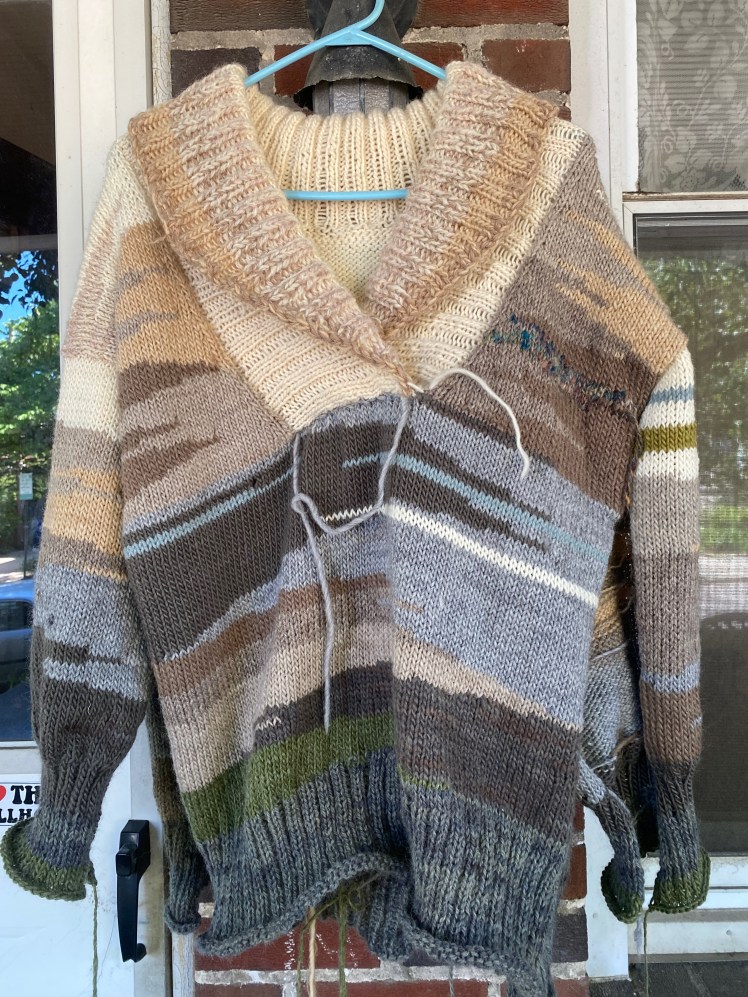
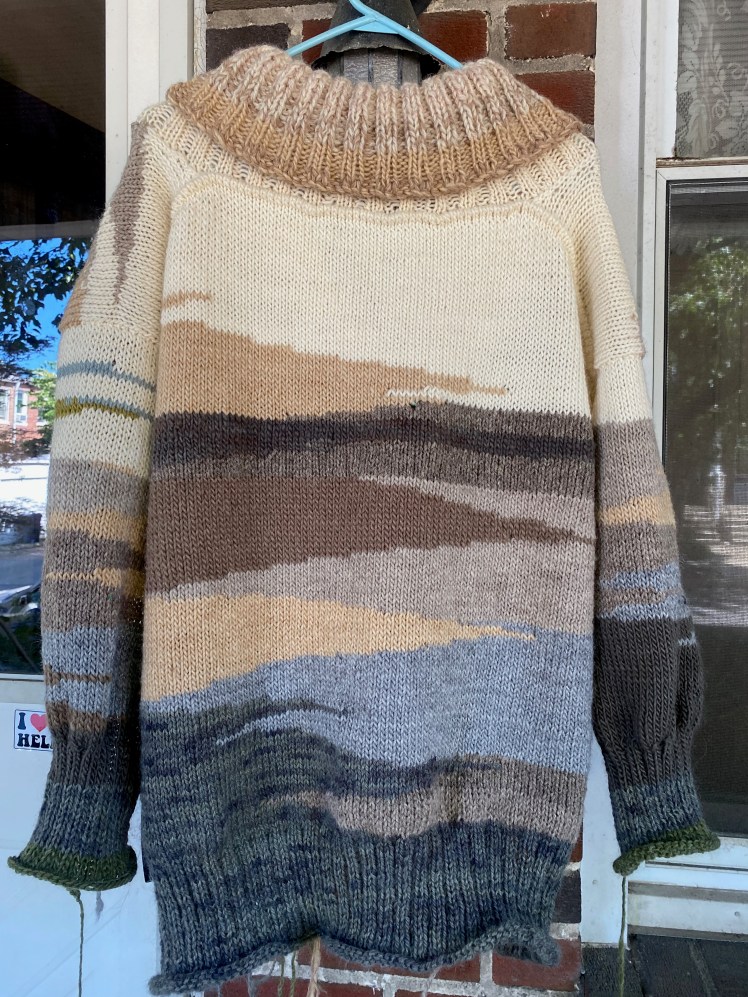
It emerged from the dryer completely transformed. The ancient, scratchy wool had changed from grizzled to soft as a kitten. The puckers and lopsidedness were now even and straight. The fabric was thick and cushiony. It fit exactly the way I wanted it to. Only one thing was wrong. Cold drafts could blow into the neck, and I needed an option for shutting them out. I searched through my button bag and found a round wooden 1″ button on a card that sold the buttons four for 25 cents. How long ago could that have been? I made a short idiot cord, sewed it on, and voilà! Perfect! Let the cold winds blow! Pity it was June in the swampy U.S. mid-Atlantic.

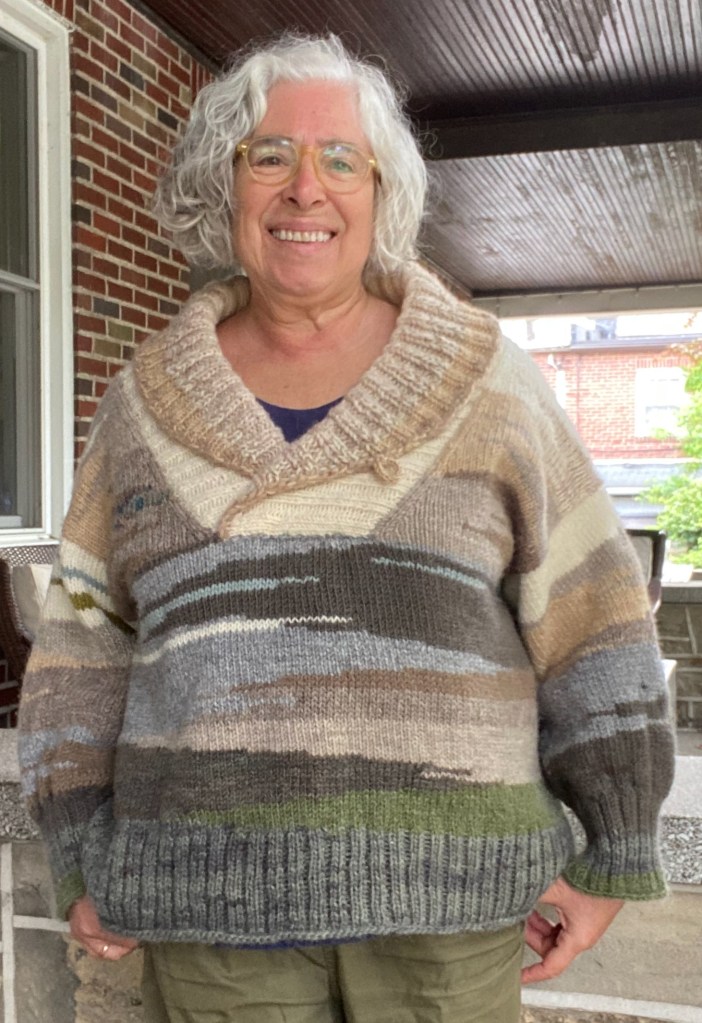
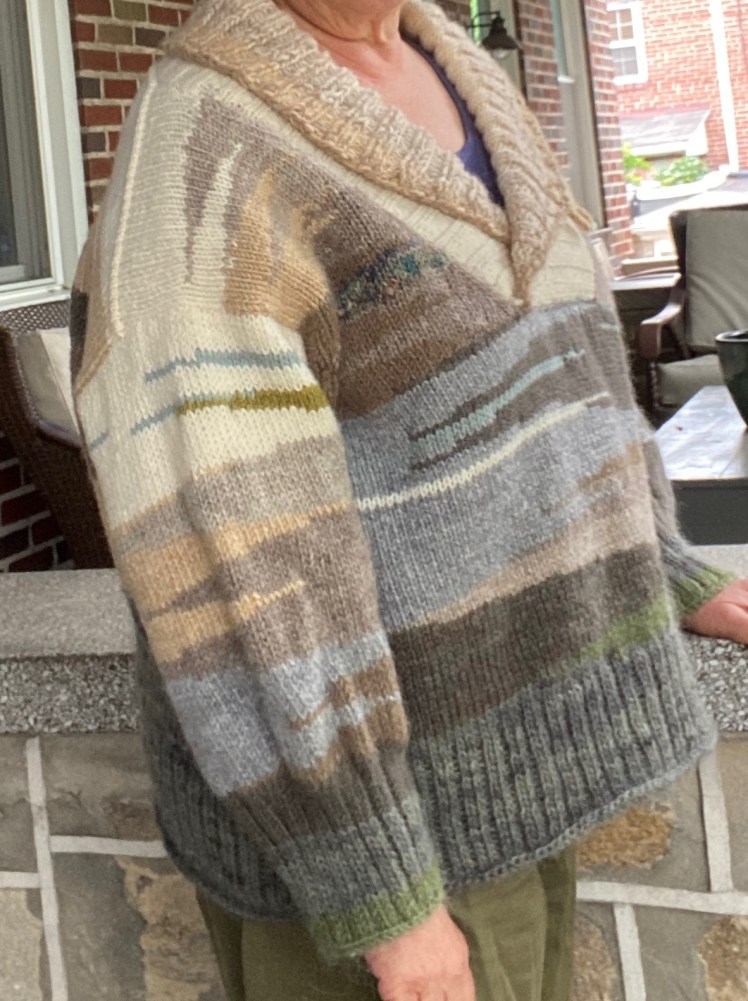

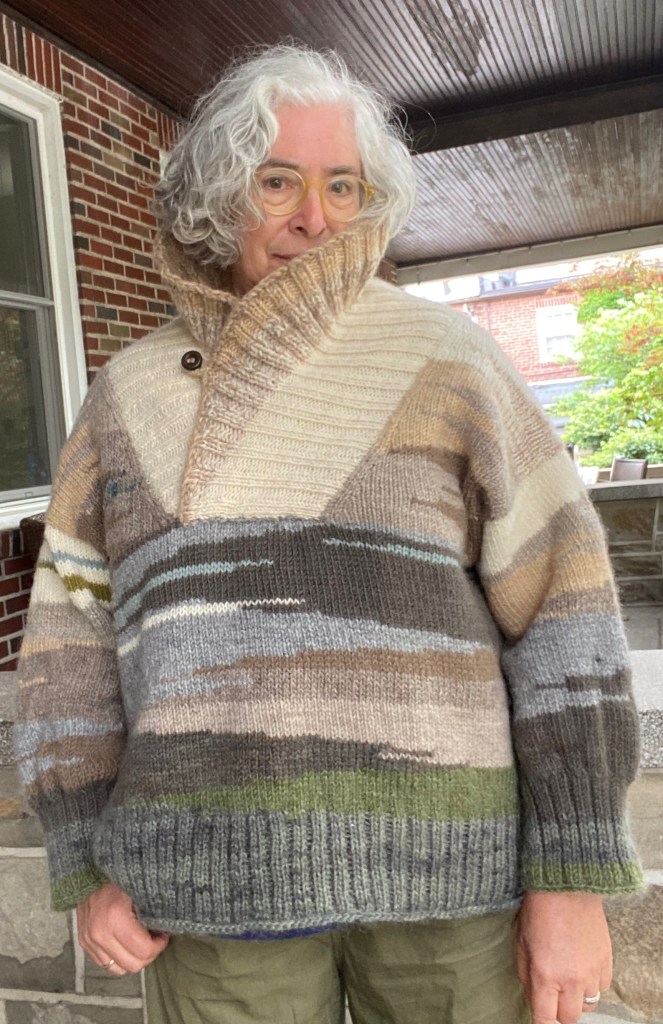


This second version bears so little resemblance to the first, it’s sort of amazing it’s even the same pattern. The colors and patterning of the yarns is jaw-droppingly exquisite, and right in one of my favorite palettes. I love the muted green splash at the bottom ( and your slacks are such a perfect match to it!) The serendipity of the final state of the collar, compared to the previous version’s extra large and loose appearance is quite remarkable. It pulls the rest of the sweater together in a grand architectural statement, rather than being a sort of floppy addition. The plan was nicely done, and well executed! I agree that this sweater is totally you. And a lovely echo of the dramatic landscape and geology from your trip to Peru.
As always, thank you for making the effort to share your creative journey in words and photos. Very inspiring.
LikeLiked by 1 person
Thanks, Tanya! Your comments are the best reward for writing my posts.
LikeLike
you never cease to amaze me. Well done.
felting in the dryer is such a new idea to me.
LikeLiked by 1 person
Thank you! I’m looking forward to felting more knitted garments too!
LikeLike
I thought you were mostly HKing, and was pleased to see you doing intarsia on the machine. Very Nice, natural colors. Well Done You! But what made me sit up was the circular multicolor “rug” or “Blanket”. I like to do Icords and crochet them or braid them into rugs. I do them to use up the bits and pieces rather than throw them away. So am I looking at something you made? I particularly like the contrast, multicolor/plain rows.
LikeLiked by 1 person
Thank you, about the sweater. But I can’t claim credit for the rug. I got it from Wayfair a couple of years ago, and I think they must have paid the crafters slave wages, which makes me feel pretty guilty.
LikeLike