
I don’t learn quickly, but when I learn something, I’m like a dog with a bone, and I find a million different ways to use the one little thing I finally figured out. Sure, everybody else who has a Brother electronic knitting machine with preprogrammed Stitchworld patterns takes it home, sets it up, figures out how to keep the stitches on the needles, turns on the machine, and starts cranking out the Stitchworld patterns, but it took me six years of steady machine knitting to feel ready to do that. And when I finally did do that, I discovered that somewhere along the way, my beloved machine had developed a needle selector problem that creates a straight line of background color every 16th stitch, and I haven’t gotten around to figuring out how to fix it.
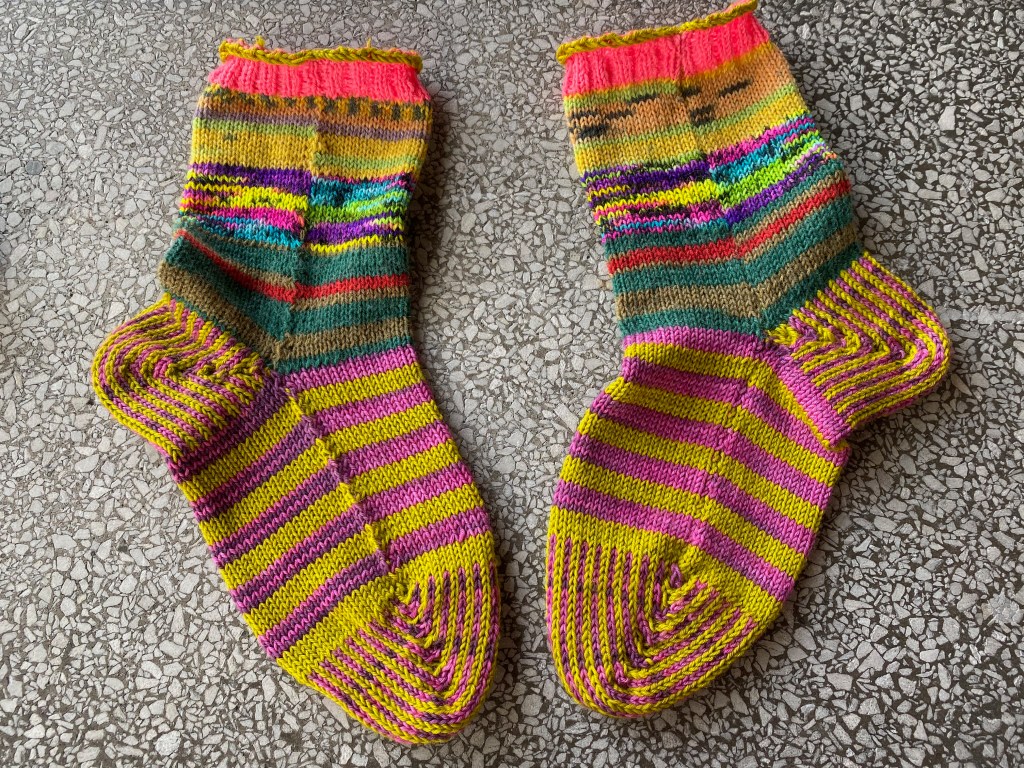
But I discovered one Stitchworld pattern in which every 16th needle goes into that position anyway, and now I’m doing that pattern to death. It’s Stitchworld #532, which is a 1×1 ribbing intended for a garter carriage. But I’m using it with the fairisle settings in a two-color alternation that creates a vertical pinstripe. Pinstripes open their own world of design possibilities, and right now I need socks. Hence socks with pinstripes, even the heels and toes. Actually, especially the heels and toes, because heels and toes knitted in two strands of yarn don’t wear out as quickly as socks knitted in only one color.
It’s possible to knit seamless socks on a knitting machine by using the ribber and the main bed together. I have a ribber, I even used it a couple of times when I first started machine knitting, but I found it stressful and haven’t used it since. Someday I will revisit the ribber with the advantages of much more experience, but for now, my big stretch has been to internalize the operations of using the Stitchworld patterns in the fairisle setting. My socks would be knitted flat with a hand-manipulated latched ribbing, using the 1×1 stranded pinstripe pattern, a short-rowed stranded heel and toe, a Kitchener join between the sole of the foot and the toe, and a seam on the side. To get the Kitchener join on the sole of the foot, I mustered up some spacial logic that I’m rather proud of for having figured it out on my own, which is that if the heel is worked on the right side of the knitting, the toe should be worked on the left in order to get the grafted stitches onto the sole of the foot. Reverse that for the second sock so that the socks can be worn with the seams oriented on the inside of the leg.
My first attempt was all pinstripes all the time in wide stripes of color changes, and I had plenty of accidents and errors. I made lots of use of my cool new pick-up tool, which has a sharp, curved, pointed metal tip with a hole to fit the needle latches. It looks like something you’d see at the dentist. It’s the best thing I’ve ever seen for retrieving dropped stitches that are hiding behind strands of the other color. It was a troubled process, but if I’m anything, I’m persistent, and I finally got that first sock off the machine and sewn up, whereupon I discovered that I had knitted a sock for my husband, not for me. I seamed it closed with my usual mattress stitch, which usually looks very good in my sweater seams. This time it looked like a big ugly scar running up and down the length of my husband’s foot and ankle. I figured that the deep and uneven seam was because I dropped stitches at the edges of the knitting and couldn’t repair the stitches perfectly, so I used the same seaming method on the second sock, which I knitted with fewer accidents. The seam looked better on the second sock, but I had once heard machine knitting goddess Diana Sullivan mention a flatter, less conspicuous seaming method whose name escaped me.
I posted my question and a photo of the socks on a Facebook machine knitting group and got some interesting and useful answers. The name I was looking for was Bickford seam, and I googled videos demonstrating it. There’s a video by Very Pink Knits, but she says it’s not a very strong seam, which sounded discouraging. Someone else linked me to a video by Creative Tien demonstrating how to seam a sock knitted flat without sewing it closed. It’s done by stretching the seaming yarn across the knitting and hooking it into the latch of the end needle of the side opposite the carriage and knitting the row. When the sock is off the machine and the toe is kitchenered shut, you pull on the end of the tangle of strands across the knitting and it miraculously closes the circle with a flat and inconspicuous seam.
So I tried it out on on my next pinstriped stranded sock, and bad things happened to the stitch next to the edge stitch on the right side. That stitch just didn’t want to stay on its needle and I couldn’t figure out what was making it take that flying leap row after row.

I frogged (good thing I enjoy detangling yarn barf) and resigned myself to a sewn seam. But I had also posted my question about the Bickford seam on Diana Sullivan’s Facebook page. Diana was kind enough to email me a beautiful handout she had prepared for a workshop on the weekend, on the subject of seams, and she was interested in my feedback. My timing was perfect! As were Diana’s diagrams, photos, and verbal instructions for the Bickford seam. I spent 30 seconds looking at her diagram and a very short time later I had sewn up 2/3 of a perfect Bickford seam on the sock. As for Very Pink Knit’s disparagement of the Bickford method, if it’s good enough for Diana, it’s good enough for me.
However, I was a few rows off when I reached the cuff and had to wiggle things around to end the seam at the same place on both sides. On the second sock, I worked from the cuff down, and somehow couldn’t find the knot/loop combination from that direction. I did the seam by sticking the needle down into the nearest part of the edge stitch and up into the part of the edge stitch next to that bit, then crossed over to the other side and did the same thing. It’s a pretty nice seam, but not a Bickford seam. Not quite as flat.
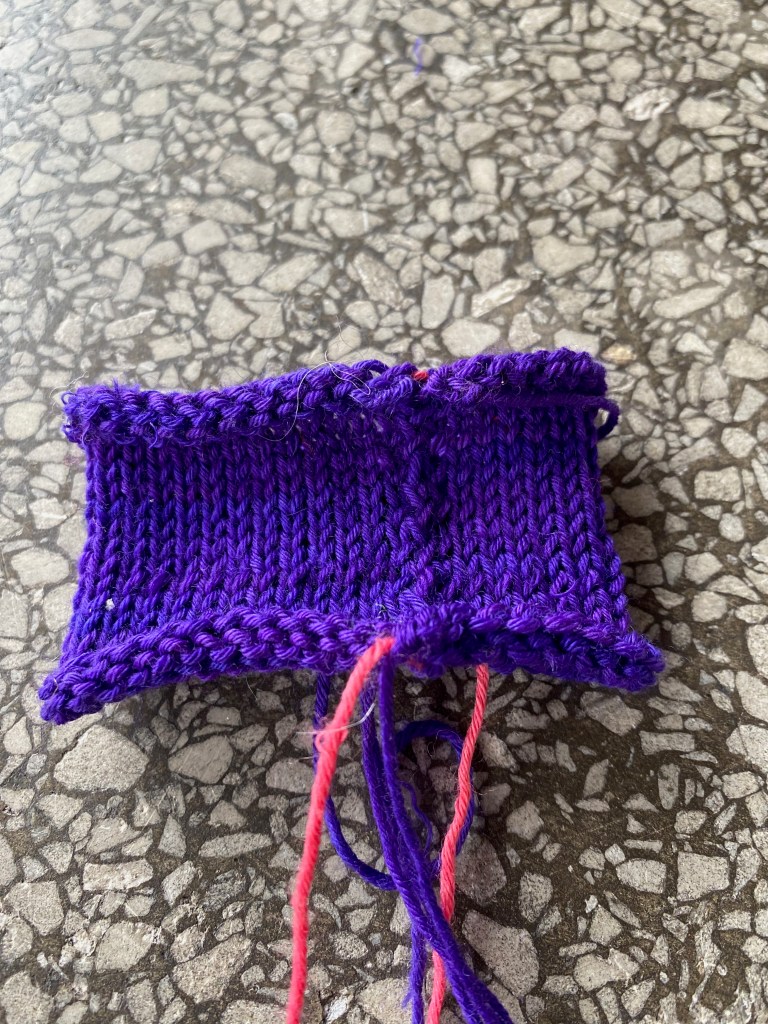
I continued to be interested in that no-sew seam, so I tried it out on a 20-row swatch of purple yarn for the knitted part and salmon pink for the seaming yarn.

The seam closed up like a magnetic attraction when I pulled on the end, and the pink yarn was completely invisible. That encouraged me to try it out on my next sock.
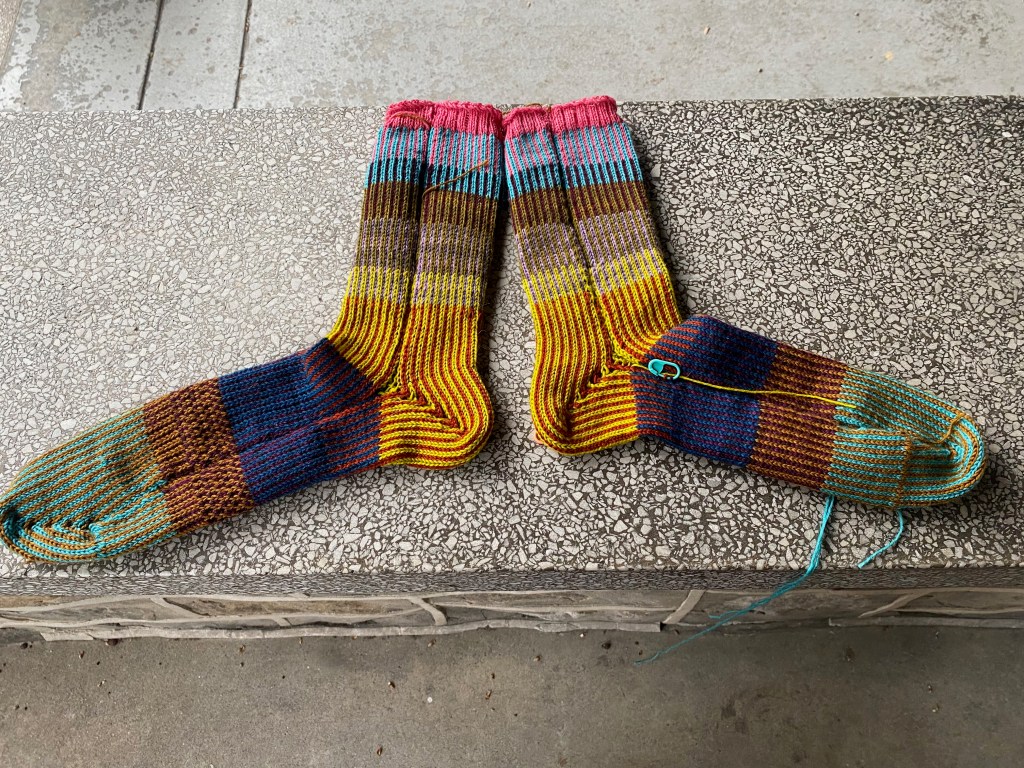
The no-sew seam apparently works best on socks that are knitted using only one yarn, and I can’t bring myself to knit vanilla socks. So I decided to try it out on socks with a widely striped mixture of yarn remnants on the leg, then the pinstriped heels, then the same colors of the heels in alternating 4-row stripes with the unused color carried up in the end needle halfway into the stripe, then pinstriped toes. I was very pleased with the visual effect of these yarns in this combination, but when I tried to pull on the seaming yarn to close the circle, the seaming yarn and the carried stripe yarn conflicted with each other and the circle-closing became balky and came to a complete impasse a little bit past the ankle. I had to cut the yarn at that point and complete the seam closure with the liberated yarn, and it closed from that point on without a problem, but there’s a raised ridge on the seam where I tried to close the seam over the carried yarn. I did the second sock without the seaming yarn and sewed it up with the not-quite-Bickford seam that I had stumbled into for the second sock of the second pair.
At this point, I had made three pairs of socks, all of which I had intended for myself, but which I ended up assigning to my husband and two daughters, who I will be seeing soon. Part of that is because I love my family and consider them knitworthy, and part of that is because my experiments with the numbers resulted in socks that will probably fit them better than they fit me. The socks that my husband will get were a wild shot in the dark that were 20 rows too long for my foot. The second pair with the stranded pinstriping used the same circumference as the first pair, 72 stitches, but I shortened them by 10 rows on the leg and 20 rows on the foot. The fit is roomy for me, but I like it, but it would fit my younger daughter’s slightly longer foot, and I can always make myself more socks. So they’re going to the younger daughter. I adjusted the numbers for the third pair because they were going to be plain stockinette with a larger gauge than the pinstriped stranding, so I went down from 72 stitches to a standard 64 stitches. They fit my foot, but they feel slightly sparse, and the older daughter has slightly shorter feet than I do. Also she loves the wild yarn combination, and I have more of the yarn and can make another pair for myself with slightly more stitches and rows.
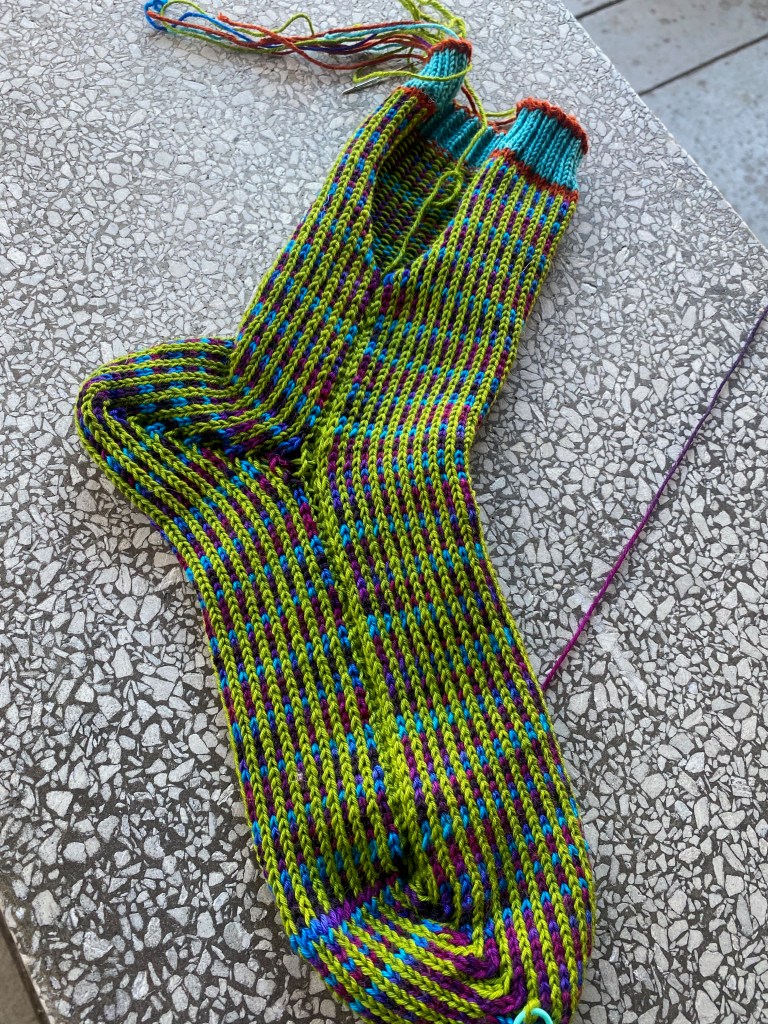
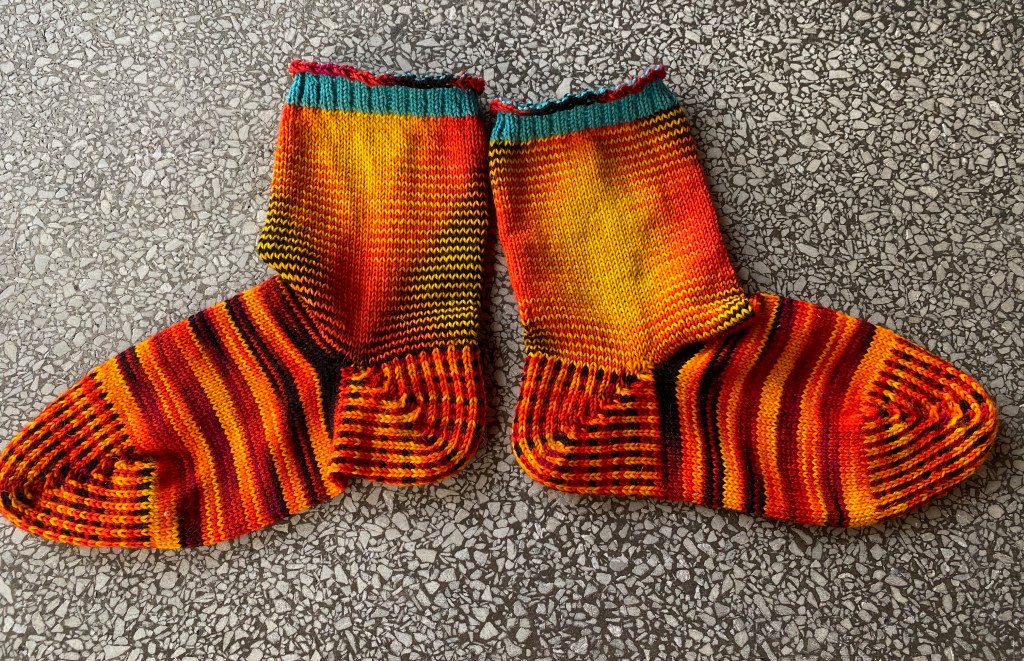
It was about time to make socks for me that would stay with me. I hadn’t given up the idea of trying the no-sew seaming yarn method in the leg of the sock, but this time using only one yarn in that area. I also remained committed to the pinstriped heels and toes, and I liked the look of the 4-row striping in the colors of the pinstripes. This time I would increase the number of stitches around from the 64 in the previous socks, the ones going to the older daughter, to 68. The yarn for the leg part of the sock would be a wild Wollmeise multi colorway descriptively named Thriller, in black, orange, and yellow, and the yarn for the pinstriping and the 4-row stripes would refer to those colors, using a red and black multi and a yellow and orange multi. The top ribbing would be a complementary aqua.
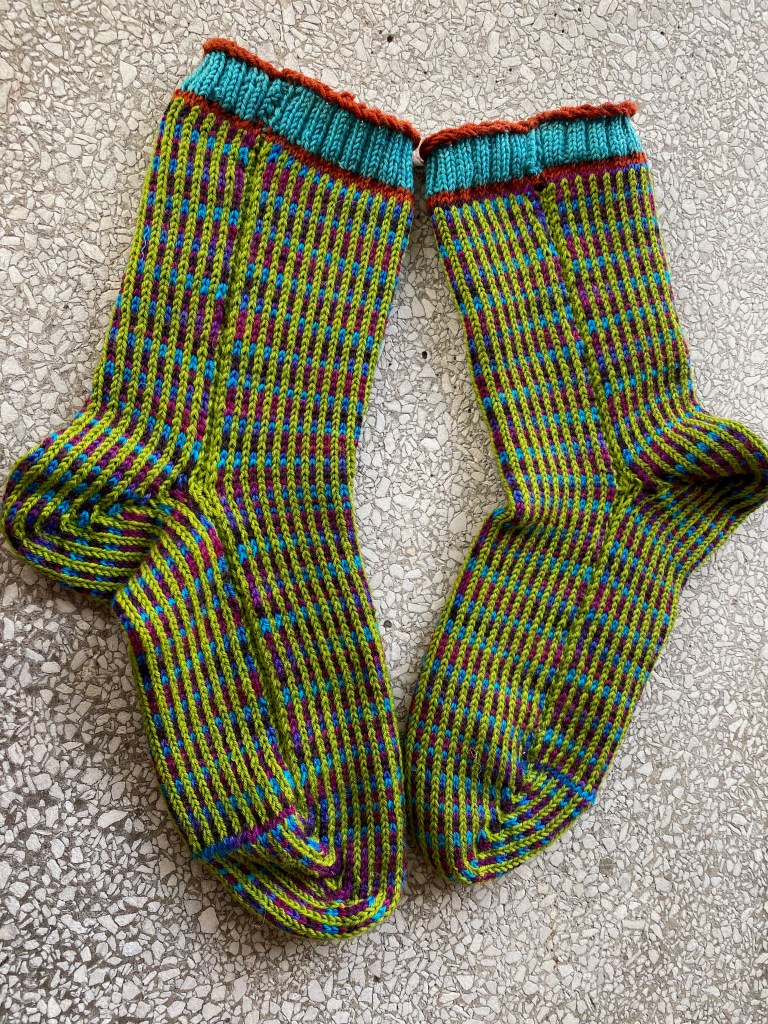
I cast on my 68 stitches, hand-manipulated my ribbing, and began knitting the Thriller colorway. 68 stitches in my tension on T7 turned out to be a magic pooling number, because in a few minutes of moving the carriage, I had a big, perfect argyle. I was so entranced by the patterning that was emerging that I had almost reached the ankle when I noticed that I had completely forgotten to put the seaming yarn into the hooks, so I was going to have to sew that seam.
After six previous socks, I had gotten pretty good at getting the tension I needed to keep the stitches on the needles when short-rowing the heels and toes while running the stranded patterning. Unfortunately, I found a new way to mess myself up. On the second half of the stranded short-rowing, when putting the needles back into work to create the pocket encasing the heels and toes, I got drifty and put the needles out of work again instead of back into work, which messed up my count. I tried to correct it, but I might have over-corrected, because the shape of the toe and heel has an odd fit, especially on the second sock. At least for the second sock, I did remember to put the no-sew seaming strand into the end needles. It was kind of a scary-looking mess fresh off the needles, but it was easy to pull the end and close it up to get a tidy and inconspicuous seam.

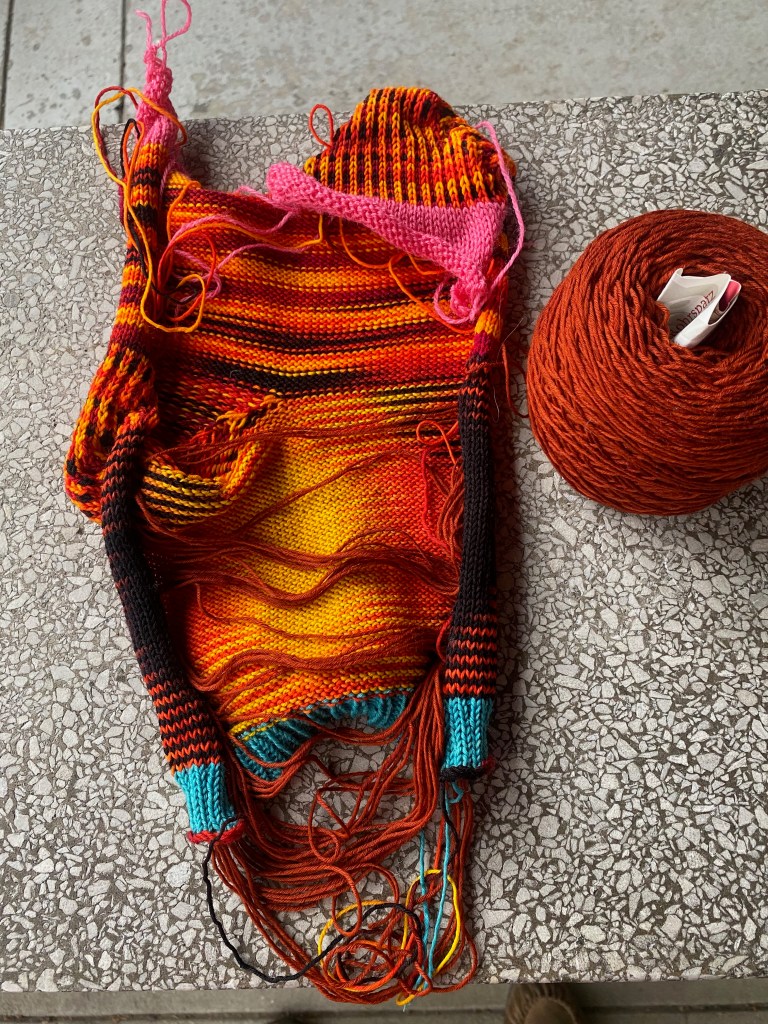
But one odd thing happened that I haven’t figured out yet: when I got to seaming the striped part between the heel and toe, I discovered that the stranding yarn was somehow no longer in the end stitches of about four rows on one side of the knitting, and those stitches were hanging open in loops that were prone to raveling. I immediately sewed them up, but how did that happen? Did I pull the yarn too hard? Why was the yarn still in the end stitches of the other side? I’m going to have to experiment some more to figure out what happened.
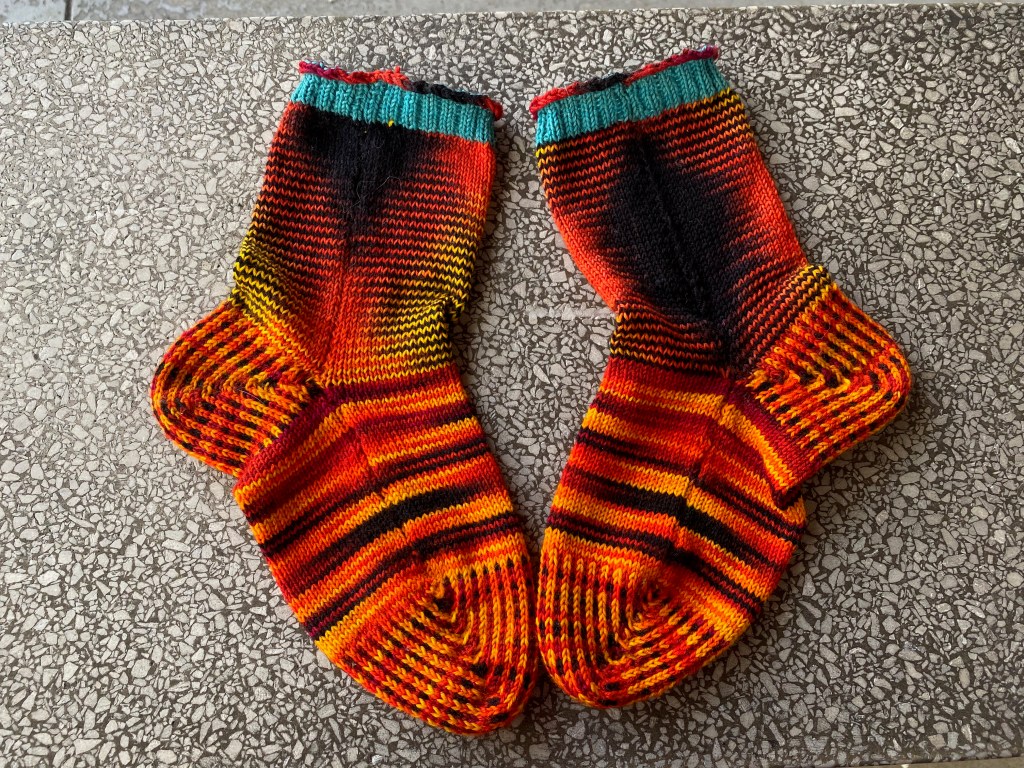
There are good reasons why most machine knitters don’t use stranded patterning on short-rowed heels and toes: it’s really easy to mess it up. I have done it because I want more durable toes and heels, since the stranded fabric is twice as thick as a single-yarn fabric, but there are loose loops along the line where the yarn is wrapped around the out-of-work needle. My remedy was to use a crochet hook to tighten those loops and chain them together, then affix that final loop to the fabric by duplicate-stitching into a stitch just above the loop and hooking into the sides of the loop from above. I have produced a practically airtight fabric at the vulnerable spots of the socks. Those reinforced areas are not as smooth as an unreinforced sock would be, but I wore my socks yesterday and walked a few miles in them, and I found them perfectly comfortable. I’ll have to see how comfortable these reinforced heels and toes are for my family members when they wear them.

I consider these four pairs of socks to be prototypes along the arc of an incomplete learning curve. They aren’t smooth and perfect, and I still am not totally satisfied with the fit. I got more proficient at the seaming and the stranded short rows with each successive sock, but there’s still room to get a lot more skillful. Fortunately everyone always needs new socks, so there will be lots of opportunities to get good at this.


Seaming multi-colored/stranded knitting is a whole new challenge over single color. I have not mastered it yet. Using end needle selection might (?) be helpful in providing a somewhat more consistent edge stitch.
LikeLiked by 1 person
Yes, absolutely. I always select my end needles for stranded patterning.
LikeLiked by 1 person
Also I want to say, as usual, WOW! I love all of your detail and photos and experimentation. You are a fantastic documentarian. This is great stuff. And beautiful socks. And how cool that you’re incorporating your machine’s quirk into your work.
LikeLiked by 1 person
Thank you! I appreciate your comment very y!
LikeLike
What an adventure! Thanks for the seaming tips.
LikeLiked by 1 person
It’s an interesting process!
LikeLike
I’m now lusting for pin-striped socks. Is there a way to make them by hand knitting?
LikeLiked by 1 person
Sure! You can easily plug the alternating stranded colors into any vanilla sock formula you like. I think I wrote a blog post about shaping a heel and toe with these stranded pinstripes… yes, I did! The post is called “The Comfort Zone” from October 2018.
LikeLiked by 1 person
I’ll check it out.
LikeLiked by 1 person
There is so much information here! You can probably fix your mispatterning needle by getting the machine cleaned of old grease and relubricated. I took mine apart. Not too scary.
LikeLiked by 1 person
Really? I’m kind of scared.
LikeLike
“Documentarian”! I like Tctextiles’s term, perfect for your analytical posts.
The socks look great, all of them. I was particularly surprised and pleased, as I’m sure you were, at the way the pooling played out on the golden/red socks. What good fortune!
LikeLiked by 1 person
It was a great discovery to find out that 64 stitches was the magic number.
LikeLike
This is my fave sock pattern, and it also gets you some ribber practice. I fill my toe with pound coins! http://knitting.hwoodgroup.net/pennysocks.html
LikeLiked by 1 person
You put pennies in the toe/heel as weights? That would work!
LikeLike
Yep! Washers or any small weights will do, to be fair – as long as they don’t interfere with the carriages. It’s worth a go! 🙂
LikeLiked by 1 person
Definitely! I was hooking a small ribber weight into the pocket, and that was an effective way to get the tension I needed too.
LikeLike