
I haven’t got statistics to back up my hunch, but I may be one of the very few people living north of the tropics in the Northern Hemisphere who avidly looks forward to January and is sorry when it ends. That’s because January is the month I dedicate to trying out methods I’m too busy, lazy, or complacent to try during the rest of the year, making swatches that may or may not turn into something bigger later in the year. This is my fourth annual Swatchathon, and it was quite productive, both in terms of numbers and variety of swatches, as well as learning skills that I will use again, and some that I no longer feel I have to do again.

Shadow knitting falls into that last category. I have Vivian Høxbro’s Shadow Knitting, which intrigued me enough to buy the book however many years ago because I like the idea of the now-you-see-it-now-you-don’t quality of using garter stitch and stockinette to create designs that appear and disappear depending on the angle from which they are viewed. I made two swatches: the first pattern in the book, which is an alternation of simple stripes, to get the idea of how shadow knitting works; and an improvised heart of my own design, to put the theory into practice in my own way. They look nice, but not nice enough to make me want to do my least favorite things in knitting, garter stitch and plain stockinette.
Next, a completely improvised swatch of patterned double-knitting. I learned the basic operation of double-knitting last January Swatchathon and used it plain in neck bands and as a checkerboard border for my DNA wall hanging. This time I wanted to apply it to a motif that I know and love, stylized hearts with squiggles and tendrils. This might be the swatch I most enjoyed making during this year’s Swatchathon. I absolutely intend to make something major in improvised double-knitting, like a coat with a shawl collar and fold-up cuffs to show off the inside surface. Maybe in the fall or next winter? First I have another improvised stranding message dress that I’m committed to as number 1 in the queue after I finish a couple of smaller travel-sized projects. In the meantime, I will let the idea marinate. Leaves and vines? Greens, purples, and orange against browns and grays? Can double-knitting be done in intarsia?

The next swatch was exactly that, a simple swatch in stranded knitting for yarn I had bought during the fall whose knitting had been put off for months. By God, this thing will be knitted even before I undertake the improvised stranded message dress. The swatch, a slightly adapted rendition of a stranded flower pattern from Solveig Hisdal’s Poetry in Stitches, was deep in my comfort zone. This one wasn’t about learning a new technique. It was a functional swatch for gauge and to test the interaction of the colors, as well as to learn the structure of the flower’s charting so that I don’t have to keep referring back to the book when I’m knitting. In fact, the swatch itself can serve as a portable replacement for the chart on paper. I don’t have all that much of this yarn, which is Zephyrette, an alpaca yarn with a bit of silk and cashmere and is dyed locally by Flying Goat Farms. It’s an expensive yarn compared to my usual Wollmeise, and I have six 50-gram skeins, each in a different color. I intend to use every last inch of each of these colors, and knitting the swatch stimulated my problem-solving capabilities.

My original thought, when I bought the yarn, was to make an oversized sleeveless pullover, quite wide, somewhat short, that would be worn over shirts and light sweaters. But when I was making the swatch and feeling the smooth and lofty texture of the yarn, it seemed to me that I would fail to use all of the attributes of the yarn if the garment never touched the skin. I started thinking about ways to extend the yarn so that I could make sleeves and enable the garment to be worn as a single layer. I still want it to be a pullover with an easy fit, but not as oversized as I was originally thinking. Now I’m trying to decide on the minimum acceptable width and length, to be knit bottom-up with a sloped shoulder according to the formula I’ve talked about in other posts (essentially, short rows spaced an inch apart). I would use a provisional cast-on at the hem, and after making the body, I would use the leftover yarn to make a minimal edging at the bottom and would pick up stitches at the armholes and knit sleeves until I run out of yarn.
After I completed the strictly functional swatch that had nothing to do with learning unfamiliar techniques, I buckled down and did exactly that. Finally I was going to cross Swing-knitting, one of my perennial January Swatchathon goals, off the list. Swing-knitting has always been on the list and has always fallen off the list when I got caught up in something more… fun? Years ago I had bought the first introductory Swing-knitting workshop by Heidrun Liegmann, the German lady who formalized, popularized, and copyrighted the technique, but I was put off by the peculiar musical metaphor terminology and the zillions of color-coded safety pins, and the many, many steps to make a pair of wristlets that I would never want to use. And Swing-knitting is all garter stitch. Have I mentioned that I really don’t like garter stitch? But I have more than 100 projects in my Ravelry favorites that I have labeled as Swing-knitting, so obviously I have an attraction to the look of the technique. I have a pattern in my Ravelry library that uses the standard copyrighted techniques, minus the fanciful terminology, called “Ariadnes Faden”, a poncho shape that can be adapted to become a garment with sleeves. Or just be a square swatch. The pattern persuaded me to knit a bit of it with the following description:
This pattern is for all those who like the shapes of Swing Knitting but are not prepared to go through the workshops yet.
It is a combination of Swing Knitting and Patchwork Knitting.
Every step is described in detail followed by a photo.
If you are not a complete beginner you should be able to follow it.
There are more than 40 pages because I don’t use abbreviations nor backward referring. The pattern is already complex enough.
After all that build-up, I don’t actually have much to say about knitting the swatch. It was fun to do, and after a while the use of the color-coded safety pins became logical. The technique finally forced me to learn to use German short-rows, which really are that quick and easy, but I need to see how they look in stockinette rather than garter stitch. Speaking of garter stitch, it’s not at all tedious to do in Swing-knitting, because there is a lot of interest in choosing the colors and counting out the spacing. So what it comes down to for me, is I don’t really like the look of garter stitch that much. But I’m glad to have gone through the exercise of following the method in its standard form. I have no immediate plans to continue to use the pattern or do a future Swing-knitting project, but there will probably be an occasion when I use German short-rows or use short-rows in a Swing-knitting-ish way.

My next Swatchathon project was prompted by an invitation from my dear long-time knitting friend Nancy Sauerhoff, whose meticulousness and love of knitting tradition has brought her to a long deep dive into that most meticulous of knitting traditions: Bohus, a mid-20th century Swedish cottage industry that got some supremely skilled Swedish knitters through tough times by hand-knitting ingeniously designed luxury garments. Nancy is hosting a Bohus symposium at her suburban farm in St. Louis at the end of March, whose guest of honor is the English-language translator of the Swedish patterns, and which will feature an extensive collection of original Bohus garments and accessories. Nancy was kind enough to invite me to join her group of devotees of this stringent and highly specialized style of knitting, and I needed to have an authentic Bohus project to establish my street cred among this group who, I expect, have a high degree of respect for authenticity.
During my First Knitting Era back in the late ’80’s, I played with Bohus techniques for blending colors, such as the use of purl bumps and slipped stitches, but the results were a little (or maybe very) ridiculous, partly because of the aesthetic excesses of the times and also because Bohus techniques look best in the materials prescribed by the Bohus designers, who were big enthusiasts of angora. In the interests of purism and authenticity, I decided to order a kit for a Bohus design from the copyright holder in Sweden. I’m really not a fan of Bohus sweaters, which are characterized by fabulously colored and textured round yokes and deadly dull bodies and sleeves in plain stockinette and ribbed hems. Instead I ordered a kit for the “Grillwork Red Tam”, which is a 2-color stranded hat in a red spectrum ranging from pink through dark brownish purple, with stops at orange and rust (but no actual true red) against black and almost-black brown.
The stranding combines knit and purl stitches and a pattern of rectangular shapes in random-like widths and depths. Nancy, who has knitted the design in its pullover form, found the pattern a little bit boring to knit because it is knitted in only two colors or one color per row, but I learned to dread the single-color increase and decrease rows because they always involved two competing sets of numbers, for example alternating decreases on stitches 5 and 6 and stitches 6 and 7 while simultaneously knitting 5, purling 1, knitting 3, and purling 2. That mental exercise probably delayed the onset of dementia by a couple of weeks.
I worked very hard to stick to the chart as closely as I possibly could, which was not easy because the yarn is a beautiful angora/merino mix whose specific purpose is to blur the lines between color changes, and the colors are black or almost black and contrast colors that don’t necessarily contrast. It takes better eyes and light than I have to get those purl bumps into the exact right place every time given the fuzziness of the yarn, and to my mind, it takes better eyes than I have to notice the difference between what is charted and what I actually did, given the calculated randomness of the arrangement of the rectangles. But I try for perfect accuracy anyway because I want to achieve the effect the designer intended as fully as possible so that I can get a deeper understanding of the Bohus aesthetic. Nevertheless I give a few rueful thoughts to the fact that if I were to achieve perfection, I would end up with a hat that looks exactly like all the other perfect hats made from this kit. I imagine my hat attending an international conference of all the other Grillwork Red tams, and being unable to pick mine out of the crowd when it’s time to take it home. So I’m going off-pattern to finish it. Instead of doing all the final decrease rounds in plain black knitting according to the instructions, I’m using up the last bits of the colors in stranded squares that reprise the gradient. Anything left over will go into a pompom. I’m going to like my way a lot better than knitting a black bull’s eye on top of my head. Go ahead, Bohus purism police, arrest me.

The scariest but ultimately most educational and useful of all my January Swatchathon adventures was my machine knitting experimentation. I finally plugged in my knitting machine! Brother, the maker of my KH965i knitting machine, made an instructional video back in the ’80’s or ’90’s demonstrating the use of the programming buttons, and I followed every syllable and movement the instructor made to input a preprogrammed allover pattern into the machine, and when I successfully knitted it, I celebrated two miracles: my machine worked as it was supposed to, and the greater miracle, I worked as I was supposed to. The one thing that wasn’t perfect was the tendency of the stitch on the right end needle to jump off and resist being put back on. I got in touch with my machine knitting mentor Rachel and asked her if that was a thing that happens typically. She clued me into end needle selection, which was a combination of words that was completely new to me.

A bit of research taught me that end needle selection is the mechanism that holds the end needles in one position during patterned knitting so that the same color is worked on those needles regardless of the pattern. This keeps the stitch on the needle. I studied the manual for my KH965i to see how to activate this mechanism, and I discovered an odd anomaly. End needle selection for the KH965i is turned on and off by turning the change knob to KCII, as opposed to the normal fair isle setting, KCI. My change knob doesn’t have a KCII setting, just KC. I puzzled me that puzzle for a while, before having the brain wave of looking at the manual for the KH965 and discovering that the KH965 change knob only has a KC setting. So my machine is labeled a KH965i but has a KH965 carriage.
Someone on the Machine Knitting group on Ravelry told me that I could make sure it’s a 965i if it has a port for connecting electronic gizmos to it, and it does. It seems that at some point before my machine became mine, someone swapped out the 965i carriage and replaced it with a 965 carriage, which means that turning on end needle selection is less convenient than if there was a KCII setting right there on the change knob. With the Frankenstein modification, I have to remove the carriage, turn it upside down, and turn a couple of tiny screws at the pointy end of two pink arrows at the back of the carriage so that the ridge in the screws are directed vertically. Well, it works. And now I know more important stuff about my machine. I still wish I had a functioning 965i carriage though.
After successfully inputting several of the preprogrammed patterns and knitting them up with only a few flaws that can be fixed easily, I started thinking of ways to combine my new experiments with things I already know how to do. First I wanted to try to do something I didn’t yet know how to do, which was to knit patterning into fabric that was also being shaped with decreases. My idea was to make a hat by dividing the stitches of the patterned knitting into quarters once I made the strip of fabric as tall as I wanted it to be, shape each quarter into triangles while knitting in pattern, and then seam the sides of each triangle together with its neighbor to form the crown of the hat. I studied the video and the manual for instructions on neck shaping in pattern, even though that wasn’t exactly what I wanted to do. I put the stitches to be knit later into hold, hit the memo button so that the machine would start the patterning at the same place on the next set of knitting, and began knitting while decreasing one stitch at either side of the triangle. It went perfectly.
Then I put the needles of the next bit of knitting into what I thought was B (working) position, left the rest of the needles in hold position, pushed in the part buttons, moved the carriage to the other side of the knitting, and everything fell off the machine. I diagnosed the problem as being because I had failed to put the stitches into B position properly. I tried it again on a different swatch, knitting the a first set of the triangles perfectly, and pulling the needles of the next triangle precisely into B position, but when I started to move the carriage, I saw that the stitches I wanted to knit had fallen off again. This time I put them back onto the needles and shaped the section, but I gave up on the third section and decided to take a step back. I had to be missing something basic, something so obvious that it would never occur to someone more knowledgeable than I am to mention it. But what was this basic thing?

I have trouble asking questions of more experienced machine knitters because I don’t know how to word my questions in ways that make sense to them. So I thought that if I made my hat shape in plain knitting, I could point to it and say, how do I make that in patterned knitting? So I made a prototype. First I knitted a lining, then the outside of the hat for the same number of rows as the lining, and folded the lining and joined it to the stitches of the outside layer of the hat as if it were a folded hem. When I got to the triangles, I knitted the first one, with the other stitches in hold, and then moved on to the next triangle. Reflexively, because I have done this before, I used my transfer tool to grab the stitches that had been pushed out of the hooks in E position to return them to the inside of the hooks. And that was when I realized what that basic thing was that I had been missing. I had totally forgotten to use the transfer tool to get the stitches safely inside the hooks when I pushed the needles from E position to B position, and they had fallen off the needles because they were unsecured. It’s funny how the unfamiliarity of using the preprogrammed patterns caused me to forget this step that I am thoroughly familiar with. It’s possible that I was messing up plenty of other steps as well, but it was a little hard to get very many steps into the process when the knitting is on the floor before I even start.

This hat prototype took me away from experimenting with the electronics of my machine and into a series of striped machine-knit hats using my plant-dyed yarn. I never get tired of playing with these colors, which always have something new to tell me every time I combine them with a neighbor. Any given color, in isolation, might look murky or dull, but when they are put together in stripes, they look like flavors of sherbet and gelato. As my friend Linda is fond of saying, “A color isn’t a color until it’s next to something.”

Now for the annual January Swatchathon feature: Class of January 2018: Where are they now?

In one way or another, my January 2018 Swatchathon experiments found their way into almost everything I made in 2018. I think the only exceptions were the Strong heel socks, the Minnesota winter gear for my daughter, a jacket for my new grandson, and Mrs. Maisel’s Coat. Everything else I finished was the direct result of the Swatchathon, and I documented each of them in last year’s blog posts.
The crocheted shawl is the subject of A Visa to Adinda’s World. To be honest, it’s not the most practical thing I have ever made, being too big and hard-to-manage, and also too stylistically conflicting with most of my clothing, to wear outside very often. But it is very cozy to huddle under in my chilly house when the weather is cold. I started a version in Wollmeise Lace-garn, but that is in hibernation.

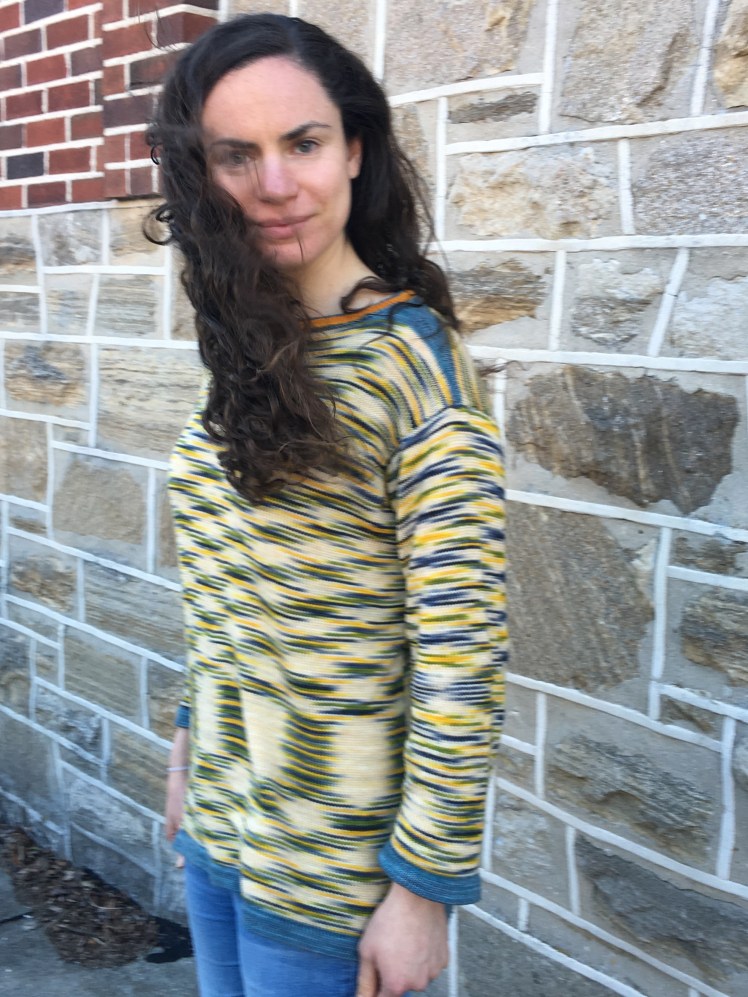
The dress whose double-knit neck band is peeking out from underneath the machine-knit sweater achieved some minor glory, described in Knitting Tourism: Pittsburgh. I detailed the thought process and symbolism that produced the subversive message hidden behind the hearts and flowers decorating the dress in Love and Death.

The elaborately textured blue-gray swatch on the right-side edge of the group photo became a pullover that I love to wear. I wrote a detailed recipe for making this garment, complete with accurate numbers for my size and suggestions for altering it for other sizes, in Slouching Towards Japan.

The machine-knit swatches and sweater had many offspring. I have since gotten quite good at making seams on my knitting machine, and I use seams as a design feature so often that it’s a defining characteristic of my machine knitting. The garments that owe their existence to the January 2018 Swatchathon were the subjects of Return on Investment, Nature and the Machine, and From Witch to Jester.


As for that weird little face peeking out from underneath the armpit of my machine-knit sweater, I spent the greater part of six months, from February through August, turning that face and many others into wall art that explored genetics, human interactions, social alienation, and U.S. immigration policy. The posts about my thinking are DNA and Faces Come Out of the Rain. Unfortunately, the answer to “where are they now” is upstairs in the room where my knitting machine lives. I submitted them to a couple of juried fiber arts exhibitions, which snubbed them. If any reader has advice for me about how to get them viewed by the public, please do share it with me. If you’re on Ravelry, I’m ableramm should you wish to PM me. Otherwise, send me a comment here, which I won’t publish if it contains contact information, and we’ll work out a more private way to communicate. Or contact me on my Interior of My Brain Facebook page.


So Swatchathon Class of 2018 was relatively small, but each member went on to a successful career. Class of 2019 is much larger, and I don’t expect each member to turn into a finished work during the course of 2019, but each swatch has already achieved its purpose, which was to teach me something about an unfamiliar technique.

Abby, fascinating post as always but extra fun to see the reference to the Bohus knitting you’ve been doing! Can’t wait to see you in less than 6 weeks time at the Symposium here and to have a chance to reconnect in person again! I love reading your blog but WPress seems to invite me to follow every time I read it…so for the umpteenth time, I have pressed the “follow” button and hope you don’t interpret this as stalking! haha….see you soon!
LikeLike
WordPress does have its little ways, doesn’t it! I’m really looking forward to seeing you soon and learning a lot more about Bohus!
LikeLike
Such a productive month of swatching this year, Abby! I was watching it as it happened, but seeing them all together is really quite astonishing. I also loved your recap of 2018’s projects and how they flowed from your January ’18 swatching. Your focused, thoughtful process is an inspiration.
LikeLike
Thanks, Kim! This was a good January for swatching!
LikeLike
Our local public library has display windows. The display is changed on a monthly basis. If your library has something similar, maybe you could sign up for a month and display your faces along with your intention in knitting them.
LikeLike
Thanks! I wonder if there’s anything like that where I am.
LikeLike
Last year’s swatchathon was obviously productive, and this year’s is equally stimulating, imo. I particularly like the blue-and-black swirly machine swatch, and of course, your Bohus hat! I’m sorry I couldn’t commit to the Bohus summit this March, but hope it will be successful enough to ensure a future sequel – it’s a wonderful opportunity.
LikeLike
Thank you! There are some beautiful patterns preprogrammed into the Brother machines! Of course I will report back on what I see and learn at the Bohus Symposium, so stay tuned.
LikeLike