
After a lifetime as a hand knitter who swore she would never use a knitting machine because knitting machines have too many moving parts, I got a knitting machine almost two years ago. I made that decision because I love stockinette stripes but hate knitting stockinette, and because I am of an age to consider my mortality and my yarn stash and realize that I would have to live three 120-year lifetimes in order to make a dent in my stash without mechanical help, and knitting machines can process yarn a lot faster than my hands can. I was not wrong about all those moving parts: every blessed one has caused me grief. But I love my knitting machine. I love what it can do. I love the few things I can make it do. I love the long and steep learning curve it puts me through and my eventual success in figuring out how to make it do what I can make it do.
I got a much fancier and nicer machine than I need for my goals, a Brother KH-965I preloaded with close to 1,000 electronically programmed stitch patterns. So far I’ve never even plugged in my machine, and even though I have started making the kind of garments that prompted me to buy the machine, I feel as if it is mocking me for not yet exploring its electronic potential. “That’s all you’ve got???,” it says when I bind off the final stitch on the final seam of my dropped-shoulder striped sweaters. “Shut up,” I reply. “What would you be doing if I weren’t using you? Running away and joining the circus?”
I paid a premium for my machine, because the seller added some unknown amount to the price on the promise that she would teach me everything I wanted to know about how to use it for as long as I needed her tutelage. The problem was that there was an insurmountable incompatibility between her teaching method and my learning style, and I decided very early that I was better off learning from videos on the internet and the Susan Guagliumi machine knitting basics class on Craftsy, but mostly from the experience of making the same mistake over and over again until I internalize what I am doing wrong and how to avoid doing it. It wasn’t optimal, but videos never get impatient with me, and I seem to learn more from analyzing my mistakes than I do from lectures about things that I’m not ready to try for myself.
I decided to use the high price I paid for the machine as a motivator to make sure that my investment didn’t go to waste. Except for the first few months after I bought the machine, I’ve been using it pretty steadily. I’ve had a project on the needles most of the time, even if progress was slow and my attention was not exclusive to the machine knit project. I have learned the feel of my machine and how to avoid disasters most of the time and how to fix them when they happen anyway. I’m good and efficient at e-wrap cast-ons, and I can make very nice folded hems, which I like better than ribbed edges. I can bind off a couple of different ways. I had a bit of emotional resistance to the mechanics of shoulder and neck shaping, which caused me to delay my first sleeved garment until pretty recently, when I finally sat down with the Susan Guagliumi class and watched it over and over again until I worked up the courage to press in my hold button and produce short-row shoulder and neck shaping. Susan did these things with ease and logic that I wasn’t able to replicate until I had made and repaired all possible mistakes several times each. I just finished my fourth sweater and managed to do the shoulder and neck shaping correctly the first time. Ticker tape parade!
Having developed a formula for simple pullover shapes that suit me and my daughters, my goal is to keep making variants on striped sweaters until I do them so automatically that the machine, of its own free will, seems to vomit them out. As of now, each one requires a lot of thought and effort on my part.
My first sweater was based on three small hanks of yarn that I dyed at a dyeing workshop at our local treasure, Neighborhood Fiber Co., which is Baltimore’s answer to my beloved Wollmeise. I didn’t have enough of the yarn I’d dyed, so I used a compatible and contrasting Wollmeise multi on the sleeves. The basic formula was 180 stitches on a tension of 6.2 for 238 rows, with 8 short-row groupings of 8 stitches each, starting on row 227, according to my notes. The neck shaping started 19 stitches from the center on either side in four shaping groupings of two stitches, two stitches, one stitch, one stitch. Very simple. Like childbirth, I’ve forgotten the pain I went through to accomplish it. The sleeves are 152 rows long with a final width of 108 stitches, starting at 80 stitches and increasing 2 stitches every 6 rows for a total of 14 increase rows ending at row 84. They are simple dropped shoulder sleeves that are attached to the straight edges of the sides of the fronts and backs. As for the bottoms of the body and sleeves, I hadn’t yet learned how to do a folded hem, and I wanted a rolled edge. I experimented with various ways to accomplish that using the machine, but I couldn’t stop it rolling deep into the swatching, so I started the sweater with a temporary cast-on and knitted a rolled edge by hand. It still rolls further than it’s supposed to, but oh well. I seamed it on the machine using my neon orange contrast color with the seams on the outside, to serve as a design feature. I wear this sweater all the time.

My younger daughter wanted a narrower garment with sleeves attached closer to the shoulder, so I cut back the stitch count to 160 and attached the sleeves to a square armhole. Again, very simple. I still managed to make counting errors and seams that were marvels of spacial illogic. I apologized to my daughter over and over again in advance of an anticipated disaster, but in the end, it worked out fine. The yarn is Wollmeise lace in the Aspen Tree colorway. The knitting machine and Wollmeise multis produce wonderful patterning that make me look very clever, when in fact my only contribution to the stripe and argyle shapes is to move the carriage across the work without making the knitting fall off the needles. I learned how to make folded hems on this sweater, and the neck was double-knitted by hand.
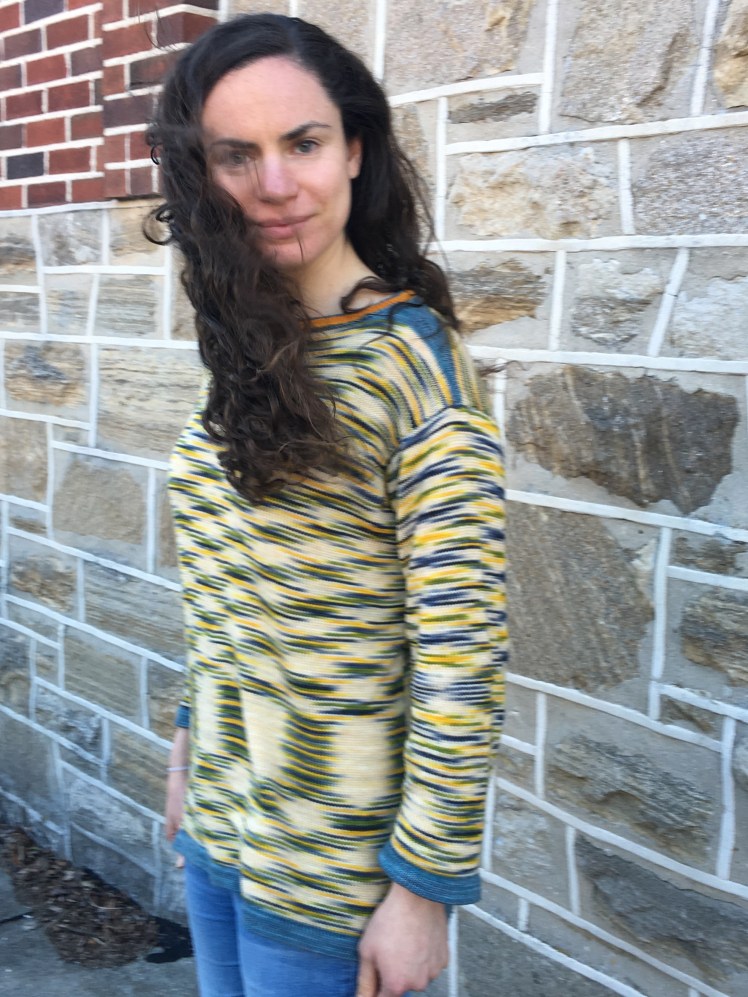
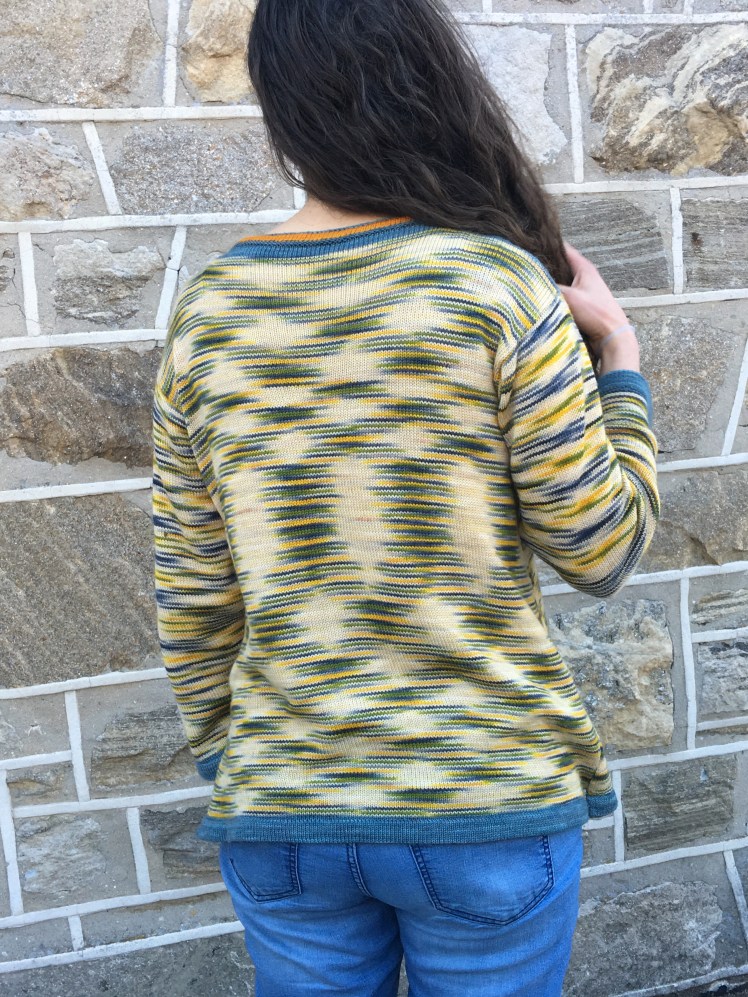
My older daughter liked the basic shape of my prototype, but she’s a good bit taller than I am, has a very long torso, and is forgetful about zipping the fly of her pants, so she wanted a longer body. I used a different yarn for her sweater, Wollmeise’s fingering weight “Pure” base, rather than the lace weight yarn I had used for the previous sweaters. The main color was a green multi-colored yarn from Wollmeise’s new Harmonista line, whose dyeing method tries to avoid organized pooling patterns. I thought the colorway would work best if it were broken up with solid stripes at varying intervals, so I chose a rather odd assortment of contrast colors. I like them and they disturb me all at the same time. Sometimes I don’t understand why colors work. The artists on my Ravelry group say it’s because of the variations in the use of the color sequence. I think that’s a nice way of saying that they work because I repeated their use so insistently that they bent to my will, and worked.
This fingering weight yarn has a different gauge than the lace weight yarn, so I recalculated my numbers. My gauge swatch gave me 6.25 stitches per inch and 11 rows per inch, so I knitted on 160 stitches for 287 rows, thinking it would give me a width of 25.6″ and 26″ of length. But the measurements of the finished garment are quite different, narrower and longer than my swatch led me to expect, possibly because the weight of the garment, 533 g, pulls the sweater downward, lengthening the rows and narrowing the stitches. Fortunately, the shape suits my daughter. My daughter has tiny stick arms, so the sleeve circumference is 10″. I used the seaming as a decorative accent, with the Wollmeise colorway Gazpacho as the seaming yarn, because it contained most of the colors of the other yarns and reinforced the possibly shaky logic of the color choices.


My younger daughter is about to move to Minneapolis for her medical residency, so I coped with my grief at losing her presence in my daily life by knitting her another sweater. I used the exact numbers as the other sweater I made for her. While I was making this sweater, dumb things happened, or maybe more accurately, I did dumb things that caused the knitting to fall off the machine a couple of times. I haven’t made those mistakes for a long time. I also had trouble with the seaming of the sleeves at the shoulder, when I was knitting the live stitches of the sleeve together with the edge stitches on the sides of the body. One or two of the live stitches would jump off its needle and I wouldn’t be able to get it back in place without it leaving a run in the fabric that I had to repair after finishing the seam. I did everything I could think of to prevent that, like weighting the fabric, and carefully ensuring that the stitch of the second layer completely entered the live stitch after getting both sides onto the machine, and putting the needles in upper working position when I ran the carriage over the stitches to join the layers. Usually these measures work well, but not this time. Could this be a signal that it’s time to change the sponge bar? On the other hand, I managed to do the shoulder and neck shaping right the first time without a hitch. And I’ve gotten pretty good at the latch tool bind-off. There are a lot of components to doing it right, but the new secret ingredient that I’ve just discovered is to keep the tension relaxed when lifting the stitch off the needle after it is safely inside the eye of the latch tool.


When I first got the knitting machine, I tried to do a calculation of what the break-even point would be to justify the acquisition: how many skeins used, how many garments made, the rate of visible shrinkage of my stash. I did some mental math and decided that consuming 25 lace skeins, or the equivalent, would be the point at which I would have achieved return on investment. But it’s not as easy as that to keep track of what I’ve used because Wollmeise lace skeins are very generously sized and I use a lot of skeins without finishing them. The number of skeins I have knitted on the knitting machine is not a practical metric, at least not in my sloppy accounting. It’s much easier to keep track of the number of garments I’ve produced, and the four pullovers I have produced over the last couple of months certainly must count for something. I have many more garments planned and a goal to turn out an average of one machine-knit garment a month for the coming year and beyond. Someday the realization will set in that I have passed the break-even point and am reaping a return on my investment by any metric.


I really liked this blog entry. I had an older knitting machine and I sold it because I couldn’t figure out how to use it. Now I wish I hadn’t sold it. I LOVE to naturally dye and spin but I’m not a fast knitter so my yarn piles up!
LikeLike
Thank you! There’s a pretty high turnover of knitting machines because, despite what some hardcore machine knitters say, a lot of us don’t find them easy to learn. I think the inflated price I paid for mine motivated me to not give up. I had already paid too much to accept a total loss!
LikeLike
Great post but I laughed right out loud at the irony of buying and using your machine to use up your stash and then going ahead and buying skeins of WM Harmonista! (says the woman with several Harmonistas in her stash!)
LikeLike
Oops, busted!
LikeLike
Holy cow! I am just blown away. Incredible. This was a big motivation for me too. I love stripes and simple stockinette. The machine does it so simply (once you get the hang of it). If I could make a suggestion for your hung hems. On the row you are going to fold the hem, you might want to try tightening the tension by a full number of two. And, on the row where you hang the hem, loosen the tension a bit. You may well be doing this. But, it’s one of those things I read about later. It helps prevent the fold to bow out and prevents an indentation where the hem is hung. I am really into hung hems myself.
Again, beautiful work!
LikeLike
Thank you, Renee! Your kind comments mean the world to me! I will give your hem method a try. The way I’ve been doing it is to knit 9 rows on the tension of the rest of the garment, then raise the tension to 10 on the 10th row, then return the tension to what it originally was for the next 10 rows, then do the fold. I’m always grateful for the suggestions of people with more experience than I have, so thank you!
LikeLike
I’ll send a photo copy of the description I have. I might have given it to you wrong since it was off the top of my head.
LikeLike