
I love garments that have long stretches of plain stockinette, but I hate knitting long stretches of plain stockinette. I hate it so much that I got into machine knitting to spare myself the tedium of knitting plain stockinette. Since then, I’ve been looking at hand knitting patterns from a machine knitting perspective, and if I say so myself, I’m starting to get fairly proficient at adapting them to the requirements that machines impose while retaining as much as possible of the shaping and design elements of the original pattern, if I want to retain them.
I had knitted Anne Ventzel’s wildly popular Robinia Sweater (1170 projects on Ravelry and counting) not long after it came out in 2022, thinking it would be a quick and simple hand knit because it is a boxy shape with a simple stranded aqueduct pattern and a big 4-stitch-to-the-inch gauge. In fact, I’ve seen some projects knitted at lightning velocity, but it took me several weeks because it was both boring and surprisingly tricky. As I said in my Ravelry project notes soon after finishing my daughter’s sweater, “I was attracted to the pattern because it looked like a simple dropped-shoulder boxy shaped pattern that somehow managed to hang really well on the the wearer’s body without any discernible shaping. The wiggle word is ‘discernible.’ There’s shaping all right, but it’s hidden in plain sight.”
I went on to explain, “The trick is that there’s a pair of short rows at the sides of all of the areas of plain knitting in the upper body stripe sequences, as well as on the under side of the sleeves. The back neck is raised for the neck shaping by means of an extra stripe sequence, also hidden in plain sight. When the garment is being worn, you wouldn’t know the shaping maneuvers are there unless someone told you. I have all kinds of respect for the designer’s clever sneakiness, but I do wish she had included a schematic in the pattern or at least a verbal description of how the garment is shaped instead of forcing the knitter to figure out the plan at the stitch-by-stitch level.”
That’s my lament practically every time I try to follow someone else’s pattern. Why, oh why, can’t they include a schematic drawing to illustrate what they’re expending 1,000 words and abbreviations to explain? (And thanks and blessings to the designers who do accommodate visual learning needs.) After I succeeded at cracking Anne Ventzel’s code, I thought about how the design could be adapted to machine knitting, but at the time I didn’t have the equipment to knit the size I wanted for my own sweater or the skills to enter the stranded patterning into the brain of the machine that I currently had. In the years since, I have addressed both of these needs, with my LK150 machine that can easily knit heavier yarn at the width I want, and with the prowess I have achieved with the Needle Beetle to knit 8-stitch stranded patterning, which is exactly the width of the Robinia stranding. I can also poke patterning into the brain of my electronic machine pretty readily. I have to relearn the procedure every time I do, but it’s no longer a traumatizing Luddite experience.
The idea of adapting Robinia to machine knitting rattled around my head for about three years, and finally my thoughts and yarn coalesced after I finished the 2025 birthday knitting for my two daughters. I started compiling peacock colors in worsted from my ancient stash and arranging them to have the least possible hue and value difference between them for the wider part of the aqueduct patterning, hoping to pair them with a complementary rust colored tweed yarn that I had recently purchased. But my machine wouldn’t knit the rust tweed, so I went back to ancient stash for colors in rust, orange, and yellow that could form a complementary gradient to play against the blues-greens-purples.
Then I started studying the pattern, knowing that I wouldn’t be able to use any of its numbers, since I was knitting at 4.5 stitches to the inch instead of the pattern’s gauge of 4 stitches to the inch, and I had to knit flat instead of in the round. What I wanted from the pattern was to extract its essence so that I could apply its shaping concepts to a different technology and different numbers. First I decided the width of my garment and multiplied it by my gauge, then rounded up to the nearest number that was divisible by 8, for use with the Needle Beetle, plus one for the seaming. It came to 15 pattern repeats widthwise. My desired garment length was 9 pattern repeats lengthwise, with 16 rows for each pattern repeat, requiring 9 color pairings. This was two more repeat sequences than the pattern instructed, which divided its seven sequences in half, three and a half for the sleeves and three and a half for the lower body. My version would give four sequences to the sleeves and five to the lower body. Although my version had more stitches widthwise and more pattern sequences lengthwise than the pattern, I wanted to use as many of the pattern’s numbers as possible, since they were already figured out, and then use an extension of the logic to fill in the gaps between the pattern’s numbers and my numbers.
This pattern is so clever and sneaky. It has shaping, but you can’t see where it is. The sleeves look as if they ought to be simple tubes attached to a straight line at the sides of the body, but no. Working top-down, you cast on stitches at the shoulders for one fewer widthwise pattern repeat than you will end up with. Hidden in the armpit are increases in the last few rows at the bottom of the sleeve-body divide, for shaping that helps to eliminate the excess fabric bunching up in the armpit of the sort that we suffered back in the 80’s in the era’s oversized squares with tubes sticking out of the sides. I remembered from my hand knitted version that there was a pair of short rows in the top three patterning sequences placed in the first two plain rows after the stranding, knitted at fairly even intervals emanating from the neck edge of the shoulders outward to the shoulder seam. How I wished that the pattern had had a schematic that illustrated the placement of the short rows! The pattern has a million words and numbers and parentheses to tell you to do this:
What I did here was to cast on 113 stitches (an extra stitch for the side seam), as opposed to 96 stitches for the pattern’s largest size, and knit two rows in rust. I unraveled every other stitch in the center 45 stitches and re-formed them for a narrow, two-row knit-purl ribbing at the neck. Then I had 34 stitches at either side of the neck, out of which three sets of short rows would eventually radiate. Unfortunately I no longer remember my logic for the exact placement of each set of short rows, although it’s a couple of stitches more than the instructions for the pattern’s largest size. The important thing is that the short row pairs were roughly the same number of stitches apart, and the really important thing is that I did the same thing on either side.
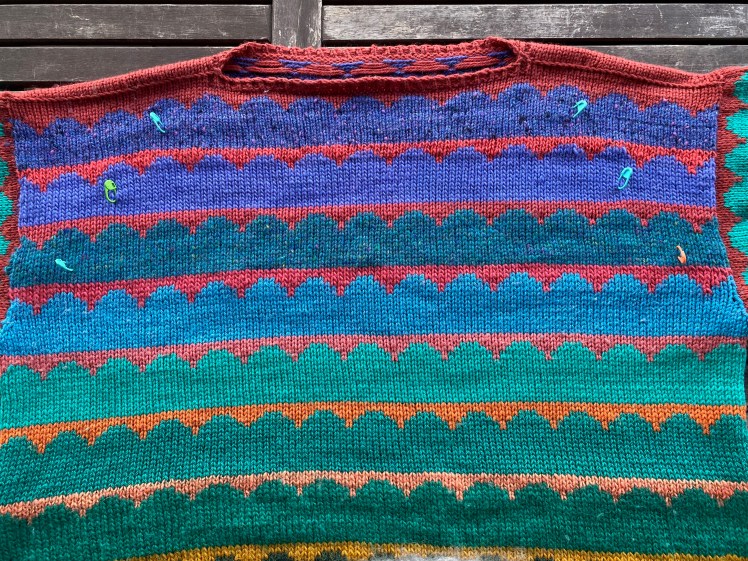
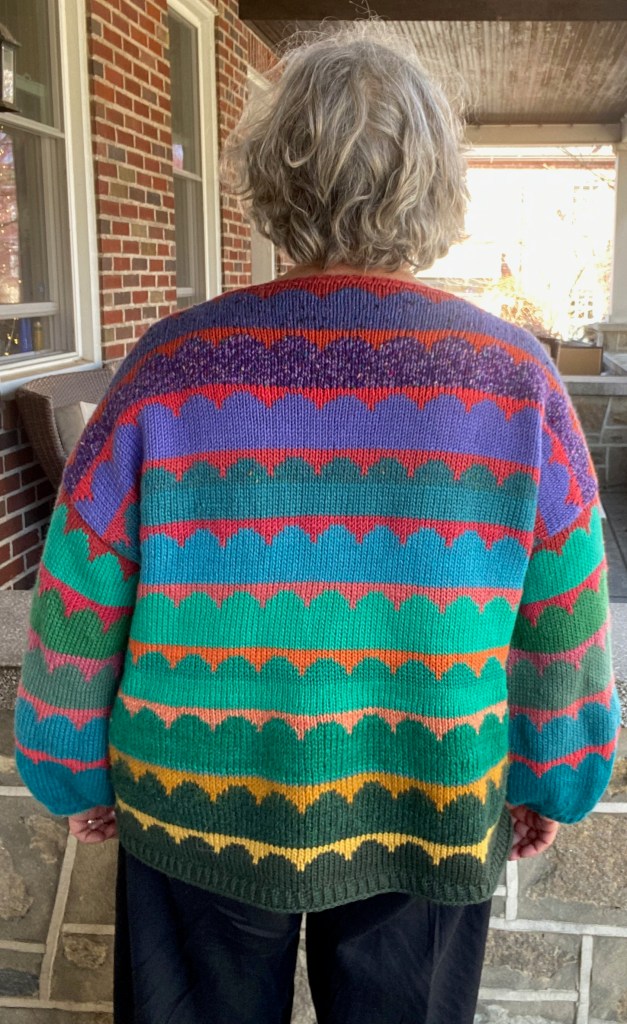
Since I had one more pattern sequence in the yoke than the pattern had, I did the increases for the armhole shaping in final four rows of the fourth sequence rather than in the middle of the sequence as the pattern did. A simple modification. Then I knitted the remainder of the front straight down to the hem for five sequences, where I unraveled every other stitch for four rows and re-formed them for a knit-purl ribbing. I took some calculated risks with the yarn I was using, since I was using yarns from deep, dark, ancient stash, and couldn’t be certain that I had enough of all of my colors for both front and back. In fact I didn’t have enough of some of the yarn for both front and back, but I had close approximations of the colors that I might run short of. I decided to be satisfied with close approximations to complete the sequences. You can see where I had to spit-join substitute yarn in the photos of the back, but I’m fine with that.
After binding off the ribbing of the hem on the front, I rehung the piece onto the machine at the shoulder cast-on to knit the back piece top-down. The back was where the garment shaping got really sneaky and clever because there’s a whole extra patterning sequence on the yoke that adds another set of short rows to the shoulder shaping. It also adds a couple of inches to the circumference of the armhole and drops the front-back join at the shoulders about an inch down the front of the shoulders. This is how the neck shaping, which is just a straight line of cast-on stitches, forms an opening at the base of the throat instead of slashing straight across the neck at the vocal cords. It’s so subtle you wouldn’t even know it was there unless you knitted it, but it magically and invisibly changes the fit.
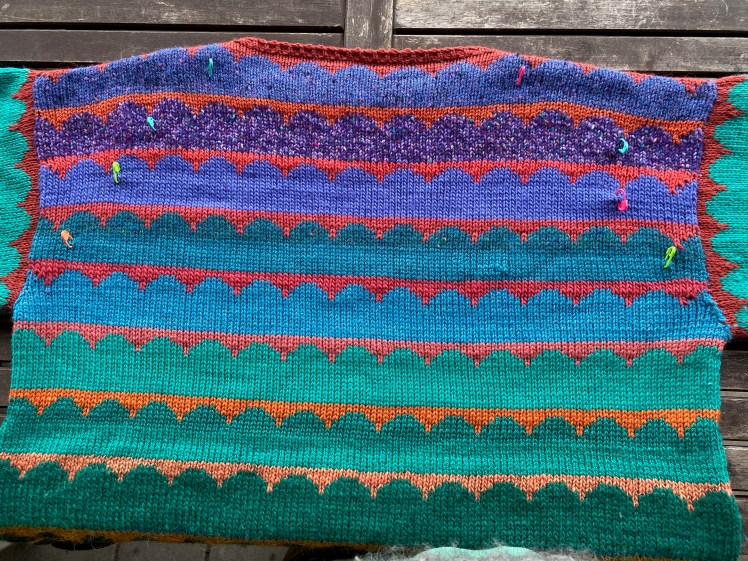
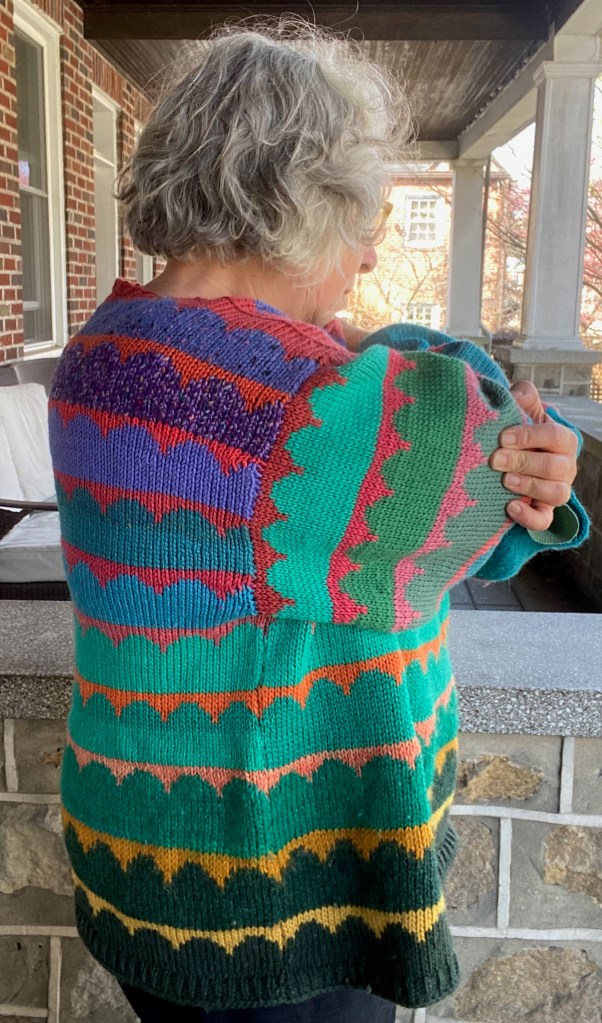
This photo shows the configuration of the short rows on the back yoke. The purple tweed second from the top is the extra sequence that doesn’t appear on the front. I can’t remember exactly at this point, two months after finishing the garment, but I think that I put one of the short rows for that sequence in the wrong place. I can’t even see where the mistake is. I fretted about it for a while, and then decided to pretend the mistake had never happened and did the rest of the short rows according to plan. Some mistakes matter and some mistakes don’t, and this one didn’t.
With that whole extra sequence in the back yoke, the number of stitches I needed to pick up from armhole opening was only slightly less than the number of stitches for the width of the garment below the armhole. Since my gauge required me to add additional pattern repeats to the yoke on the front and back, my numbers were different from the pattern’s by three 8-stitch repeats, 24 stitches. Once again I figured my shaping by referring to the pattern and logically extending the concept. To make it easier to see what I need to do and when, I highlighted the numbers for the largest size in the pattern and calculated how far from the beginning of the round the short row turns were positioned, and I used those numbers for my version. (Except for that place in the second back sequence where I got misread where I was in the pattern and put one of the short rows in the place where the turn for the third sequence was supposed to be.) I could have gotten fancy and done some kind of proportional calculation to determine my numbers, but it seemed like a waste of brainpower.
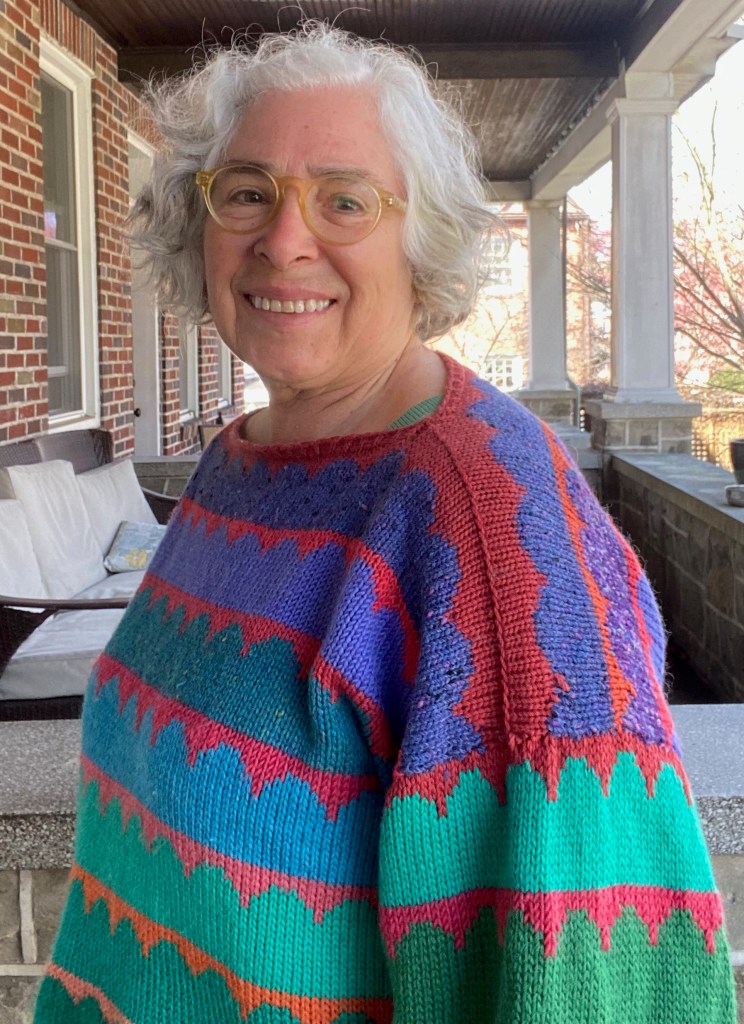
The short-rowing for the sleeves was different than the short-rowing for the front and back. Where the front and back had one set of short rows per patterning sequence in the first pair of plain stockinette rows after the stranding, for the top three sequences in the front and four sequences on the back, the sleeves had two sets of short rows in the first three sequences, executed over four rows of plain stockinette, and then one short row pair in the next two sequences. The placement of the short-row turns is staggered along the edges of the beginning of the row, or in my machine knit version, along the beginning and end of the rows, like this.
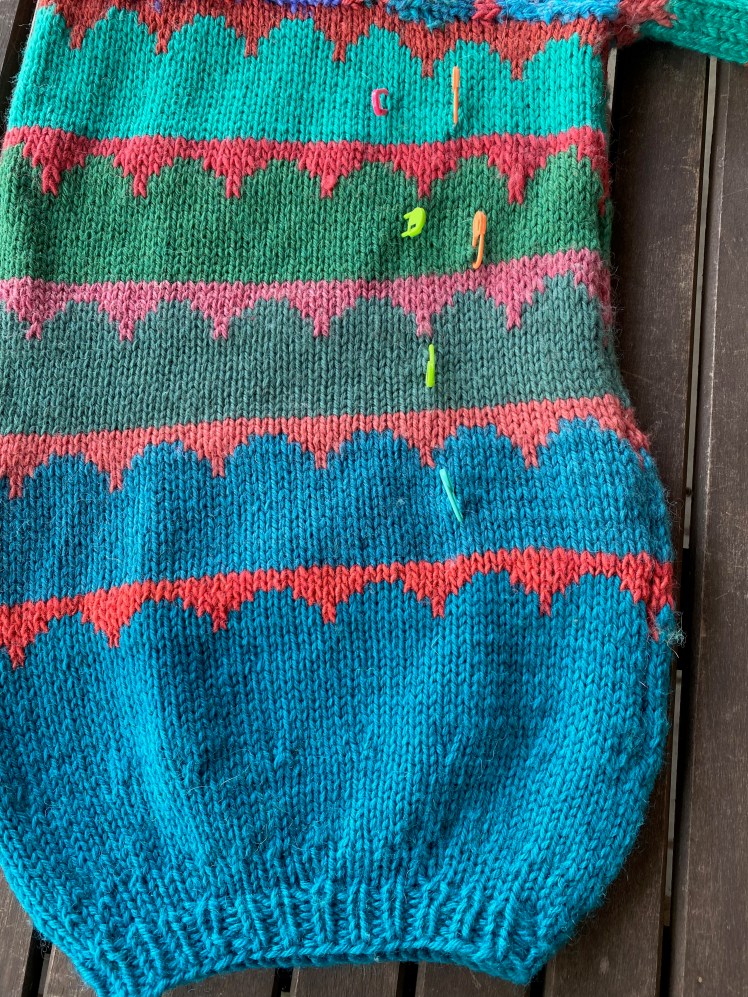
After the final stranded patterning, the pattern says to knit plain until the sleeve length is about 16″ on the inside edge of the sleeve, where the short-rowing was done, then commence a series of decreases around the bottom of the sleeve to form the balloon shaping at the cuffs. I took the work off the machine at that point and knitted that shaping by hand, because doing all those decreases on a machine is awkward and much more complicated than just doing it on a circular needle by hand, since the machine’s needle bed requires every stitch to be moved multiple times with a transfer tool. It probably takes less time to do it on the machine, but I didn’t feel like it.
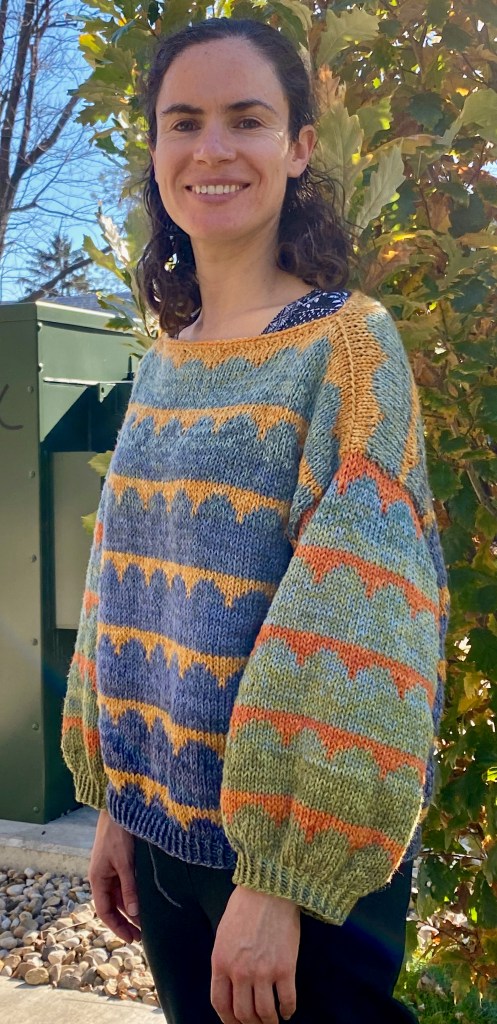
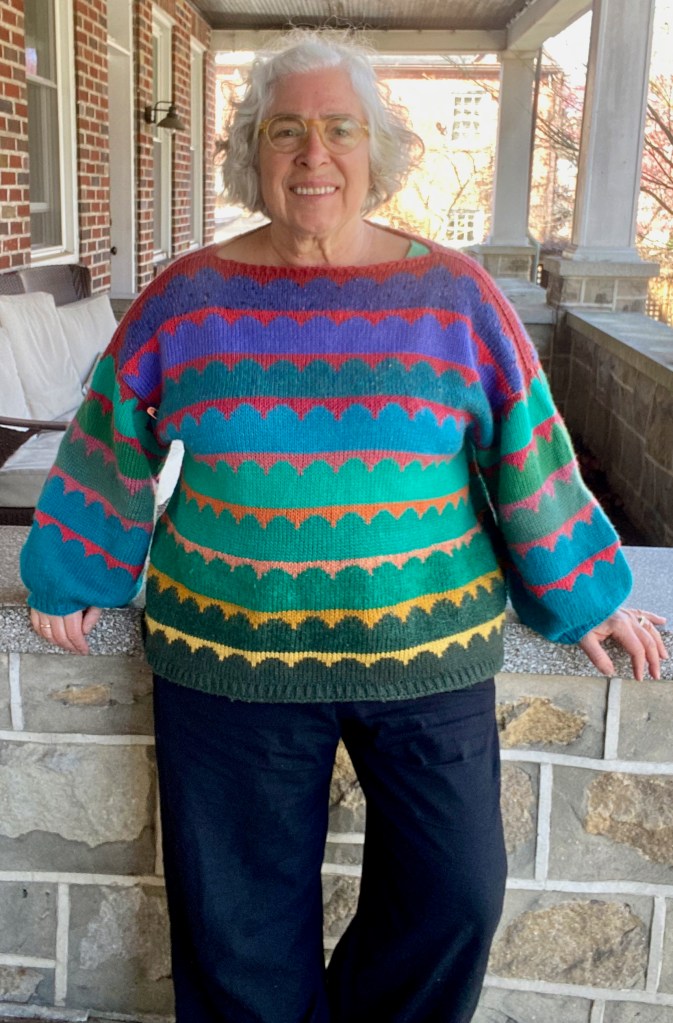
Then I seamed what needed to be seamed, wove in the ends that would have dangled out of the cuffs, hem, and neck, and washed it and dried it flat. Wearing it, it’s perfect. It fits exactly as I like it. People are struck by the colors, but I don’t have much to say about them because two complementary gradients are a bit of a no-brainer to me. But I have a lot less of my blue-green-purple range in ancient stash now. Happy-sad about that.


Thank you for this delicious piece of machine knitting adaptation! I’m with you regarding schematics (though I’ve had some success asking designers to share one if they had it).
LikeLiked by 1 person
I wonder why it wouldn’t occur to designers to provide their schematic in the first place???
LikeLike
I love it! And I also love that you shared so much technical info.
LikeLiked by 1 person
Thank you, Kay! I know you share my interest in converting hand knitting patterns to machine knitting.
LikeLike
I wish that color management was a “no brainer” for me, but alas, I am completely missing that gene! So I am one of the hapless color incompetents who marvel at your constructions. The fit is remarkable! That was a lot of math. 😆
LikeLike