
My older daughter was an only child for a blissful two years and 49 weeks. That ended when she got the worst possible birthday present three weeks to the day from her third birthday: her younger sister. It took her a couple of years before she understood the cyclical nature of time, while she tried to puzzle out how she could be older but her younger sister had her birthday first. Now they’re both grown up, good friends, and fully acceptant of the timing of each other’s birthday. But the timing of the two birthdays, three weeks apart at the end of the year, means that I spend every autumn on birthday knitting and suffering the attendant stress of doing a lot of knitting against a deadline.
I thought I was well ahead of things this year. I found a sweater pattern back in April that I knew would look cute on Prima and sent her a picture of it to get her theoretical okay. I got that, and I bought the yarn during the summer. It’s a simple stranded pattern, basic raglan shape, big stitch gauge on two worsted weight yarns, so how long can it take to knit it? I figured I’d start it in late October or early November, after finishing Secunda’s birthday knitting, in time to get it in the mail to her in December, two weeks before her birthday.
But first, Secunda’s birthday knitting. At the end of August, I saw a pattern by Nicky Epstein for a blanket that I knew I would never want to do by hand, because it’s all garter stitch and appliqué, but I thought of ways to adapt it to machine knitting. I’m not going to post a picture or a link to the original here, because when something inspires me, I never look at the source material again until my version is completed, and I might be working on this blanket until I die. The basic features of Nicky’s blanket are squares in different colors, separately knitted flower shapes in contrasting colors sewed onto the center of each square, and knitted fringes at the top and bottom of the blanket.
I kept the basic features, but my construction method is completely different, since I am doing it on the knitting machine. I added features aimed at making the blanket completely reversible. The facing side is knit strips and purl strips joined together in an alternating sequence, and each strip is made up of colored squares and appliquéd flowers sewed onto each square in an alternating checkerboard on both sides of the blanket. The flowers are embroidered so that the stitching on the “wrong” side describes the shape of the flower. The left and right edges of the blanket are knit with a non-curling edge. The fringes are machine-knit i-cord. Here’s my swatch:
I knit the colored squares one on top of the other in strips, and joined the next strip to the previous one by knitting the edge stitch to the new work, alternating stockinette and reverse stockinette for the facing sides, seven squares per strip, eight strips, 56 squares. I devised a way to machine knit the flowers. To make the flowers, I cast on 14 stitches with e-wrap on the knitting machine, knitted one row to the right and one row to the left, then loosely cast off 12 stitches with the carriage on the left, knitted the remaining two stitches with hand manipulation and started the next petal by knitting the two stitches again and e-wrapped the other 12 needles. Then I repeated the process until I had six petals. To finish the machine-knitting, I hand-manipulated a little tab and took the flower off the machine.
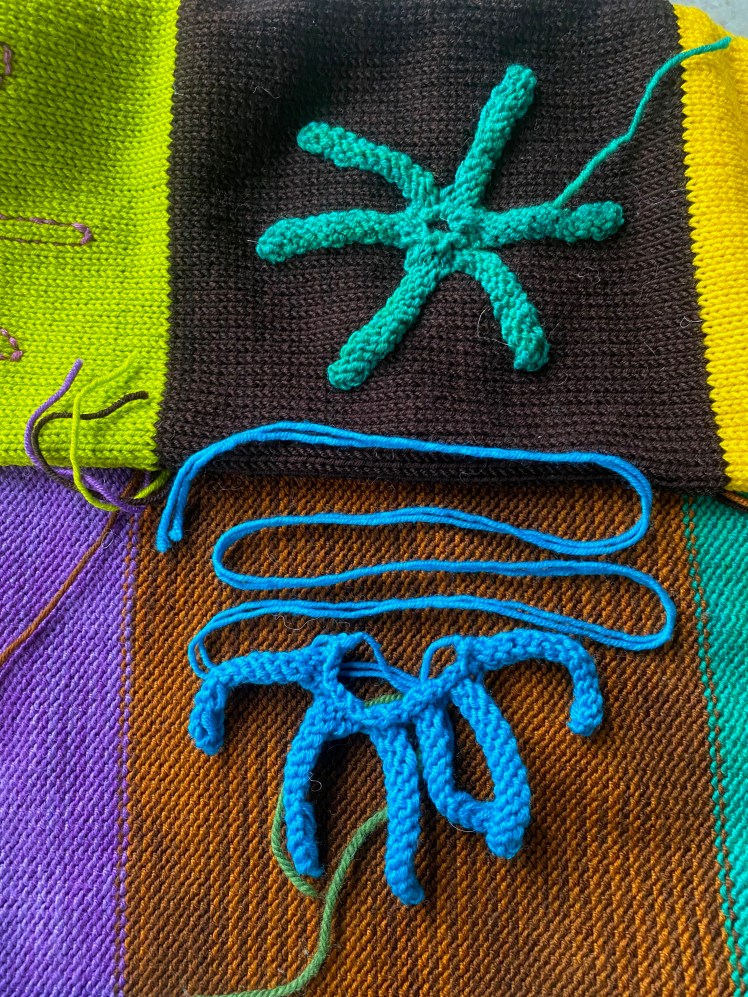
When the flower shapes first come off the machine, they look like nothing at all. Well, they look like dead calamari, as someone on my Ravelry group jokingly told me, since they are knitted in stockinette in a strip with six curling branches. I sew the ends of the strip into a circle, then gather the inside hole into a smaller circle, which I place into the center of the square it has been planned to decorate. This is a fiddly and delicate operation, and then I have to sew the petals into place so that the flower looks reasonably even on the right side and the stitching on the wrong side reads as the outline of a flower. Each flower takes several hours to embroider. There are 55 flowers on the blanket. One square is a black and white argyle, and I’m not putting a flower on top of it.
Even though my swatch took days to complete, I was in denial about what a time-consuming, labor-intensive project this blanket this would be. I blithely thought, machine knitting, how long can it take to knit it? A month, tops! Harsh reality soon revealed itself. Each strip took at least a week to complete, with the machine-knitted strips, flowers, i-cord fringes, and the hand-sewing, and there were eight strips. But I was starting in early September, and Secunda’s birthday was at the end of November, so I thought I was in good shape for time. Then when I was starting the third strip, I ran almost literally into a wall. It wasn’t actually a wall, but it felt like one: my yarn was too thick for my machine, and the carriage just stopped moving on the rightward carriage return. I don’t know why there wasn’t really a problem when I first started knitting it, but I guess my poor little machine got tired. I tried cleaning the machine and rigging up a device to divert static electricity build-up, but the yarn (Wollmeise DK) just wouldn’t knit anymore on my 4.5 mm standard gauge machine.
So I had to move my operations over to my LYS, Lovelyarns, where Melissa had a bulky Brother KH230 upstairs available for as long as I needed it. I had never used any knitting machine other than my KH965i, but once I figured out how to thread it, it was totally intuitive. No frills, just knitting. If I had been introduced to machine knitting through this machine rather than my super-fancy smaller-gauge machine, I would have had a lot less beginner’s trauma. Fewer stories, but a lot less stress. But I still had to face the fact: this blanket was not going to be done in time for Secunda’s birthday. It was October, her birthday was at the end of November, and we were going to visit her at the end of October. In the ideal world, I would be able to finish a substitute gift and leave it with her.
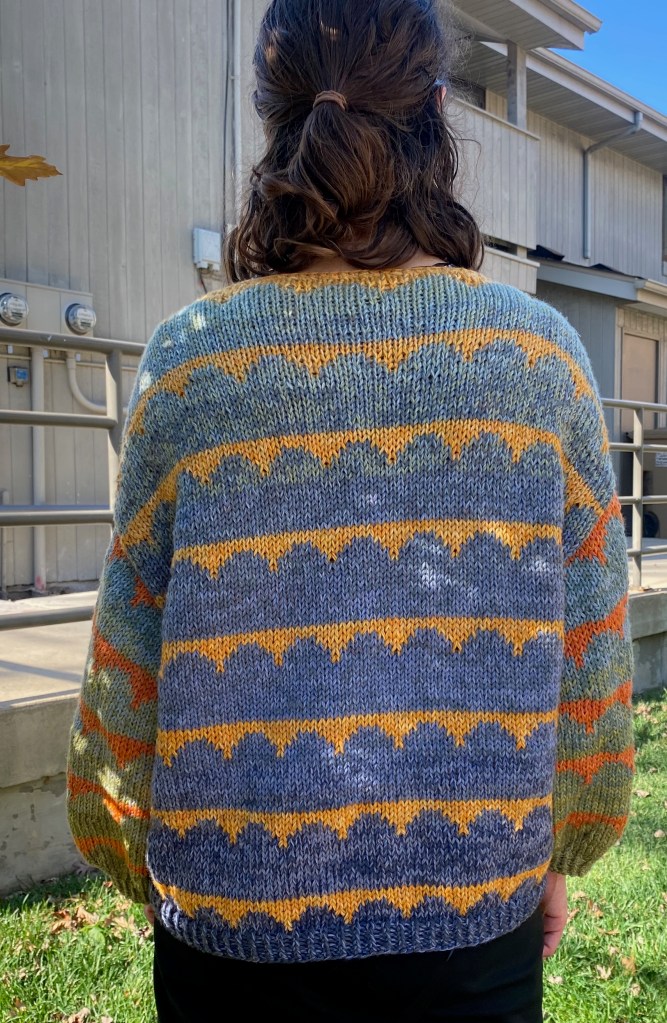
Then I ran across the Robinia Sweater pattern by Anne Ventzel. It looked so simple, a beautifully draping dropped-shoulder pullover shape knitted in chunky yarn with a simple but effective scalloped stripe in stranded knitting. I thought I could knock that out in about two or three weeks. I started seeing it knitted in multiple strands of my plant-dyed yarn. I bought the pattern and swatched it, getting gauge with four strands of plant-dyed yarn in a heavy lace or light fingering weight yarn base. My colors would be a mixture of yellows for the contrast color and, for the main color, a slowly changing green-blue gradient formed by swapping out one strand every dozen rows or so, starting up at the top with a light blue-green mixture and ending at the bottom with my darkest blues. As usual, I underestimated how much time it was going to take to get this substitute gift done and ready to present, because I was still dividing my efforts between the blanket and the sweater, and also because there was more to the sweater than I first thought.
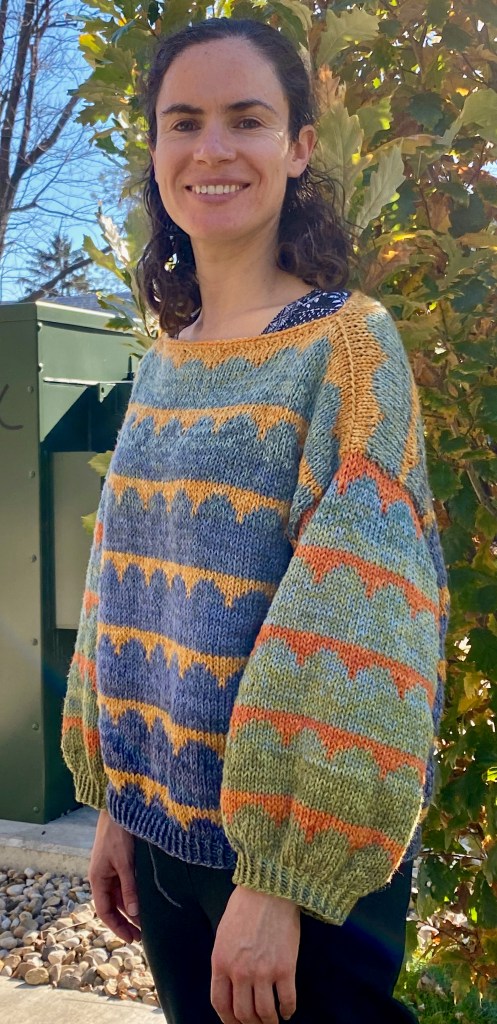
I quickly discovered that this apparently simple design was not as simple as it appeared, and that it wasn’t an accident that the garment hung as well as it did on the wearer’s body. The shoulder shaping was achieved through cleverly concealed and almost invisible short-rows that were strategically positioned throughout the entire top half of the garment, and the neck fit higher at the back than the front, as necks should, because there was a whole extra stripe sequence on the back that wasn’t on the front. When picking up stitches around the armhole for the top-down sleeves, you pick up more stitches at the back than at the front. There are also short rows on the underside of the sleeves, which was a new trick for me.


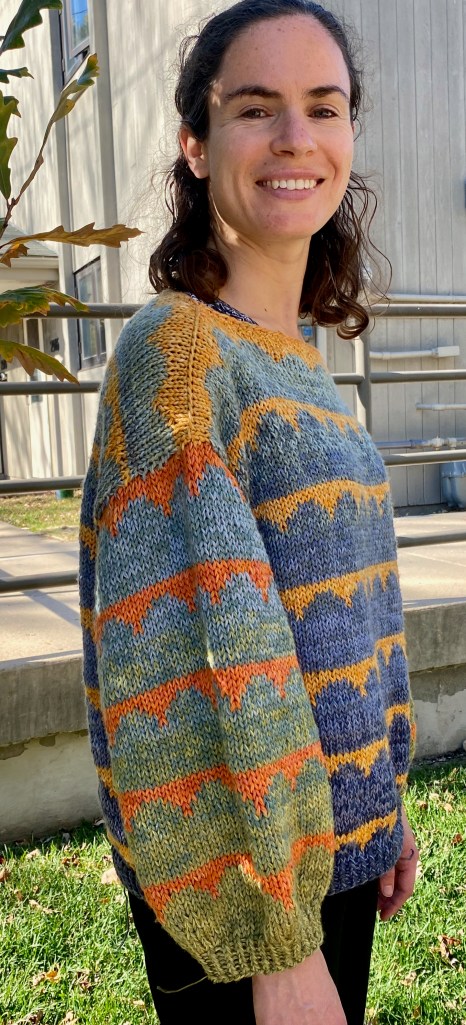
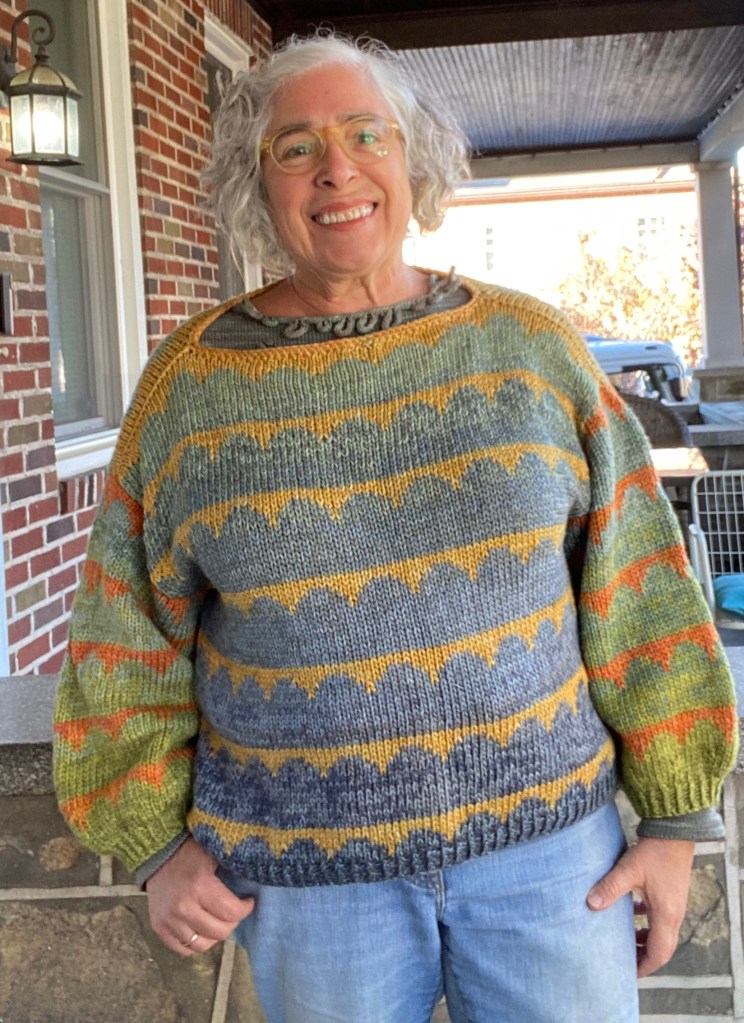
But even an experienced knitter, looking at the sweater while it is being worn, wouldn’t know all this was happening unless they’d been clued in beforehand. It had never occurred to me to shape a sweater this way. It’s so subtle. This invisible shaping is a magic trick that could work well especially in machine-knitting, because you can shape the shoulders and neck without having to divide the work and knit first one side of the piece and then the other. My one gripe about the pattern is my standard complaint: the absence of a schematic or even a general verbal description of the structure, for orientation, so that I can understand ahead of time what the designer’s plan is rather than having to derive it at the stitch-by-stitch level. Other than that, the numbers were accurate and the instructions were lucid and well-thought-out. The pattern was a professional product that had undergone quite a lot of test knitting and probably the services of a tech editor, and its accuracy justified the purchase price.
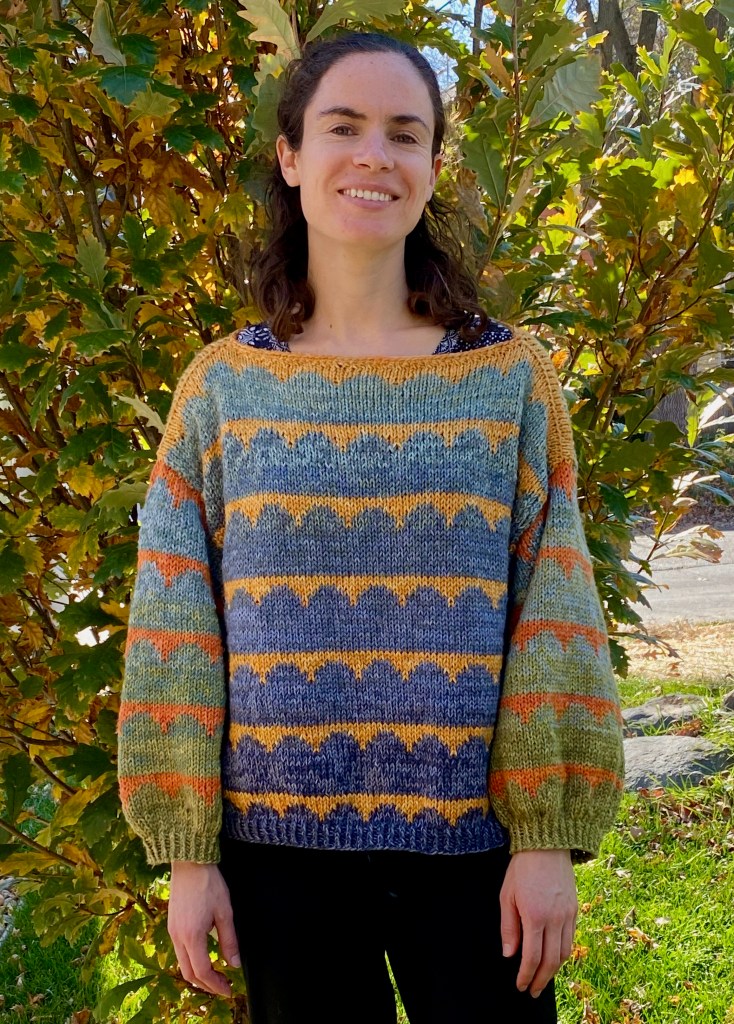
I took the sweater home and completed the finishing. After it was blocked, it got large enough to fit me, although I would go up a size if I were knitting it for myself.
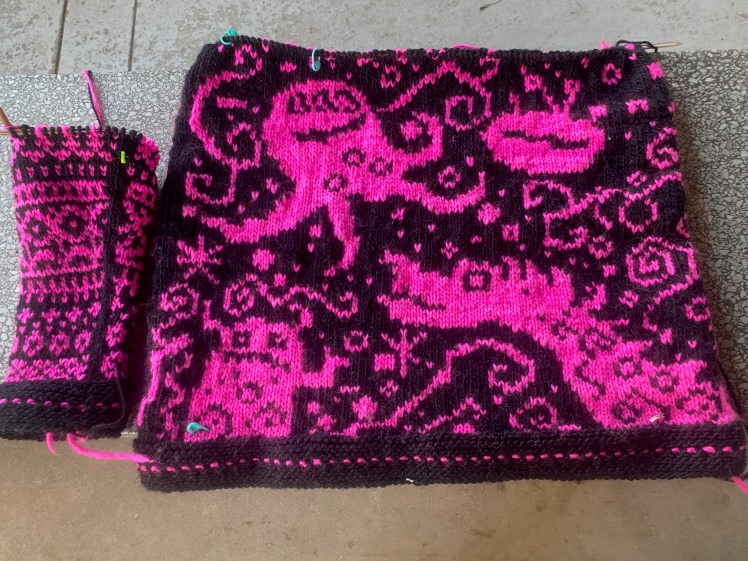
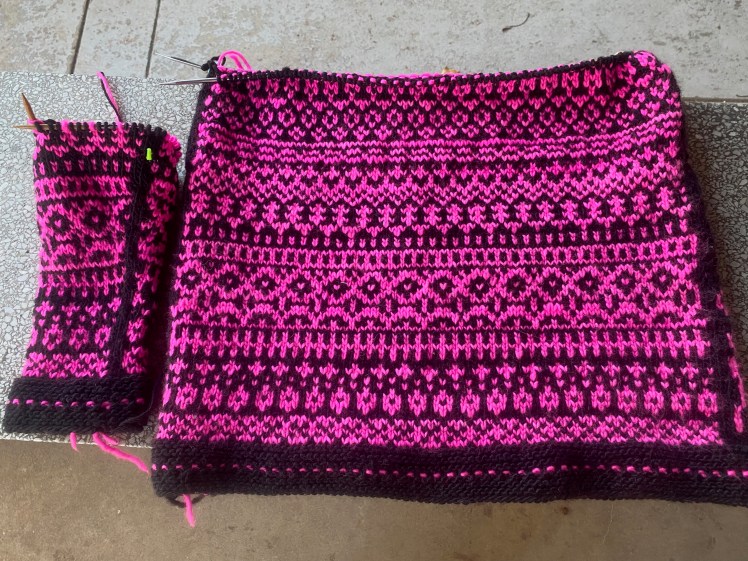
The difference between paid patterns and free patterns was quite clear when I sat down with the free pattern I was planning to use for Prima’s sweater in order to understand its dimensions and construction. The pattern was named Monster Sweater, designed by Kristen Bruckner, and it attracted my attention because the front side has a whimsical design of monsters and creatures from outer space and the back is covered in narrow stripes of Fair Isle patterning in small repeats. One sleeve has Fair Isle patterning and the other sleeve has monsters.
I didn’t have very demanding expectations of the pattern. The first tip-off that it might not be a polished work of technical writing is that it’s a free pattern, published six years ago, without modeled photos, and there’s only one heavily modified finished object in the project gallery on Ravelry other than two versions knitted by the designer. That shows it was never test-knitted. The instructions are for only one size, also a signal that the knitter should be prepared to do their own numbers and modifications. This was all perfectly fine with me because all I needed was the charts and the idea, and for that I am grateful to the designer. I adapted the charts to a smaller number of stitches so that my very slender daughter wouldn’t look like the monsters had eaten her, leaving behind only the bones, and that was a very simple thing to do because the monster chart looks improvised anyway, so a little more improvisation isn’t even noticeable. As for the Fair Isle patterning, it didn’t have a consistent stitch repeat, so it’s easy to start at the right-hand bottom corner and knit until you don’t have any more stitches to knit, and it won’t look like an incomplete sentence because the repeats are only four to six stitches wide.
I knew at a glance that I wasn’t going to use the pattern’s chart for the sleeve shaping because the increases were positioned in an arbitrary way and the final stitch count was going to end up about four inches too big for Prima’s tiny little upper arms. Also there’s only one sleeve chart, the one for the monster sleeve. The designer just applied the arbitrary sleeve increases to the chart for the back, which seems like an awful lot of mental labor for a sleeve that’s not going to fit anyway. When I do the sleeves, I’ll increase two stitches every six rows, ten times, building the increases around the parts of the chart that I want to include.
Once I was liberated from expecting the pattern to be completely accurate and applicable as written to the body I was making it for, I was free to use the charts any way I wanted to. There were a lot of empty spaces inside and between the monsters, so I improvised swirls and spirals and dots and squares to use up some of the space and to cut down on the long floats, although I did keep a lot of blank areas so that the monster shapes would be intelligible. Improvising is fun, after I get past the first few rows when it doesn’t look like anything but a random mess, and the general shapes of the monsters helped to orient me while I was establishing my embellishments to the original design. The chart is like a coloring book drawing, inside or outside whose lines I can decide to color and decorate any which way. A serving suggestion, so to speak.
I started working on Prima’s sweater at the same time that I finally got Secunda’s blanket off Melissa’s machine, after working on it for a couple of hours every day for four or five weeks (or was it six weeks?). For a couple of weeks I was much more drawn to sewing on the flowers than I was to knitting the sweater, until I realized exactly how little time I have to finish it in order to get it in the mail in time for Prima’s birthday. Now I have suspended work on the blanket and am working as fast as I can on the sweater. As of now, I have finished the body and am working my way up the first sleeve, the Fair Isle sleeve. It’s Sunday now, can I finish both sleeves by next Sunday? I should be able to do that, and then the yoke will be simple stockinette stripes in a square raglan shape with a few sets of short rows from the center of the shoulders around the back to shape the neck. The numbers won’t work out to form a close-fitting square neck, so I’ll have to finish the neck with additional decreases all the way around, which will turn the square into something rounder. But at least the neckline won’t be huge and drafty while the rest of the sweater is thick and warm.
So I’m closing this November blog post with a lot of unfinished business, although Secunda’s substitute birthday sweater has already arrived to its birthday girl days before her birthday. Prima’s birthday sweater is still in progress, and I won’t have time to get modeled pictures of it for this post, although I think that if I’m diligent, I’ll have it done in time to get to her for her birthday. As for the blanket, it might be finished in time for my birthday in three months. Or maybe my husband’s birthday in six months.

Amazing work. I really like the plant-base dyed yarn you used on Secunda’s sweater.
LikeLiked by 1 person
Thank you! I now have noticeably less of that yarn!
LikeLike