
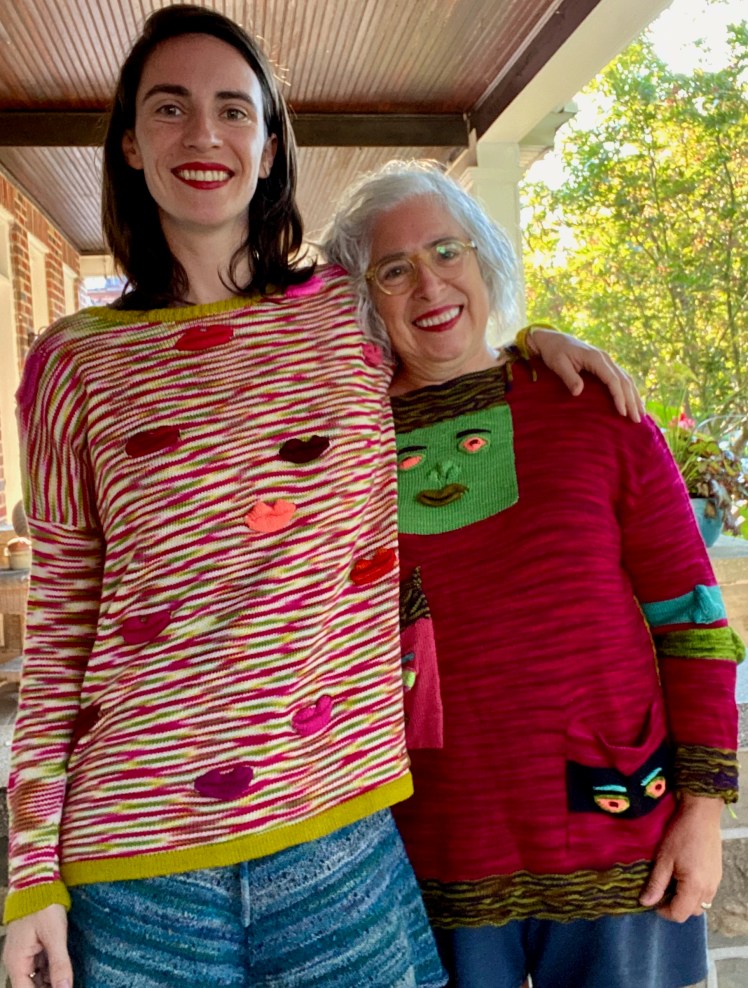
One of my favorite sources of design inspiration is… pigheadedness. Also technical failure. Or both, as was the case for this pullover for my older daughter that combined both of these elements. The pigheadedness expressed itself by prompting me to take up the challenge of using a Wollmeise colorway that one of my Ravelry friends had disparaged. The technical failure was the machine-knitted lips that I had messed up when I tried to knit a pair of lips on the sleeve of my machine-knit faces sweater.
I began thinking of a sweater covered in lips because that would force me to learn the structure of the lips shape described in Rebecca Yaker’s machine knit faces recipe, and to learn the structure well enough that I could adapt it to make fuller, more human-looking lips than my initial efforts produced. Around the same time, someone on my Ravelry group cited the Wollmeise Pitahaya colorway as an unusable combination of colors. I happened to be staring straight at my skein of Pitahaya lace, and its deep rose, verdant green, and white suggested itself to me as the perfect background for lips in a range of lipstick colors. My older daughter liked the idea of disembodied lips on a sweater and she liked the colorway too, so the sweater was for her.
The yarn and the technical failures that produced this design:
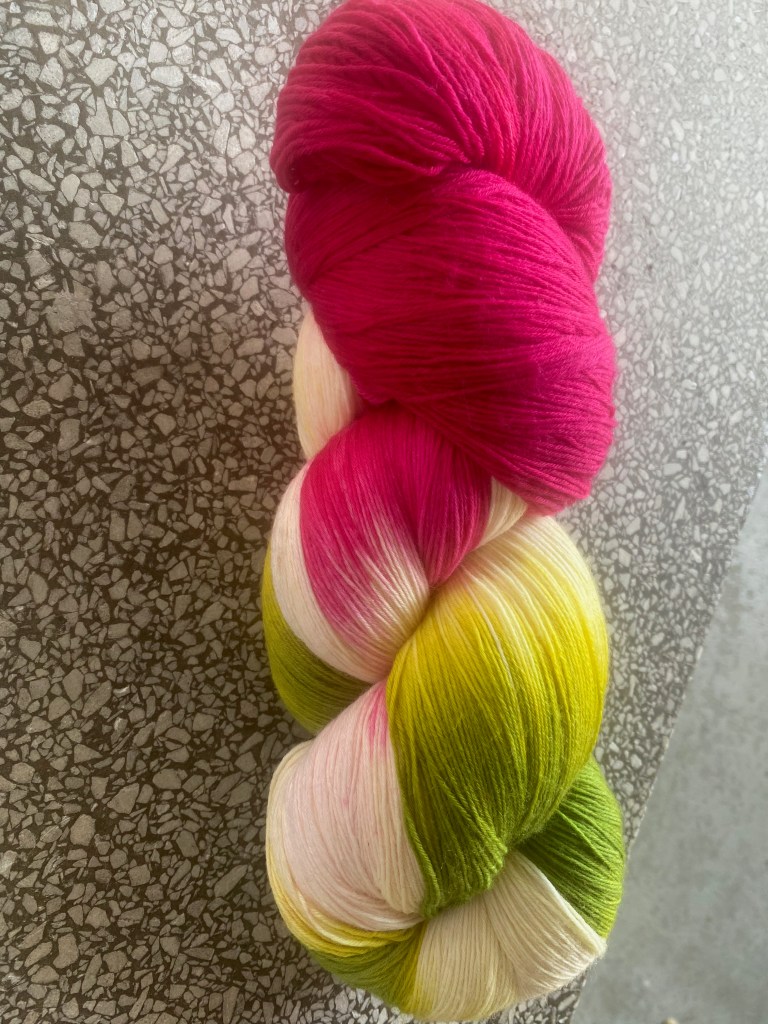


Since the lips were going to be labor-intensive and full of opportunities for disaster, I decided that the shape of the sweater should be as simple and basic as possible. I used the numbers for a previous oversized, dropped-shoulder sweater that I have used before and cast on 180 stitches. I did a folded hem, 10 rows deep, in a green that appeared in the Pitahaya skein, and then I weighed the Pitahaya skein before I started knitting it. This daughter has an unusually long torso and likes her sweaters to be long enough to cover her fly in case she forgets to zip it, which meant that I would need to watch my usage because I would be playing yarn chicken.
Rebecca’s lips recipe is 16 stitches wide, and my version is also 16 stitches wide. But I wanted my lips to be fuller and more shaped, so I started with a base of 8 stitches and put stitches into work at a slower rate than Rebecca did to make the lower lip longer and more curved. Eventually I settled into this pattern for the lower lip:
- All needles in hold except for the 8 stitches, carriage on right. Knit one row. Wrap the needle next to the last knitted stitch.
- Put one needle on the right into work, knit to the right, wrap the yarn.
- Put one needle on the left into work, knit to the left, wrap the yarn. 10 stitches in work. These two steps can be repeated, if you want more fullness and a curvier lower lip. In fact, I think I prefer some of the lips in which I did that.
- Put one needle on the right into work, knit to the right, wrap the yarn.
- Put one needle on the left into work, knit to the left, wrap the yarn. 12 stitches in work. Sometimes I repeated steps 4 and 5 and had two wraps on the outer needles.
After I had 12 needles in work, I put one needle on the right into work, knitted and wrapped, and did the same on the left side. Then I knitted and wrapped these same needles back and forth a second time, for needles 13 and 14. I did the same doubling-up for needles 15 and 16. Next, I returned to Rebecca’s instructions and transferred every other stitch onto the stitch next to it, starting from the ends and meeting in the middle, with the empty needles out of work. Rebecca explained to me why she did this, but I don’t remember the reason. I did it anyway. Then knit over the 16 stitches from right to left. Next row, put the empty needles back into work and lift the nearest convenient loop of a contiguous stitch onto the empty needle. Knit back left to right. Carriage on right.
Then make the welt to form the shape of the lower lip by picking up a loop from the first row of the lip stitches and putting it onto the corresponding needle, and doing that for all 16 stitches. Precision is not necessary, which is a good thing since precision is not possible, at least not for me. Knit 4 rows, wrapping around the two needles at either end of the lips, alternately so that there isn’t a big yarn pile-up on needles 1 and 16, then start the right half of the upper lip, putting the left-most 8 needles into hold.
- Knit 8 stitches from right to left, wrap.
- Put the right-most needle into hold and knit from left to right, wrap. 7 knitted stitches.
- Put the next needle at the left end of center into hold and knit from right to left, wrap. 6 knitted stitches.
- Put the right-most needle into hold and knit from left to right, wrap. 5 knitted stitches.
- Knit the same number of stitches a second time, right to left, wrap the left-most needle a second time.
- Knit the same number of stitches a third time, left to right, wrap the right-most needle a second time.
- Put the next needle at the left end of center into hold and knit from right to left, wrap. 4 knitted stitches.
- Knit the same number of stitches a second time, left to right, wrap the right-most needle a second time. 3 knitted stitches.
- Put all lip needles to the left of the carriage into work and knit right to left. The carriage is on the left side of the lips.
Now put the right-most 8 needles into hold, that is the needles of the just-completed right half of the upper lip, and put the left-most 8 needles into work. Repeat the process in the reverse direction, ending with the carriage on the left. Put all lip stitches into work, knit to the right, and cut the yarn. Then close the upper lip by picking up stitches from somewhere within the lip. Rebecca’s instructions say to pick up stitches from the very beginning row of the lip, but I preferred the upper lip shape I got when I picked up the closure stitches from the row I knitted to close the lower lip. I knitted the closure row with the main color.
I particularly like the way these lips came out. It looks as if I doubled up the rows when there were 10 needles in work. On the wrong side, note where I did the upper lip closure. You can see several rows between the join at the bottom of the lip and the join at the the top, which gives both the lower lip and the upper lip more space for the short-row shaping to show itself. Attaching the upper lip closure to the lower lip closure flattens the shape of both the upper and lower lip.

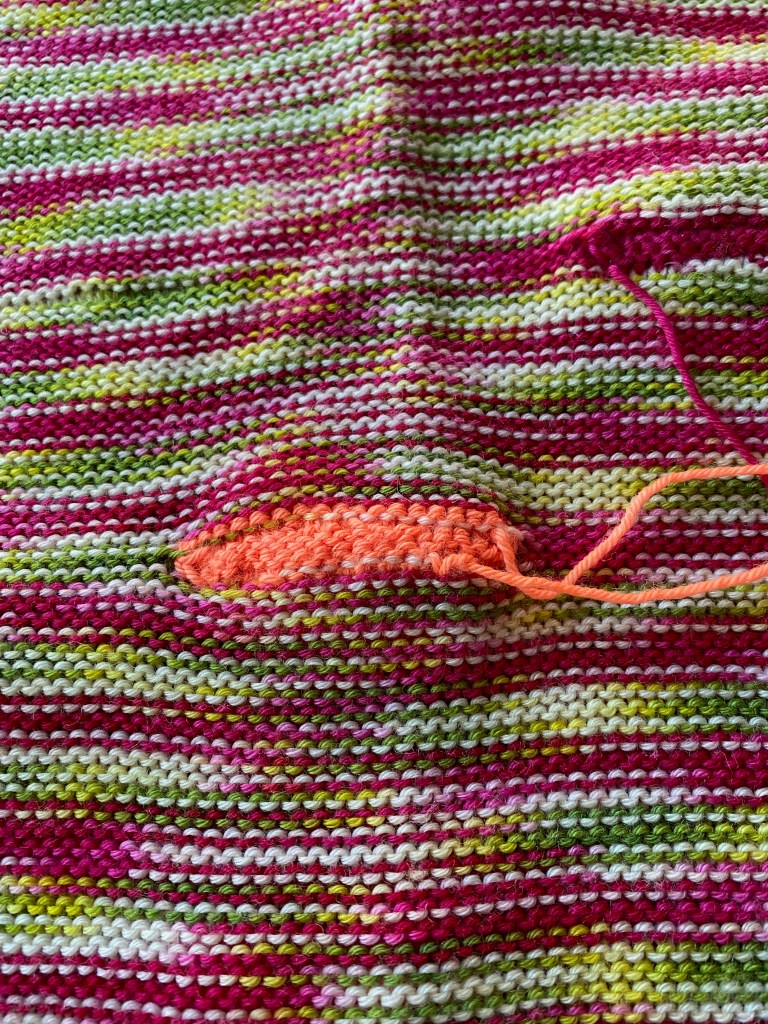
Here’s a pair of lips that I like a little less. The problem here isn’t that I joined the upper lip too far down. It’s that I joined it too far up, too close to the top of the upper lip. That turned the curves of the upper lip into a thin line and pushed the fullness of the lower lip up into an ill-tempered pout.


On the other hand, I also like how these slight variations in where and how the closures are formed give so many human idiosyncrasies to something made on a machine.
As for the sweater itself, I used a Wollmeise lace, which is a heavy lace weight yarn, maybe even a light fingering weight. But I decided I wanted the lips to have more heft and substance, so I used mostly Wollmeise fingering weight yarn for them, which is also kind of on the heavy side as fingering weight yarn goes. I used about a dozen pinks, reds, and oranges for the lipstick colors, purposely disregarding their compatibility with the rose-pink of the main color. No good reason for that decision, I could have chosen matching colors and that would have looked nice. I just didn’t feel like it. The pooling of the multi looked like ribbon candy to me. I think I wanted to bust up some of that sugariness with a bit of dissonance.
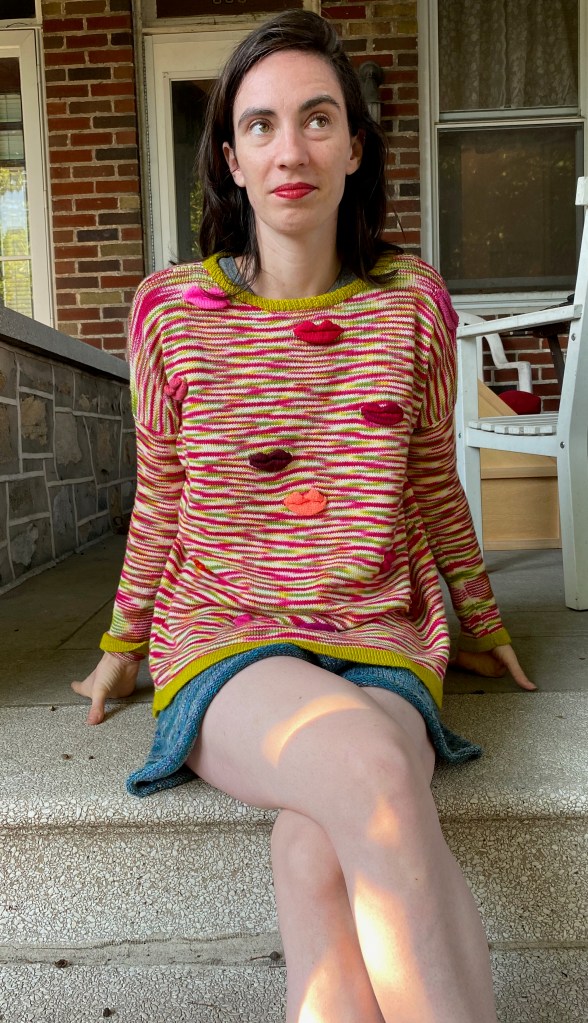
Another advantage that the weight of the lips offered this sweater is that it lengthened it somewhat and literally stretched the main color, which I feared I might run short of, to accommodate my older daughter’s very long torso. I was weighing the yarn as I worked to make sure that it would last through front and back and both sleeves, so I made the front and back about 10 rows shorter than the sweater I was modeling my numbers on. I ended up with about 40 grams left over. That probably would have given me another quarter-inch of length if I wanted to play yarn chicken. But there was really no need to, since the finished length from nape to hem is 26″, long enough to cover even my older daughter’s unzipped fly.
When I finished the knitting of each piece, I left long ends for sewing the pieces together and minimizing the number of ends that I would either have to weave in or ignore. I wove in and cut off the ones that would have dangled down on the outside, but I left the ones at the armpit, and when I had my younger daughter try it on, I was glad the ends were still there, because I had totally miscalculated the seaming of the sleeves to the body, and the shoulder seam bunched up on the body side. It looked awful. I tore the sweater off of her body and started looking for an entry way into the seam rather than into the fabric itself so that I could undo the seam rather than unravel the sweater. It was a bit of a tense search to find the end that went in the right direction, since I had been just a bit too clever about using the same strand for the side seams, the sleeve seams, and the sleeve/body seam. That meant I was going to have to cut a seaming strand so that I could keep the seaming that I had done correctly and just take out the bunched-up parts. I pulled on strands here and there to see where they led, and when I found the strand that went into the seam that needed to be redone, I prayed a little and cut, then unraveled and resewed at the 3:4 ratio that makes the stitch-wise knitting fit the row-wise knitting, using the yarn that was dangling inside the sweater. Very handy, those dangling ends, since I was in Michigan at the time, and the leftovers of the skein were in Maryland.
Then I put the sweater back onto my younger daughter, the one who was available at the time, and it looked exactly right.


Finally I got the sweater onto the intended daughter.
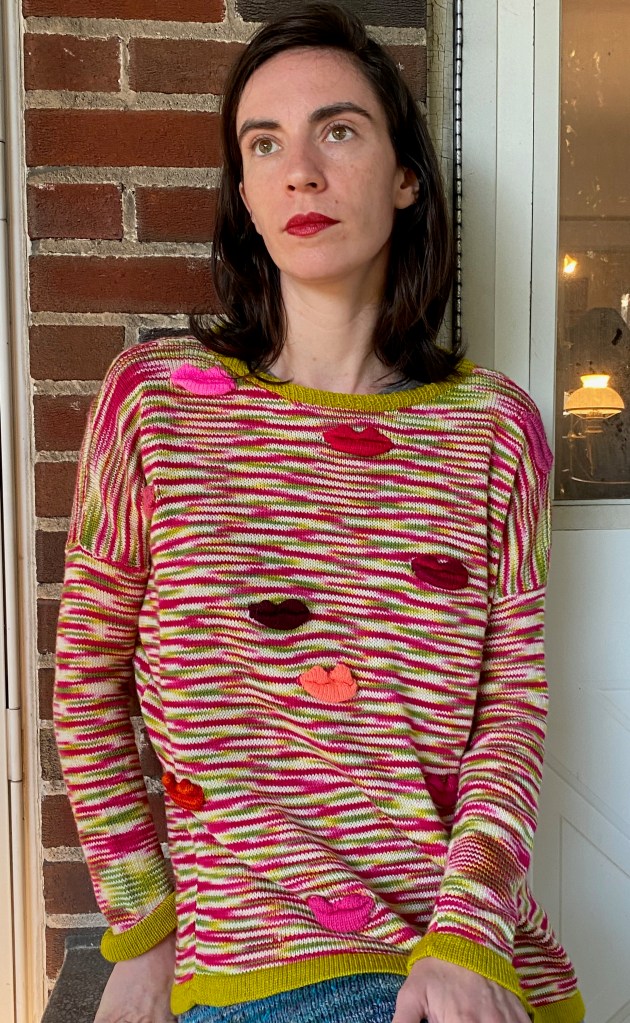
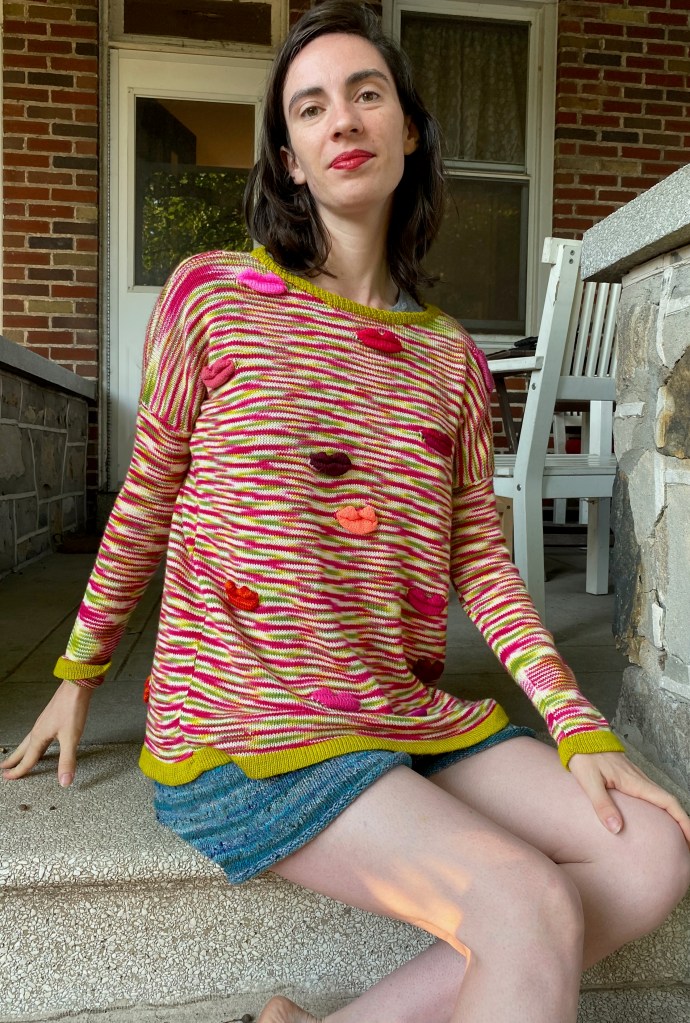

I waited a long time to get this photo.

Hey Abby!
I’ve been following your blog for a while now. I’ve always loved your creative knitting. I’ve been knitting for the past several years after a 30 year hiatus. My knitting isn’t as creative as yours, but I was pleasantly shocked win 3 blue ribbons and one white (3rd) ribbon at the Howard County Fair. I need to post pics on Ravelry, but one was a test knit for a designer for an Expression Fiber Arts that hasn’t been published yet, so I can’t post it.
Anyway, I wanted so say that the pitaya colorway is FIRE—and your lipstick sweater is perfection! And it’s so nice to see your girls and you modeling your creations.
I hope you and Charles and the girls are doing well. I retired at the end of July but Keith is still working. And our 3 grown children are still at home figuring out their next moves.
Kathy Kartak
>
LikeLiked by 1 person
Thanks, Kathy, and congratulations on your own knitting success! Maybe we can get together sometime and catch up. If you’re interested, pm me on Ravelry and we can discuss. I’m ableramm. Also, congratulations on your retirement! It takes a little while to adjust, but it has all the potential for your best phase of life.
LikeLike
This is quite amazing and amusing. I really like the way the multi-colors of pitaya ripple across the sweater. Excellent work.
LikeLiked by 1 person
Thanks so much! I always appreciate your kind “attagirl” comments!
LikeLiked by 1 person
I love that Pitahaya colorway! Heck, given the way it pooled and the well-chosen chartreuse of the trim, it would have looked great in the pullover even without the lips. But the lips are the point, of course, and the varied reds, from orangey to sweet fuchsia, make the garment much more interesting than if they had all been the same as the Pitahaya pink. Plus, you and your daughters look great. Fab modeled photography throughout. Thanks for all the fun!
LikeLiked by 1 person
Gretchen, your observant and flattering compliments make me blush! And a speck of dust just got in my eye…
LikeLike
Love, love, LOVE! And all that talk about your daughter and her unzipped fly….she’s wearing knit shorts! hahahaha! Keep up the amazing dismemberment, friend!
LikeLike
She knitted those shorts! This old block is very proud of the chip!
LikeLike