
I spent most of the January 2025 Swatchathon experimenting with the capabilities of the LK150 knitting machine, now that I have one in both of the places where I knit with machines, at home and at my daughter’s house in Wisconsin. Unlike the machine I learned the basics on, the Brother KH965i electronic machine that has all the bells and whistles, the LK150 has no bells and whistles, just levers at the sides of the knitting carriage that knit or don’t knit the stitches depending on whether the levers are pointing up or pointing down, and which position the needles are set in, and which direction you’re knitting in. One of the things I wanted to explore was stranded knitting, which the LK150 requires doing in two passes of the carriage in which each color is knit separately, while the other stitches of the other color are left to sit still due to the position of the needles and the direction of the levers.
Back in January, I tried to follow the instructions for stranded knitting as explained in the LK150 manual, using a very basic motif that had only four rows of patterning, but I had a lot of trouble understanding how to arrange the levers and use the right yarn so that I had the color I needed at the end where the carriage was located. Every couple of rows I had to lift the carriage off the bed and reattach it at the end where my yarn was. I was pretty sure that wasn’t supposed to be how this worked.
I looked at videos, but I couldn’t find one that demonstrated how to do two-color stranding without the use of a device called the Needle Beetle. The Needle Beetle will let you arrange the first eight needles of an 8-stitch repeat, then you run the device over all the needles you want to knit and it will put them all into position for the stranding you want to do. It looked like there was a bit of a learning curve to use the device, and it was only good for 8-stitch repeating patterns, and I wanted to try it out under adult supervision before I decided to purchase one, since these little plastic boxes with a metal tail on a spring and a little plastic piece inside are pretty pricey. Of course the adult in question was my friend Tanya, who has every kind of knitting machine and gadget and knows everything about everything machine-knitting.
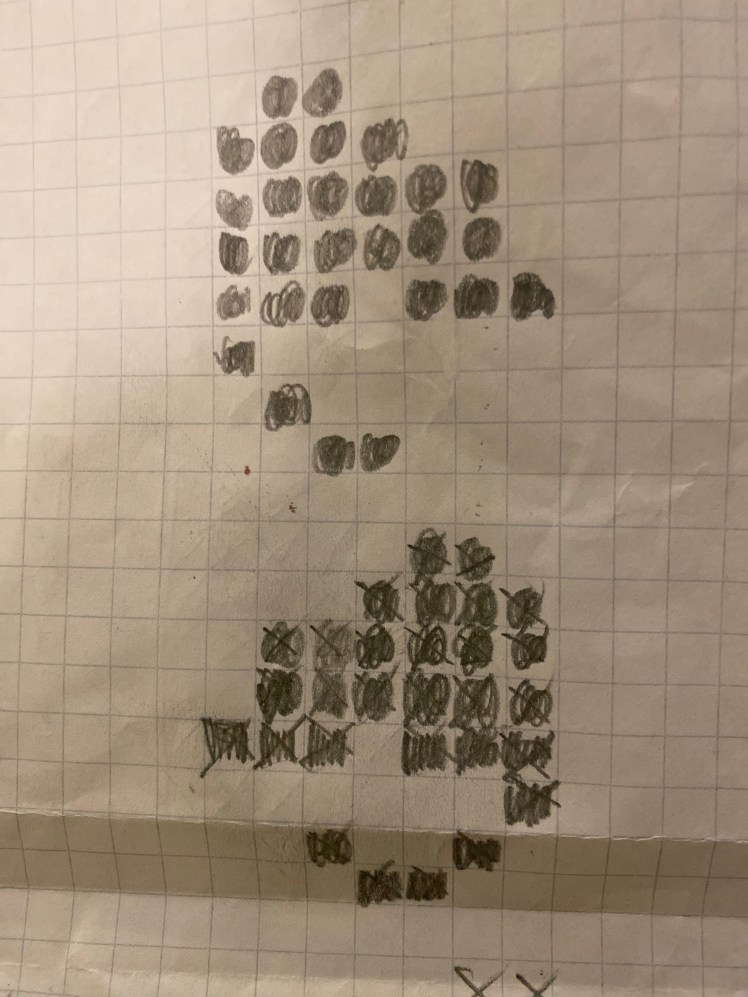
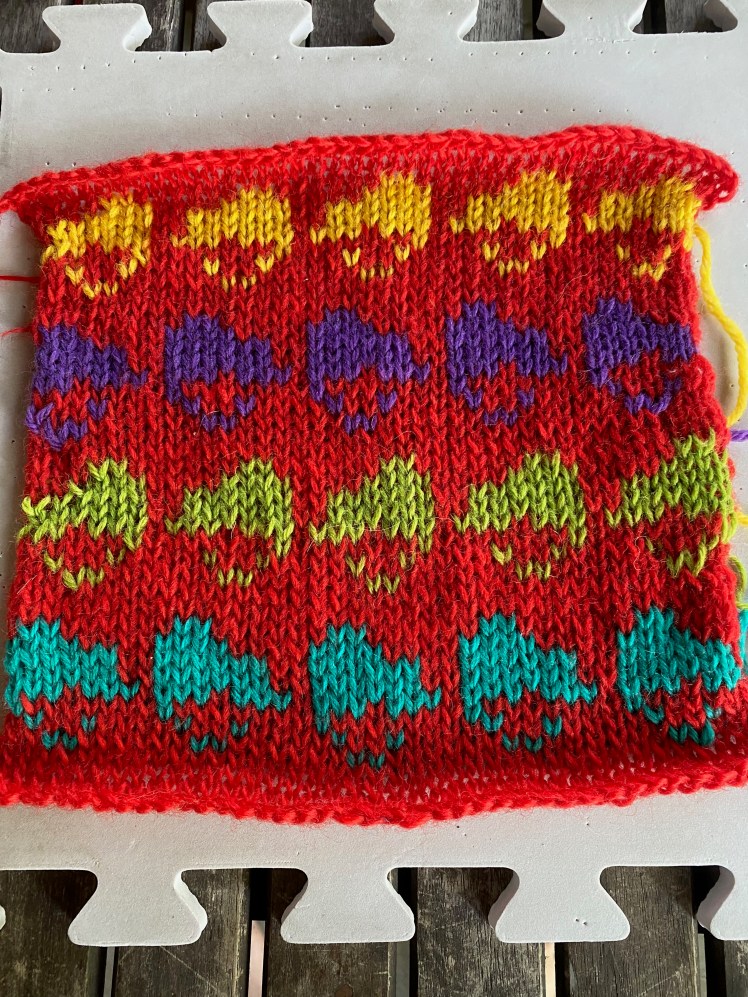
Tanya is a scientist of knitting machines and machine knitting. She makes one swatch after another in order to answer a technical question and all the follow-up questions, but she rarely makes garments. She and I have a symbiotic relationship, because I run into a problem and lack the imagination to even know where to start to solve it, so I ask Tanya and she researches it and swatches it every which way, and then teaches me how to do it. I’m a slow and not very bright pupil, but Tanya is a patient teacher, and once I finally understand, I’ll make something interesting using my new knowledge. After my unsatisfying experience with stranded knitting on the LK150 during the Swatchathon, I ran across a charming slipover vest knitted in a stranded cat face pattern whose repeat happened to be exactly eight stitches. I texted a picture of it to Tanya and asked her if it was feasible with the Needle Beetle. She texted back a chart she had drawn of the stitch pattern and then a couple of photos of swatches she had just knitted, with a promise to teach me how to use the Needle Beetle during my next visit to Madison.
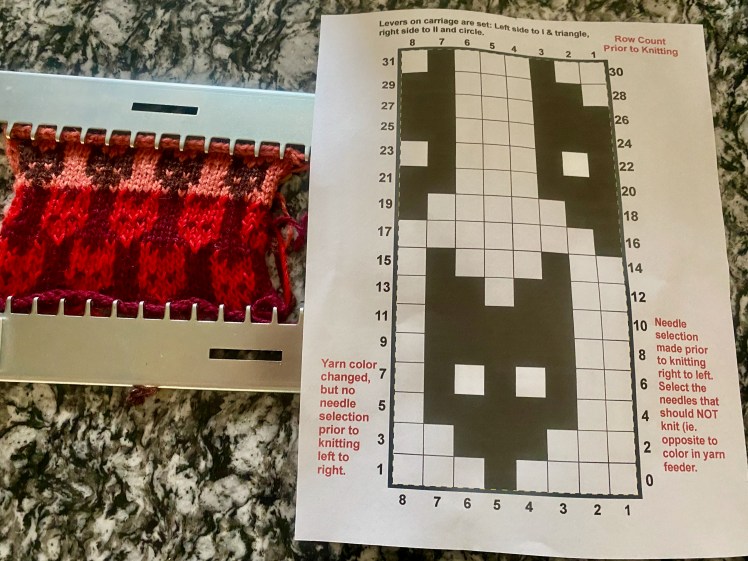
When I came over during our visit in May, she presented me with a chart of the cat motif. She had numbered each side of the chart, even numbers starting from 0 on the right, odd numbers starting from 1 on the left. She had notes about which direction the levers should be set in and where the two colors should be placed when it’s not their turn to be knitted so that you never end up with the carriage at one end and both yarns at the other end. She supervised how I applied the chart to the needles at every row so that I didn’t accidentally reverse the settings of the needles and ruin the patterning. I didn’t fully internalize how to use the Needle Beetle, but I produced a credible swatch, and I started thinking about how to use the 8-stitch repeat limitation as a stimulus for creative problem-solving. I ordered one to use for my own machine back at home.
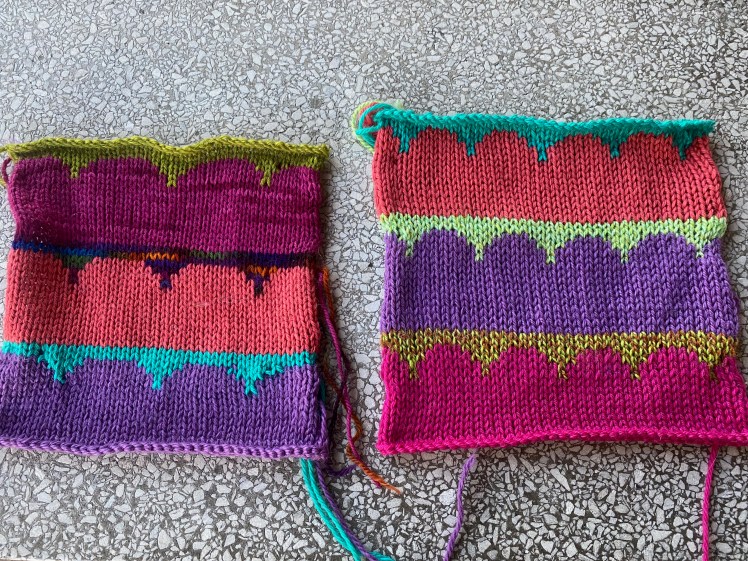
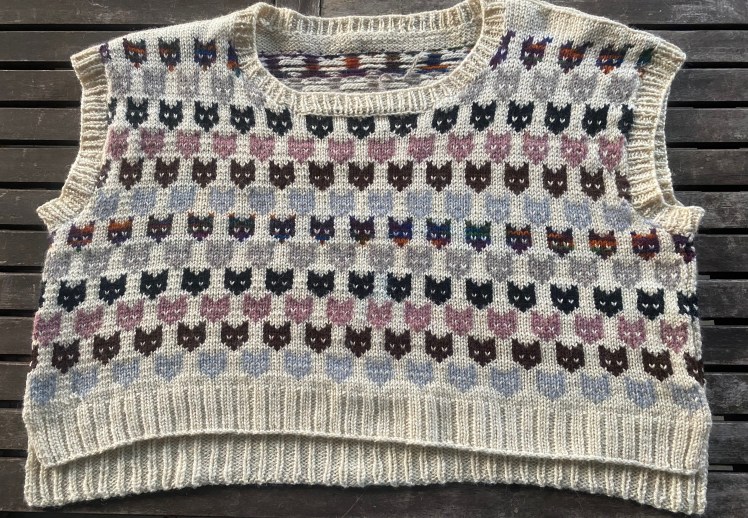
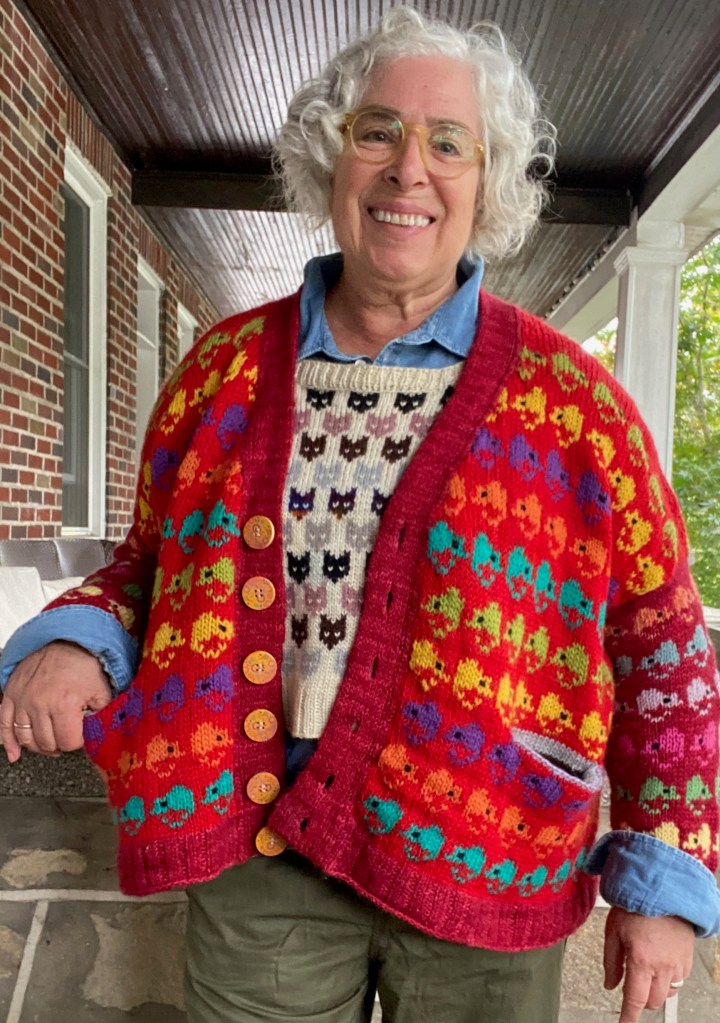
My original thought for the colors of my cats slipover was to use worsted weight yarn in colors that changed for both the background and contrast colors, but the swatch I made at Tanya’s house showed me that too stark a contrast between one contrast color and the next would disrupt the readability of the motif in a way that didn’t serve my purpose. The background needed to be the same color throughout, or at least hues of the same value, and I hunted through my stash for enough of a single color in worsted to get me through a short, wide, sleeveless slipover garment. I found three skeins of white, undyed farm yarn left over from my first attempt at the Flourish sweater, which I had given to my older daughter.
I have feelings about white with bright colors. I tried out the white yarn with reds and purples and didn’t like it, so I collected odd cakes of brown, grays, black, a dark multi, and brown-pink, which pleased me much better.
By the time I got around to planning my own project with the Needle Beetle several months later, I had forgotten the details of how to use it. That was when I realized that Tanya’s cheat-sheet chart had all the information I needed available at a glance. Of course I made all the mistakes, because that’s what I do, but in making the mistakes, I finally internalized how the levers pointing upward knit the background color and the levers pointing downward knit the contrast colors. I also internalized the protocol of starting my pattern with the background color attached on the right and the background color needles in B position, and the contrast color needles all the way forward. Knit to the left, removing the background color from the feeder and hooking it onto the right side of the machine. Next attach the contrast color on the left and knit with it from left to right, then set up the needles for the next row with the contrast color needles in B position and the background color needles pulled all the way out, and knit the contrast color from right to left. Then remove that yarn from the carriage and hook it to the left side of the machine, then retrieve the background color from the right end and put it back in the feeder, knitting to the right and setting up the next row with the background color needles in the back and the contrast color needles in the front. The shorthand rule is, always change contrast colors on the left, always knit the color in the feeder when the carriage is on the right.
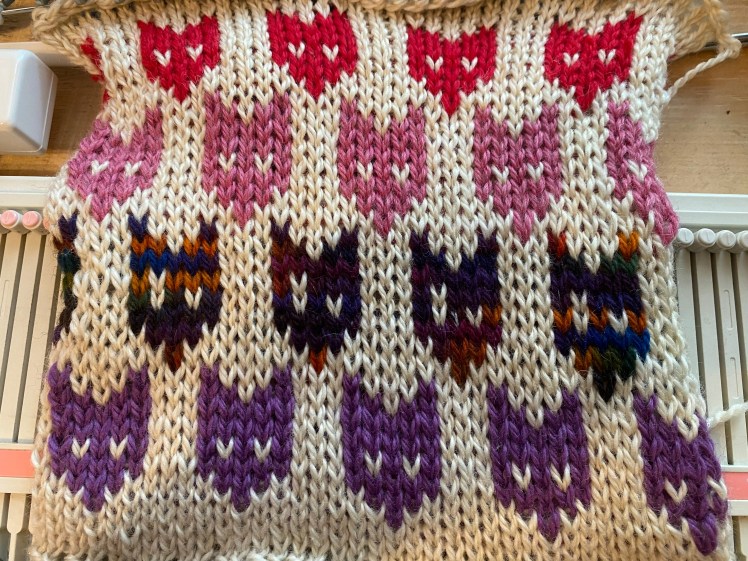
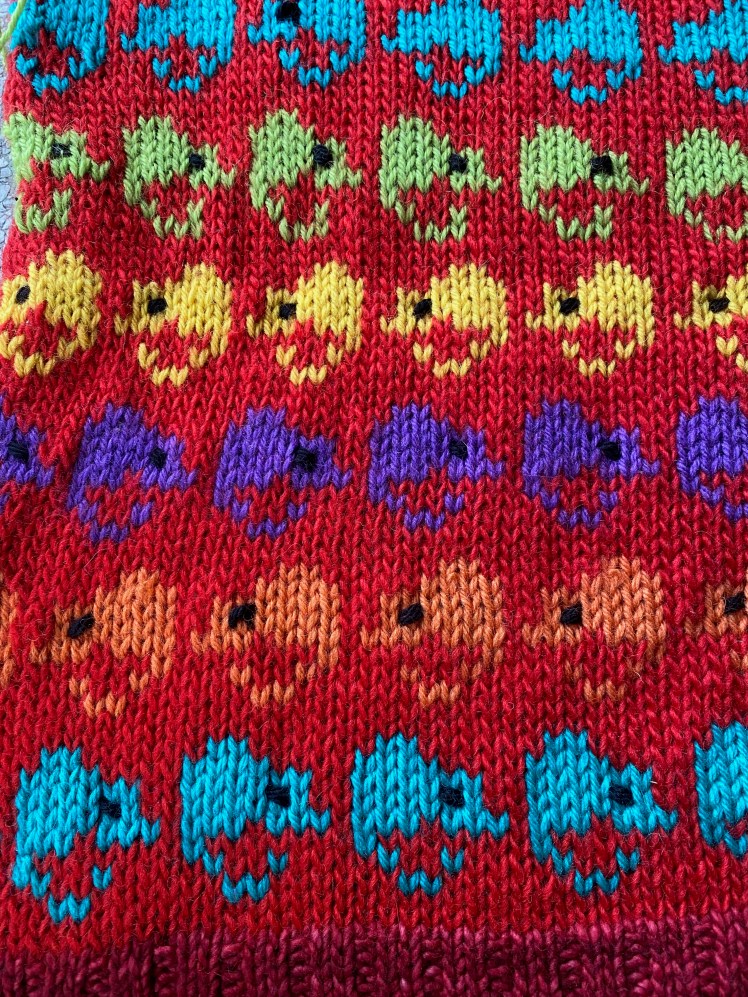
When I got about halfway up the front of the slipover, it seemed to me that I was using the background color at a rate that might consume all the yarn before the garment was finished, so I began to think about possible design solutions that looked intentional. What if I knitted cats on a white background for the front and mice on a red background for the back? I did have a fair amount of a red single ply wool from who knows where and when. I started sketching mice on graph paper, although sketching and graphing are not my artistic strengths. The first few attempts looked something like umbrellas. I got a little closer with something that looked a bit like an armadillo. Eventually I achieved what I thought looked like a mouse, although no one else was really seeing it.
When I showed my swatch on the swatch thread of my Ravelry group, nobody wanted to be the one to say, “uh… what is that supposed to be?” Their silence spoke volumes.
The problem with this chart, aside from its dubious readability, was that the mice pattern was two rows taller than the cats pattern, and that was going to be a problem because the machine’s row counter was occupied with ensuring that I was setting the needles for the right place in the pattern, not for counting the total number of two-color pattern rows, which was information I would need for making sure the armhole shaping was at the same place front and back. I’m sure I could have mathed it out, but I had enough going on with figuring out how to shape a garment when my row count was disrupted by knitting each row in two passes, and I didn’t want to break my brains more than necessary. The way I did my shaping decreases for the armholes so as to assure the minimum brain-breakage was to have a total of eight decreases on either side, the same number as the repeat. First I bound off four stitches, decreased the next two when the carriage was on the right side, then decreased the final two when the carriage was on the right and the row began with the white. I ensured that the patterning remained accurate by setting the Needle Beetle to pass over the original needles, then push the unneeded needles out of work before knitting the row.
As for the neck shaping, I couldn’t put needles in hold and knit each side successively, because the operation of stranding on the LK150 knits stitches in that position in the contrast color on the left-to-right pass of the carriage. I had to knit one side of the neck onto waste yarn, knit the other side by shaping the opening according to the procedure I had used for the armholes, shape the shoulder slope without patterning, bind off, and return the stitches that were on the waste yarn back to the needles, and repeat the process for the other side of the neck.
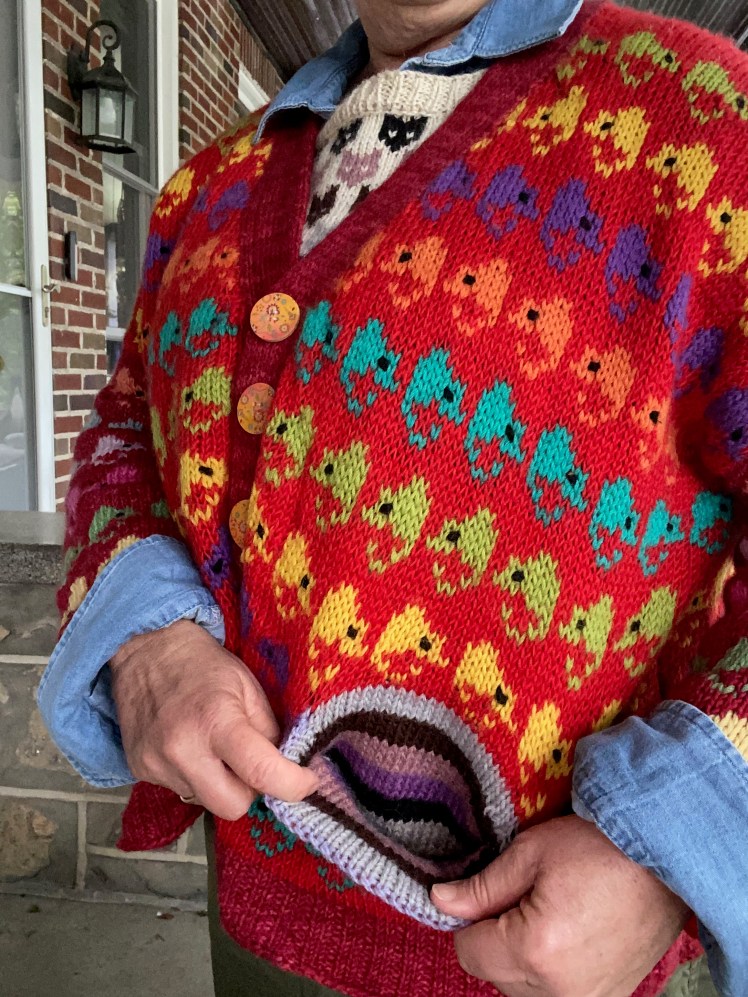
Fortunately I finished the front with more than enough white yarn for the back, so I could save my mouse chart for a cardigan to make a fraternal twin set. I believed I could make my mice patterning read as mice, despite the general skepticism, but then I began to worry that I didn’t have enough of that red yarn to get through the entire cardigan. Back to the stash I went, and pulled out three 100-gram skeins of a darker, more brown-red Malabrigo worsted that I had won years ago in a competition. That would be used for the sleeves, ribbings, and button band. I did more stash diving and found muted, pastel versions of the colors I wanted to use to contrast with the bright red for the body of the cardigan.
One persistent problem I had while knitting the slipover was that knitting in the usual way, with the yarn fed into the carriage feeder through the tension wires, caused a lot of resistance in the progress of the carriage across the stitches, which tightened the gauge of the fabric and sometimes stopped the carriage dead in its tracks with the yarn tangled up in the wheels. For this second piece, I made sure that there was plenty of slack throughout the movement of the carriage over the needles, and that solved the problem. I started with the back, because it required less shaping and gave me time to think about numbers for the shoulder shaping and neck width, and also because mistakes wouldn’t be front and center. There were mistakes. I covered them up with duplicate stitch, and now I don’t remember where they were. I sent a picture of the back piece to my daughters, my sister, Tanya, and Melissa, and they all told me that they really weren’t seeing the mice, but maybe eyes would help? So embroidered eyes, and this focus group assured me that the eyes helped. Then I ventured to show that picture to my Ravelry group, and the reactions confirmed that eyes were the missing element.
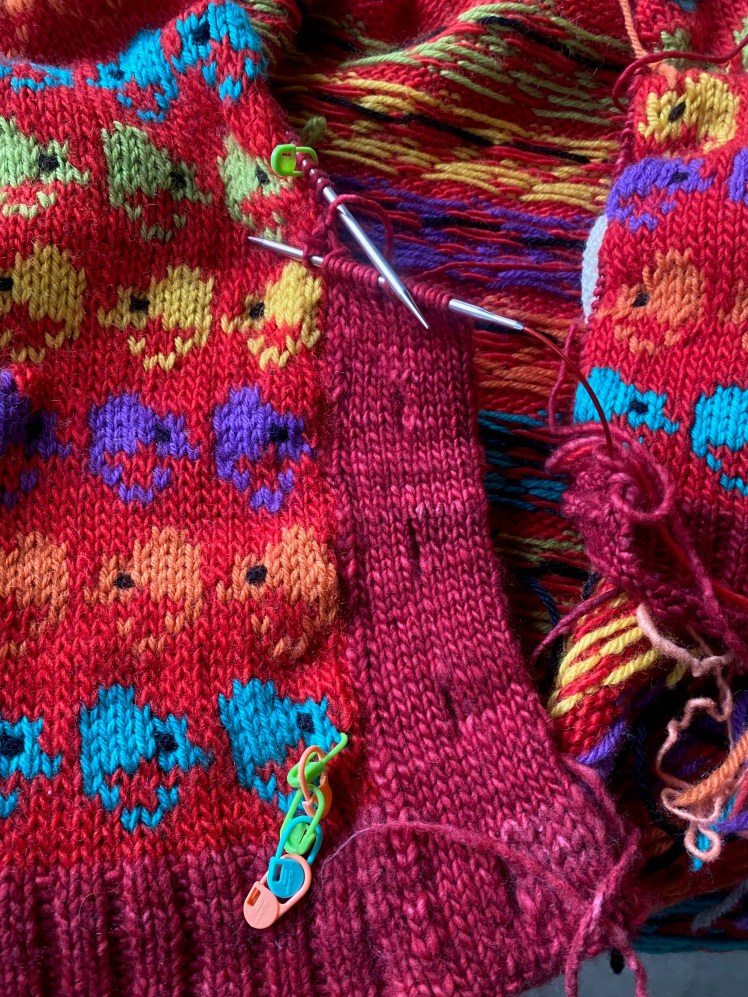
Of course the fronts needed pockets. I thought for a while about devising some stranded patterning as a fun little secret hiding inside the pockets, but my preferred method for making pockets is to put the needles to the right and to the left of the pocket needles into hold, knit twice the desired depth of the pocket to make a loop of fabric, then put the needles in hold back into work and resume knitting the front piece. The problem is what I said about putting needles into hold in order to make a short-row shoulder slope: can’t do it in stranded knitting on the LK150 because held needles will knit when the levers are set to knit the contrast color. I would have to put the stitches to the sides of the pocket onto waste yarn. I wasn’t up for that much effort. Instead I knitted 4-row stripes in the colors of the cat slipover. It’s almost not visible as simple stripes, so it really wouldn’t be worth the trouble to knit it in a stranded pattern.
For the cardigan’s V-neck opening, I needed the same number of decreases as the 40 stitches I had assigned to the back of the neck, so 20 decreased stitches per side. The V would start in the plain row at the end of the sixth mice sequence, and there would be a decrease every other row for 40 rows, which I marked on the row count of my chart. When I completed each piece, I embroidered eyes and seamed the shoulders, because I was going to pick up stitches for sleeves at the side edges of each front and back, and knit the sleeves top-down. That required recharting the motif so that the top of the mouse’s back was the start and the bottom of the tail was the end. My first attempt was a false start. I misread the chart for the first motif so badly that it was unrecognizable, and I started the sleeve decreases too soon so that even if I did the duplicate stitch fixes on the first motif, the sleeve was going to be an unwearable tourniquet. I frogged and benefited from the experience so that both sleeves could be dispatched quickly and accurately. Since the dark red Malabrigo yarn was the background color for the sleeves, I used the bright red yarn for the cuffs. The nice thing about the yarn I used was that it was all non-superwash, so I could spit-splice the frogged yarn back onto the cake it came from and spare myself a few ends to have to work in.
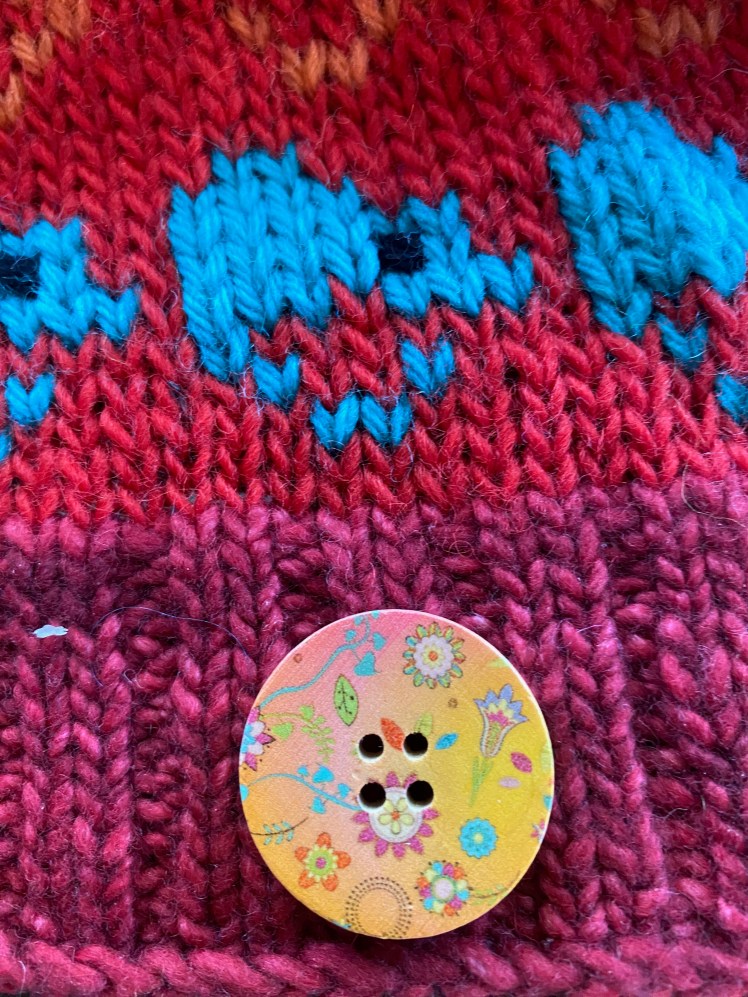
After embroidering the eyes and sewing the seams, the next major endeavor was button bands. My friend Jayne had put double-knit button bands on two beautiful, impeccable cardigans she has made over the last year, and she kindly showed me how to do it. First, I picked up a stitch on every row going up the edge of the cardigan. At the neck, which was so loose that the unfinished sweater fell off me, I picked up at a rate of three stitches out of four rows to tighten the neckline. Then pick up a stitch every row going down the edge of the cardigan. After that, cast on twice the number of stitches needed for the width of the button band, knit one stitch, slip the next with the yarn in front, do that until the last stitch, slip a picked-up stitch onto the needle with the double knitting, and slip-slip-knit those two stitches together, which joins the body of the cardigan to the button band modularly. Turn, slip-knit to the end of the button band, repeat ad finitum. But in the “ad” on the way to “finitum”, I had to work out the spacing for the six button holes, which needed to be large enough to accommodate big round buttons that I found in my collection, and to knit vertical slits in the button band by knitting one half of the stitches to the height of the hole, then the other half of the stitches to the same height, and knitting the entire width of the band to close the slit.
That took most of a week and most of a skein of the Malabrigo to make this double-knit button band. But it’s the best looking button band I’ve ever made (although it probably could have benefited from a few extra stitches in the bottom section to make the button band fit more smoothly against the opening of the garment), and I do not begrudge it the time or yarn it took to make it happen.
Now I have a very solid understanding of how to use the Needle Beetle, and I’m constantly scouting stranded projects on Ravelry to see if their repeats are eight stitches or if I can adapt them to eight stitches. I’m planning a garment with a 1×1 alternating stranded pattern, which I could do with the 1×1 needle pusher if I didn’t have the Needle Beetle, but I do have the Needle Beetle. I also have a burning interest in making magic balls from scraps of warm colors spit-spliced together, and another from scraps of cool colors, and making a Kaffe Fassett-style 8-stitch Little Circles garment. Of course if I used my dear, faithful, patient KH965i, which has put up with me since my unpromising start nine years ago, I could do all this in half the number of carriage returns required to do stranded knitting on the LK150. But I really like the look of thicker, non-superwash wool stranded on the LK150 because it has an organic dimensionality that isn’t there in most machine knitting, even if it’s more labor-intensive. And one more thing I have gotten from getting comfortable with the Needle Beetle: I don’t have to use it, if I want to knit stranded patterns that are bigger or smaller than eight stitches. Now I understand the workings of the levers and can use what I know to knit any pattern I want as long as I can chart it, even without using this device.
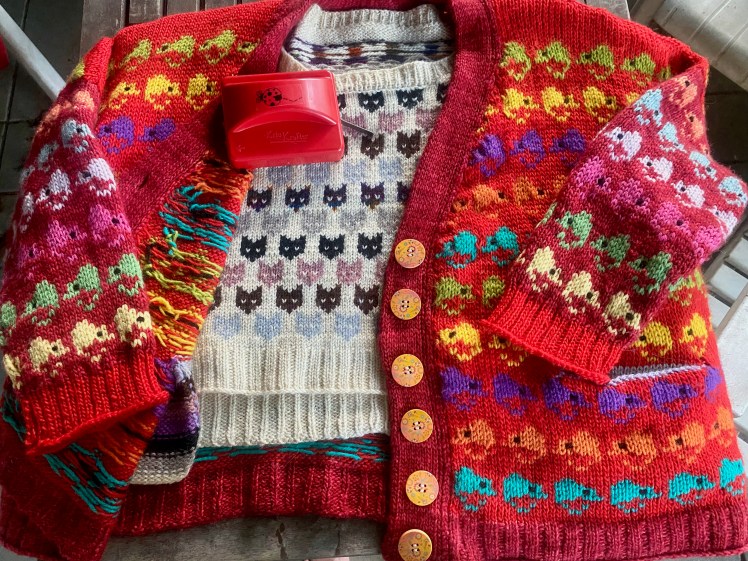

Oh what fun! I like everything about these knits, but especially the secret striped pockets. That’s something I have enough skills to try.
LikeLike
Thank you! There are more ends to work in but it’s a fun subtle feature.
LikeLike
Surely no one else in the world has a cat and mouse (would we even dare to call it a Tom and Jerry) twin set?!?! Or, if by chance there is another out there, it is unquestionably not as adorable as this set.
So, there are a few thoughts that recur every time I look at this set. The overwhelming first thought is that you have managed to create this set and avoid conveying the sort of nauseating cuteness and (what I think of as) “twee” factor that hovers threateningly over such a design. Rather than taking my emotions down that sort of rainbow-farting unicorn, Disney world of garishness, my mind is consumed by delight at the UTTER ADORABLENESS of them. They are both totally adorable.
The second thought that seems to consume my brain is how brilliant your color combinations are (and, of course, why would I expect anything else, as this IS your superpower), most especially in the cat vest, which, on a cursory glance conveys a very elegant and classical effect. It is not until the eye rests long enough on the motif that one realizes that one has been drawn in by none other than kitties – and honestly, what can be better than that? It gives me a tiny dopamine rush of reward for paying attention long enough to realize that I’m looking at kitties!
Finally, OMG, that button band is genius! I have not come across that method before, and I adore how it looks. Definitely am writing that one up for myself and will try at some point.
Thank you, as always, for this delightful dish of delicious knitting.
LikeLiked by 1 person
Thank you, Tanya! This would still be unused yarn in my stash without your patient tutelage!
LikeLike
You and your projects are so freaking cool! ❤
LikeLiked by 1 person
Thanks so much!!!
LikeLike