
I dedicated most of my annual January Swatchathon this year to exploring machine knitting techniques illustrated by the British textile designer Alison Dupernex, especially her use of color in circular tuck stitch shapes. I have owned her book Machine Knitting: Designing with Colour for some years, but it took some years for me to get around to learning the skills she assumed knitters would have in order to put her ideas to practical use. My January 2025 Swatchathon scarf served that purpose.

As I noted in the January 2025 Swatchathon post, the largest and most elaborate tuck stitch shapes shown in the book had 14 strands piled up on the tuck needles on a 4.5 mm knitting machine. How on earth did Alison Dupernex get the carriage over so much bulk without jamming it at every single motif and dropping all the stitches? She did warn that the stitches next to the tuck needle might drop if care wasn’t taken to prevent that, which was an epic understatement. Tucking 14 strands on a standard gauge machine seemed to me like a physical impossibility, unless the yarn was no thicker than sewing thread. But using 12 strands of heavy lace weight, or a light fingering weight, on a 6.5 mm medium gauge machine was a doable thing, and I had several lifetimes’ supply of yarn in that weight from my years-long buying binge of Wollmeise lace.
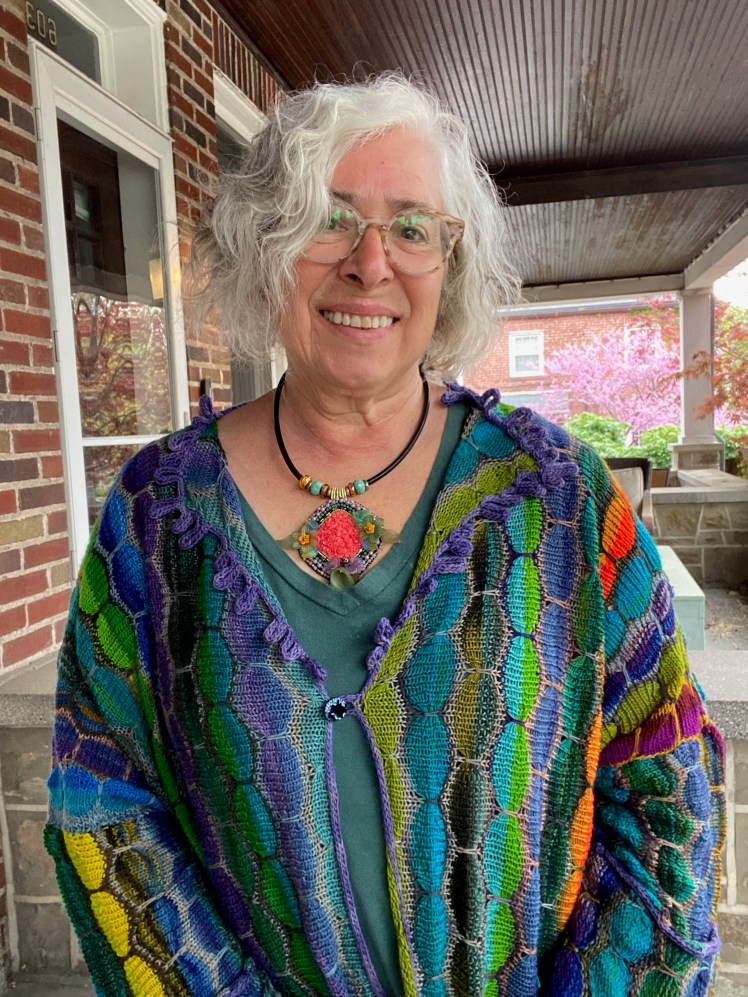
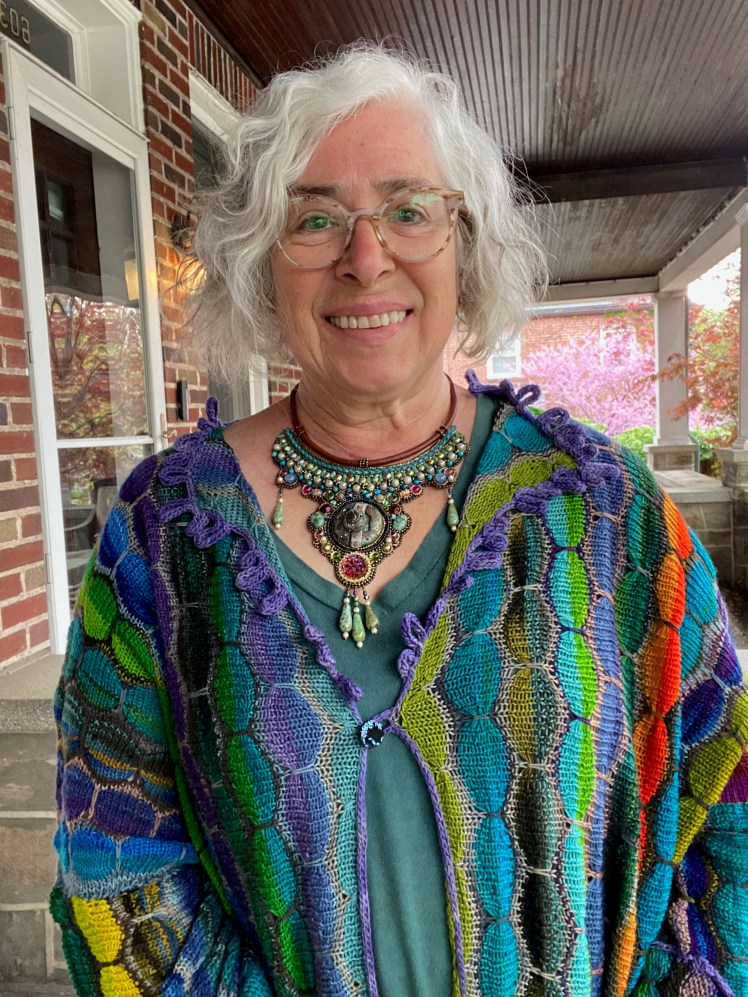
I had a plan, of course. My oldest sister was having a significant birthday ending in a zero. Nancy makes fabulous jewelry, which I celebrated in this blog post on the occasion of her most recent significant birthday, and I wanted to make her a knitted jacket using the colors that appear most frequently in her work. I’ll make a confession about my color decisions: I don’t make them on the basis of inspiration but on the basis of situation. By that, I mean that I don’t get a vision of what I want to do and then search for the perfect colors to match that vision. Instead I look at what I have on hand and build a composition based on finding contrasts and similarities and finding a rhythm and then varying the rhythm.
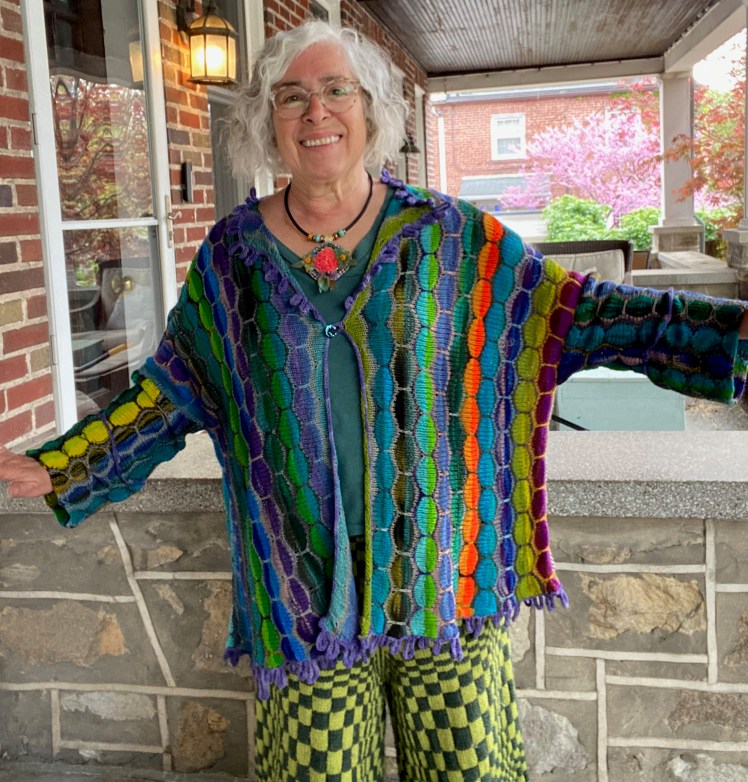
I have a wide range of Wollmeise lace colorways that are still in the uncaked bullet form that they were sold in, and they are sealed up in vacuum storage bags and crammed tightly onto bookshelves. Just taking them off the shelves is a mental and physical effort, because putting the puzzle back together is not a sure thing. Also there’s a lot of yardage in Wollmeise lace skeins, and it’s time-consuming and a lot of effort to wind them. Breaking the seal of the vacuum storage bags means having to pump the air out of them to reseal them if I open them up to peruse their content. Winding cakes, resealing the bags, and fitting the bags back onto the shelves were obstacles to my considering the entire range of colors in my possession, so my laziness restricted my color choices to yarn that I had previously wound and was left over from other projects. Restrictions liberate my resourcefulness, so these restrictions were a good thing for my creative process. The colors for the tuck stitch circles were the blues, greens, and purples that my sister gravitates toward in her jewelry art, with neutrals for the connecting plain rows. Wollmeise lace is a very lightweight yarn for a 6.5 mm machine, so the fabric would be quite loosely knit and very drapey, and hopefully useful as a layer for air conditioned rooms in the hot, humid climate where my sister lives. The garment shape would be a simple, oversized rectangular jacket knitted side-to-side with a little bit of shaping at the shoulders, mostly open at the front except for a single button at the sternum that folded the top corners over into lapels.
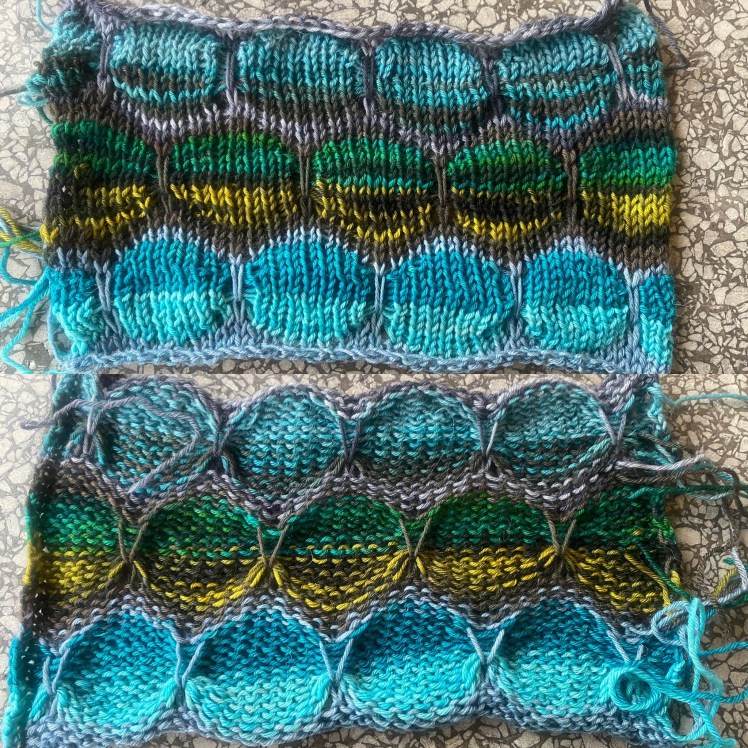
I knitted the fabric at T4 on the LK150, hoping that the thin yarn and the loose tension would help the stitches to stay on the needles next to the tucking. At least the carriage was able to get past the 12 strands sitting on top of the tuck needles, but I did have to fight with the weighting to get the neighboring needles not to eject their stitches, and it was not always a successful fight.
After I finished the first piece, Tanya gave me a tip that made it a lot less fraught to knit the plain row to close the 12 strands of tuck: pull out all the needles to hold, take the levers off hold so that all the needles would knit, put plenty of weight right under the needles, and knit. The wonderful heavy, sturdy cast-on combs that come with the LK150 are perfect for this. I didn’t lose any stitches at all on the two fronts because I positioned the LK150 combs directly under the vulnerable stitches, as close as I could get them to the needles without interfering with the path of the carriage.
For the patterning, I knitted two rows plain in a light or dark neutral, then pulled a needle out to hold every eight needles, with seven needles between the needles in hold, and knitted six rows of one color and six more rows of another for a total of 12 strands stacked on the held needles. I finished by pulling out all the needles, switching the levers to knit all the needles, and placed the LK150 cast-on comb as close as possible to the stitches to knit two rows plain in the same neutral color. Then I repeated this sequence with a different neutral and different colors at an offset position from the previous stripe of circles with the pulled-out needle centered on stitch 4 of the seven stitches of the circles. This required many color changes and many ends. To secure the ends firmly enough to snip them closely at the completion of the project, Alison Dupernex advises winding the ends a couple of times around the first needle before knitting the color change row, but that seemed a bit minimal to me, so I wound the end over and under four needles and back again to the first needle, wound it over the first needle, and all the way around the second needle, then knitted the row.
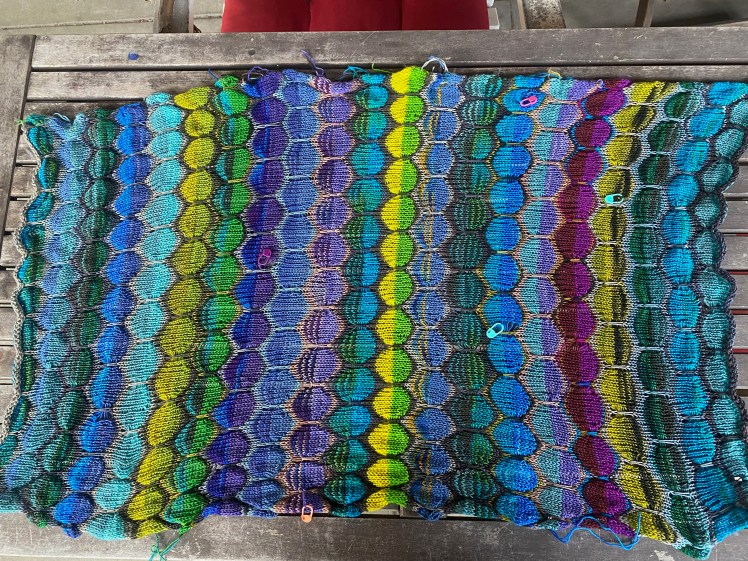
My colors consisted of maybe 30 colorways or so (kicking myself for not having counted and taken a picture of the huge bin of cakes that sat on my knitting table), solid and multi, mostly in blue, green, and purple colorways. My default was to chose color pairs that blended pretty closely with each other, but sometimes I went for colors in the same family with more hue variation. I also played with pairs of multis that didn’t seem to have that much in common when comparing the two cakes side by side, but which had a secondary color in common. I liked the way these pairings blended in some of the circles and contrasted in others. The comings and goings of the stripes and pools added movement to the visual effect of the fabric.

When the colors seemed too quiet and predictable, I threw a shock of neon green into the mix. But the pop color that gets everyone’s attention is the one stripe of orange nestled in between a deep aqua on one side and a multi of dark green and aqua on the other side. Orange is magical, and aqua emphasizes its magic.
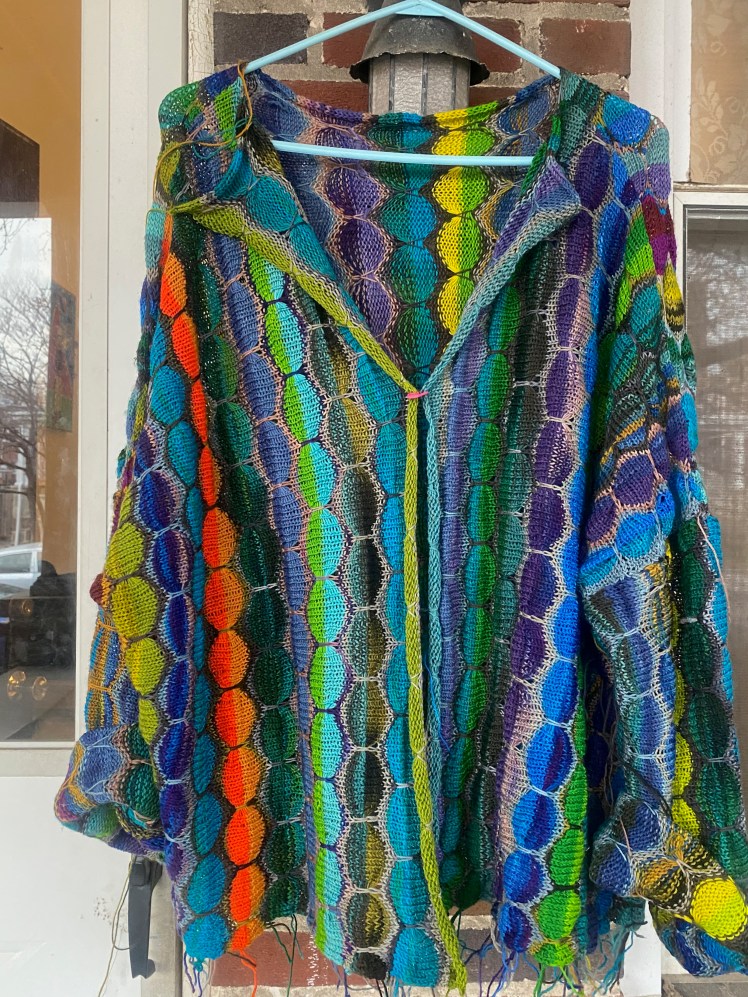
The sleeves were wide, unshaped rectangles that could have been a number of circles shorter, but I wanted them to be long enough to cuff generously. After blocking, those turned out to be very, very generous cuffs. I kept the colors pretty quiet, except for a neon green sequence on one sleeve that I placed on the opposite side from the neon orange sequence on the front body.

After I assembled the jacket, I embarked on a looped i-cord edging all the way around the hem, interrupted by plain i-cord on the front, then resumed at the lapels, and plain again at the back of the neck, then downward on the other lapel and the other front in the same way. The only thing to comfort me about the tedious week of machine-knit i-cord is that at least I wasn’t doing it by hand.

I was surprised by what a painstaking and time-consuming project this was at every stage of its creation. Even the final stage of snipping off the fringe of ends took a long time, because I needed to make sure that every single end was secure before I snipped it off and made the end too short to repair a dropped or poorly formed stitch, and there were a few that justified my caution.

But the result is good, I think. I showed the other sisters some pictures of the almost-finished work, and my next-older sister, who will reach the same birthday in three years, said it almost made her look forward to that birthday. Uh…. I don’t know how to break it to her…
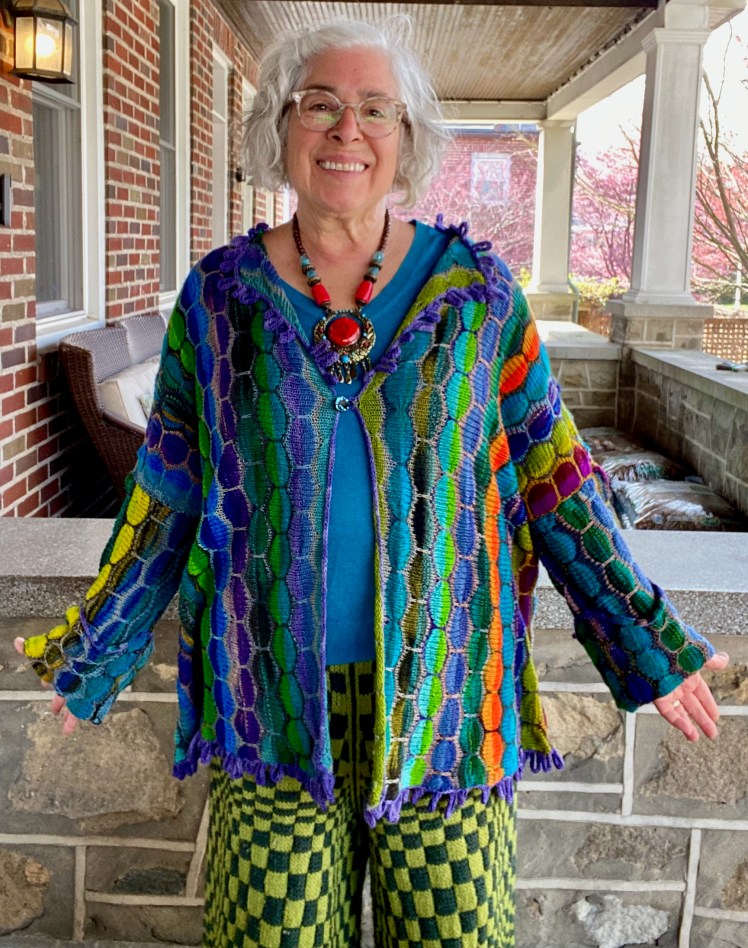

And a couple of close-ups to show the glory of Nancy’s jewelry compositions.

what a phantastic garment to wear, what a courageous, artistic lady!
we need more of the same spirit in these times of almost worldwide uniformism
LikeLiked by 1 person
Thank you! I will do my best to disrupt the drabness!
LikeLike
Stunning. Love the colors.
LikeLiked by 1 person
Thanks so much!!!
LikeLike
The colors flowing about this garment are fascinating. I would be tempted to hang it on the wall as art.
LikeLike
Arghh! The interwebs ate my previous response. Here’s a second try….
Another stunning garment, another delightful essay. Both provided a spark of joy in the otherwise hellish landscape that is our day-to-day world in these times.
This jacket would not be the bundle of wonderful that it is without that AWESOME orange stripe!! And the jewelry is absolutely fabulous! I was also surprised at how much I enjoyed seeing the purple, picot, i-cord edging. I’m not normally a fan of most edge treatments – I often find them fussy and distracting – but this one really tickled me and made me smile.
The winner line from this essay: “Restrictions liberate my resourcefulness, so these restrictions were a good thing for my creative process.”
As always, thank you for so generously sharing your photos and thoughts about your process and progress. (I still think these posts are a book in the making!)
LikeLiked by 1 person
Thank you, Tanya, for this day-brightener of a comment!
LikeLike