
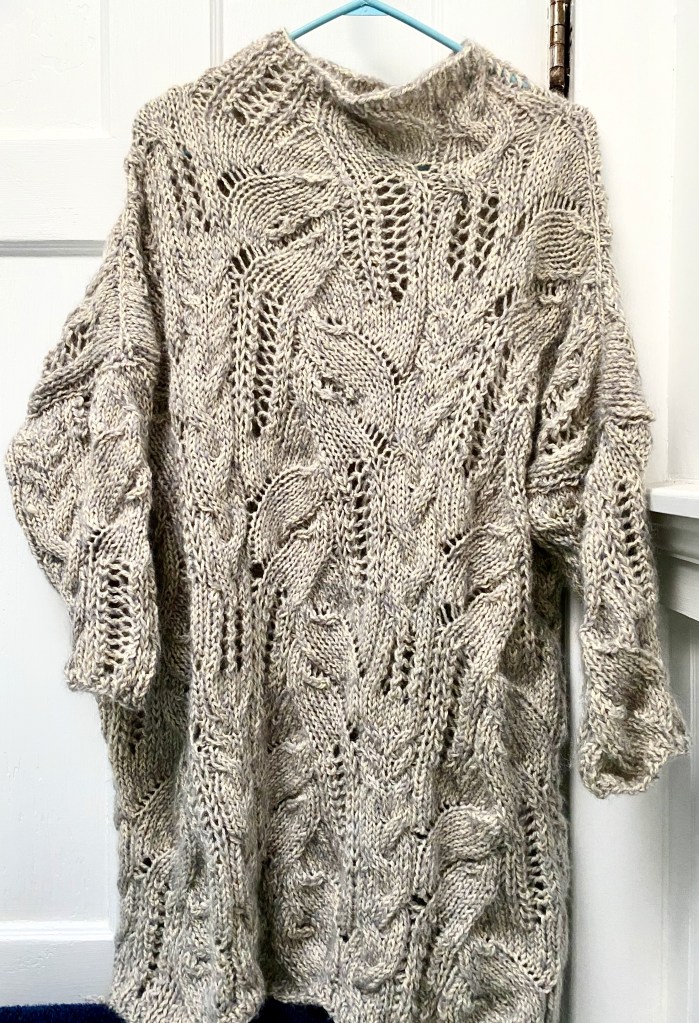
It was a beautiful sweater, knitted from an extraordinary chart made up of fairly simple components consisting of two different cable sequences, two different faggoting sequences, and two increase-decrease leaf shapes, reshuffling their order all over the length of the garment so that the lines of the designs went every which way. I showed the pattern page to Melissa, and we swooned over it together. There were red flags, however, and we knew the pattern was going to be trouble. It hadn’t been test-knitted, and at the time, there were no finished projects, and the only photo of the sample was modeled on a dressmaker’s form. If it’s not modeled on a human body, that’s a very bad sign. The designer has since responded to criticism and updated her Ravelry pattern page with information that should have been entered into the pattern itself and sent automatically to people who had purchased the pattern, but at the time when Melissa and I knowingly purchased this stunningly flawed pattern with the stunning chart, there was only one size available in the pattern, no yarn recommendations, and very vague information about stitch and row gauges. It was also an unusually expensive pattern, considering its sketchiness.
But the glory of that chart! I don’t like to name and shame designers whose patterns I’m raking over the coals, but I will here– it’s Flourish by JJ Wong, a Chinese designer writing in very confusing English. I’m naming the pattern and designer because the chart is glorious (although also flawed). But if you know how to turn a chart into a garment that you like, you can do it with this poorly written pattern, and if you heed my warnings, you can end up with a garment that justifies the $11 pattern price. Or, in my case, two garments.
Melissa and I purchased the pattern last May in order to have a two-person knit-along in the fall. I was ready to start in the fall, Melissa wasn’t. The yarn I used was a pairing of yarns from small local producers, an undyed worsted farm yarn from Flying Goat Farm combined with brushed suri alpaca lace weight from The Little Marian Farm in a silvery gray. The only place where gauge information appeared was on the Ravelry pattern page, not on the pattern itself, and that might have been added after I purchased the pattern. Why should it occur to me to get onto Ravelry to find out such vital information, especially when the information was added after people like me had started buying the pattern? The pattern did get specific about using size U.S. 10 needles, but the only information about gauge in the pattern was a picture of the sample laid out on the floor with a tape measure spread out across it, measuring 22″. I wanted my garment to have quite a lot more positive ease than that, and my knitting, in this yarn with those size 10 needles, was definitely at a much larger gauge.
The verbal instructions were minimal, which was actually fortunate, because the designer’s English was perplexing. At least I could understand the chart, although it had some irritating and inexplicable quirks, like dividing up each page of charting into two parts and placing the first half of the chart on top of the second half, contrary to the intuitive norm of starting at the bottom of the chart and knitting your way upward without a confusing interruption that forces a reorientation every time you look at the pattern.
I don’t really know why I felt so committed to following the pattern as literally as I could understand it. I knitted and knitted and knitted and my garment got longer and longer and longer before I even got to the front-back divide. I think it might have been because I wanted to see how the ingenious shuffling and directional shifts of the pattern elements– the cabling, the brioche faggoting, the increase-decrease leaf shapes, and the yarnover-decrease faggoting– made the lines of the design wander drunkenly this way and that over the entire course of the charting. I think this curiosity mesmerized me into suppressing that increasingly loud voice in my head that this thing was turning into a big fluffy dress that I was going to look ridiculous in. I also had a stubborn curiosity about what the designer’s verbal instructions were trying to communicate and where she was getting her numbers from, although I knew that those several stitches she conjured out of seemingly nowhere didn’t make even the slightest difference, since the bones of the garment were well established in the six pattern repeats that made up the body.
While I did try to follow the instructions literally, I rebelled at doing the front-back divide on the row the pattern specified, because that would have required knitting the cables on the reverse side, and submitting to that is simple masochism. The back and forth knitting was the least fun part of the work because working the chart backward complicated the counting and required some awkward needle approaches to accomplish the wrong-side SSK directional decreases. And why on earth would the designer start the back-and-forth knitting so that the cabling had to be done on the wrong side? She probably didn’t intend for anyone to do that, but she didn’t think it through. I turned the work for the divide a row later. The divide was way too big anyway for the sleeve I knitted, so delaying the start of the divide by a row didn’t make any difference.

There were more gibberish instructions and inexplicable numbers for the shoulder bind-off and seaming and for the continuation of the pattern up into the stand-up collar. But the idea is very simple, you bind off the pattern repeat on the left and the pattern repeat on the right, sew them together for the shoulders, and pick up a couple of extra stitches to close the gap where you continue knitting the neck. The neck is just a 16-row continuation of the chart, and you decrease the extra stitches in three decrease rows. There seems to be some attempt to explain where the decrease rows are, but it wasn’t intelligible.

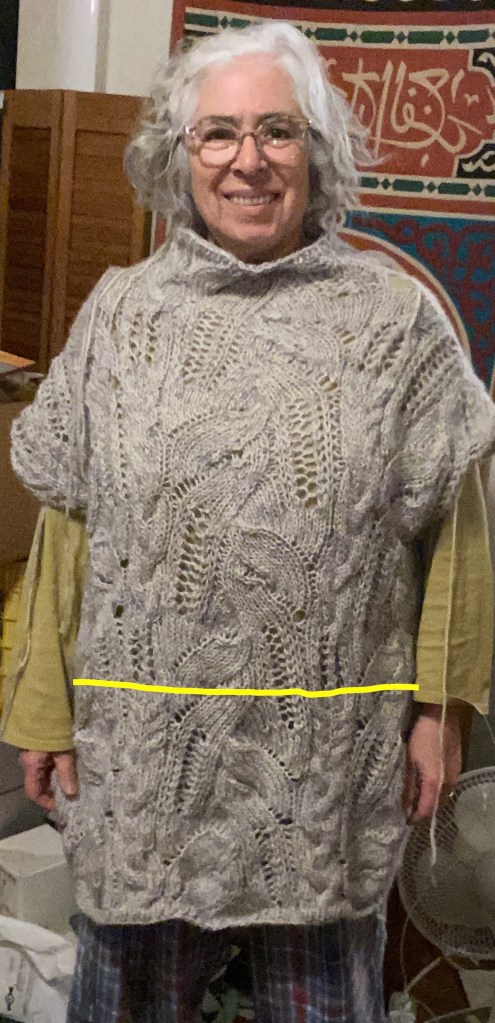
Once I seamed the shoulders and knitted the neck band, I had enough done to try it on and see just how bad it was. It was bad. Beautiful knitting, and a whole lot of it, but the garment was never going to work on me unless I had a sudden 6-inch geriatric growth spurt. Wouldn’t that be nice? And then I could saddle up my flying giraffe for a nice spin over the neighborhood.
Fortunately I happen to have a daughter who is six inches taller than I am, with a swanlike neck that keeps her from looking like a turtle gasping for breath in that overgrown stand-up collar, and slender enough to wear it belted without looking like a bale of hale strapped to a truck, and she said nice things about the unfinished work. Most importantly, she said she could use it. So I knitted the sleeves with the happy knowledge that it would go to someone knitworthy.
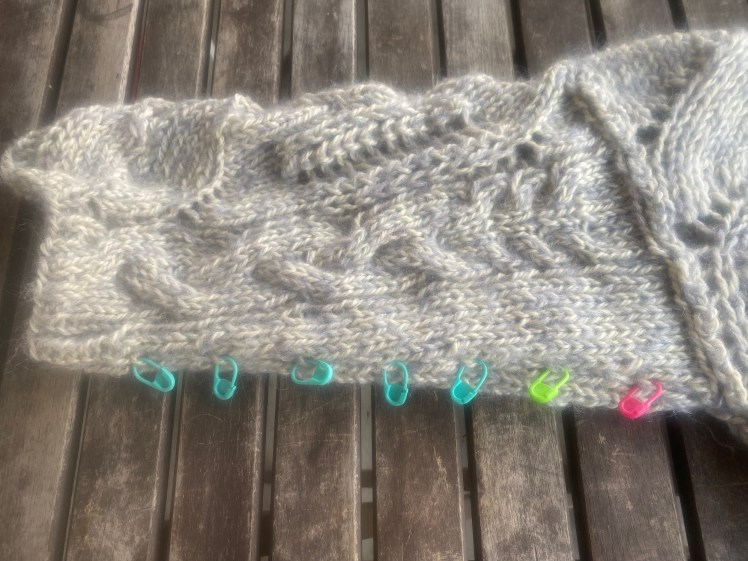
But I’m not going to end my discussion of Flourish 1 on that happy note, because I have some things to say about the sleeve chart. How, one might wonder, is it possible to mess up a chart with 7-row sleeve increases after having charted very similar configurations of the design elements for 132 rows of charting for the body, on three pages of charts? Since you ask, by cramming a similar number of rows onto a single page, resulting in microscopic cells that reduce stitch and row numbers to fly specks. That’s bad, but we’re not done yet. Enlarging the chart reveals that the designer used some extra-special-weird software that doesn’t print all of the grid lines, just to make it even harder to count stitches between decreases and yarnovers to make sure you’re on the correct row. OK, I think I’m done venting my spleen now.
Anyway, I did finish Flourish 1 and sent it off to Prima, and eventually it got to her. She came for a visit recently and I got to photograph her wearing it with the styling I hoped for, black leggings, a belt, and boots.
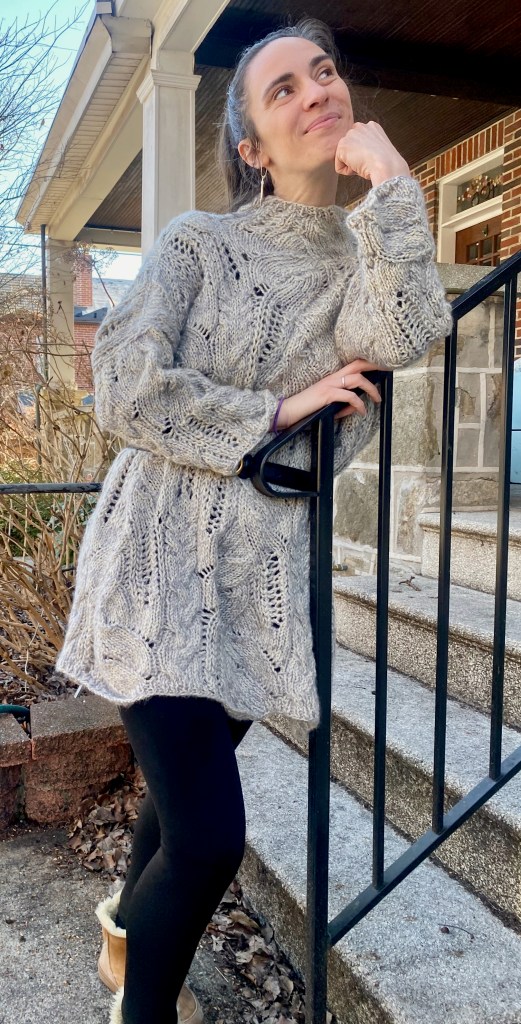

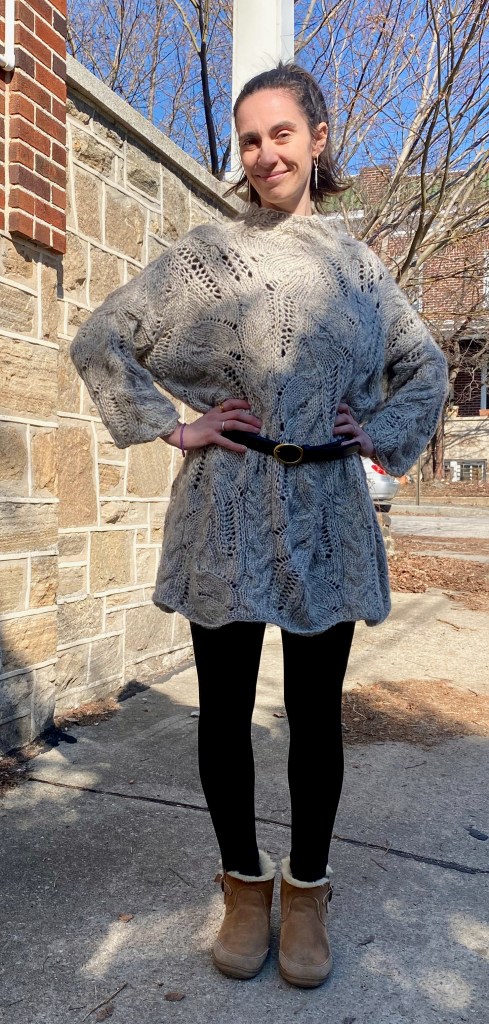
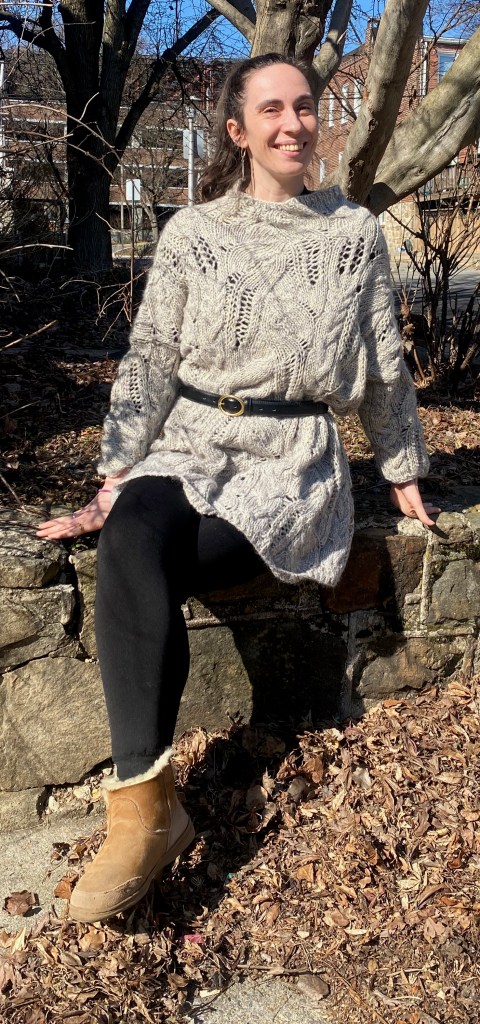
Prima has a long, form-fitting light brown sleeveless dress that she wore over a black bodysuit, and I suggested that she try wearing her huge, long Flourish 1 over that dress sometime. She just texted me to say that she had done so, and thought it might be one of her favorite outfits ever because it made her feel “like an updated Professor Trelawny, and I am here for it.” Did I mention she’s knitworthy?
I was finally finished with Flourish 1, but I required the satisfaction of turning this blighted pattern into something I could wear, because much as I criticized it, I still believed in it. I went back to Lovelyarns and bought a sweater quantity of Essentials Soft Merino Aran in the petrol colorway, which I was going to pair with yarn that I had in stash from the same Lovelyarns trunk show of Little Marian Farm brushed suri alpaca where I got the fuzzy yarn that I used for Flourish 1. This yarn was blue-gray, not exactly the same color as the petrol aran weight yarn, but together they create a denim effect with a hint of iridescence when examined close up.
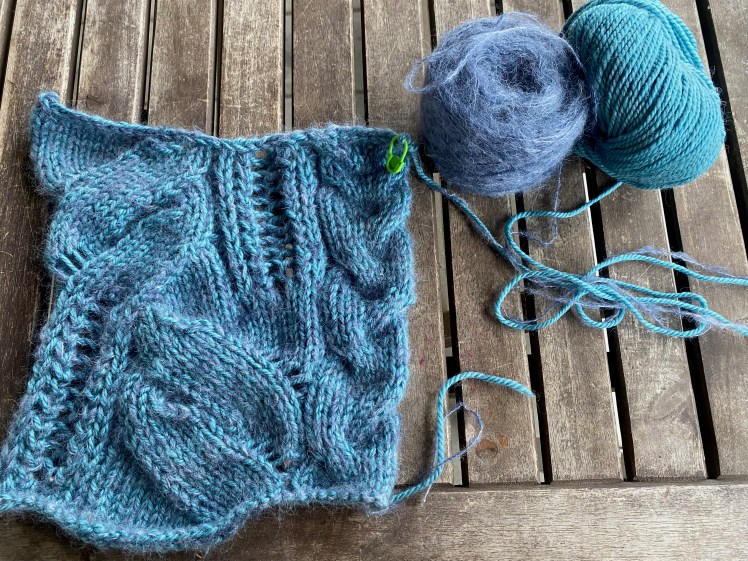
My strategy for Flourish 2 was to ignore everything about the pattern except the chart and to treat the chart as if it came out of a stitch treasury that didn’t pretend to serve any purpose other than providing a way to fill the space I wanted to fill for my own needs. Back to my roots, when I never used patterns and just knitted swatches using Barbara Walker stitch treasuries and multiplied gauge by garment dimensions to get my cast-on number, and knitted until it was long enough. This time I knitted a proper gauge swatch, going down a needle size to U.S. size 9’s, and knitted a 34-stitch pattern repeat from the bottom of the first chart up to the first reshuffling of the design elements. It turned out that six repeats, the same as the pattern, would get me the garment circumference that I wanted. As for the length, I would simply knit the charts until I had enough for the hem to the front-back division, then knit back and forth until I was comfortable with the depth of the slit into which the sleeves would be sewn.

So while I was knitting Flourish 2 happily and comfortably, with its beautiful stitch pattern that’s fun and easy when you’ve knitted it as much as I have, liberated from any expectation of useful instructions from the designer, Melissa started her version. Having witnessed my travails with the charts and the instructions, she didn’t even look at the instructions and set about recharting the pattern, muttering under her breath about what an f-ing ding-dong the designer was for messing up the basics of pattern charting. It especially bugged her that the designer had used the wrong symbol for the brioche row pairs, which of all the designer’s failings, was the one thing that I didn’t bother me.
Melissa’s approach to knitting is different from mine, by personality and by the necessities of owning a yarn shop that isn’t a rich woman’s hobby and needing to make a living from it. She estimates she has about 20 WIP’s (knitting jargon for works in progress) at any one time, most of them shop-related, and knitting for herself is an only-occasional luxury. When she starts something, she knits like the wind, but if she doesn’t like something about it, she rips it out without a qualm and starts over again. Sometimes multiple times, which she did with her version of Flourish. The first time it was because she didn’t like the fabric she was getting with her first choice of yarns. She swapped out the heavier yarn in her combination for something a little lighter in color and weight. In a couple of blinks she had knitted enough to try it on, and decided that four pattern repeats with additional stitches between the repeats was going to make a skimpy garment, so she ripped that out too. She cast on for six pattern repeats, like my two versions, and almost instantly worked up a couple of reshufflings of the design elements, but then she set the project down to work on store samples.
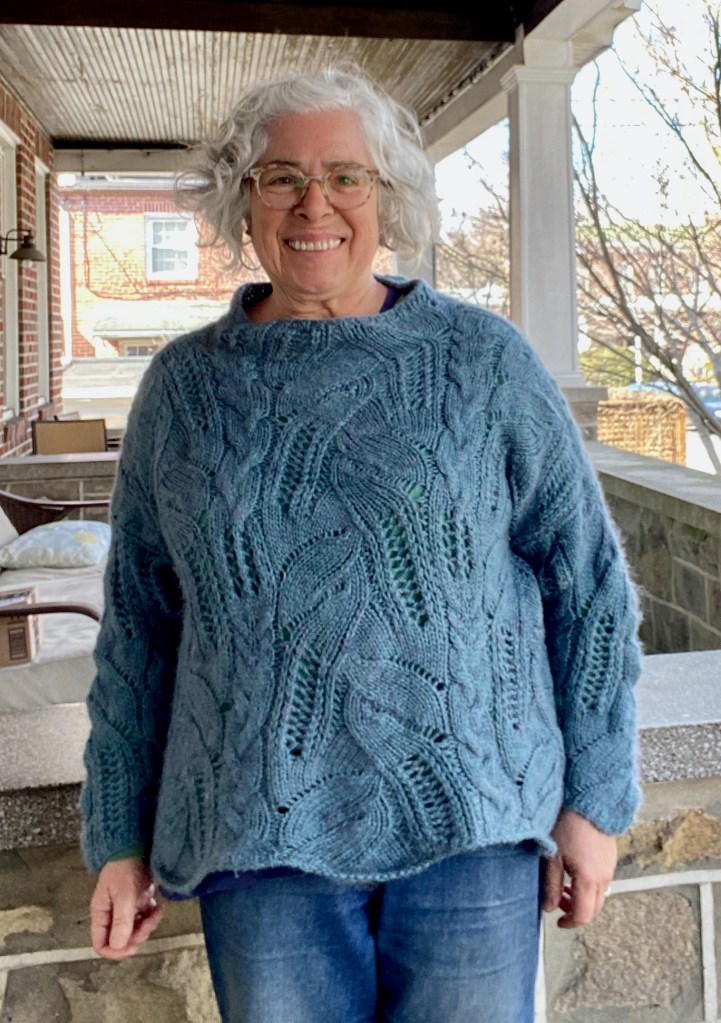
I’m the tortoise to Melissa’s hare, and I finished first. My swatch was true and gave me the numbers I needed for exactly the fit I wanted, and I knitted only enough of the chart to get the length I wanted. Stopping in the middle of a pattern sequence didn’t make any difference at all to the appearance of the finished garment, so I did the front-back divide when I had the length for the hem to reach where I wanted it on my body, and knitted each side up to the shoulder seam until I had enough fabric for comfortable sleeve slits. I knitted about 10 rows for the stand-up collar, just before the strangled turtle look set in, and I knitted the sleeves until they were long enough to cover my wrist bones and wide enough at the top to fit into the sleeve slits. If you can see where I failed to finish the pattern sequences, good for you, keep it to yourself, because I got a sweater that fits me exactly as I like it and has achieved the sweet spot of function and appearance. To those who understood what the designer was instructing, knitted accordingly, and love the result, I offer my kudos and respect. To those who are attracted to the beauty of the stitch pattern but are stymied by the pattern, I offer my story and example.

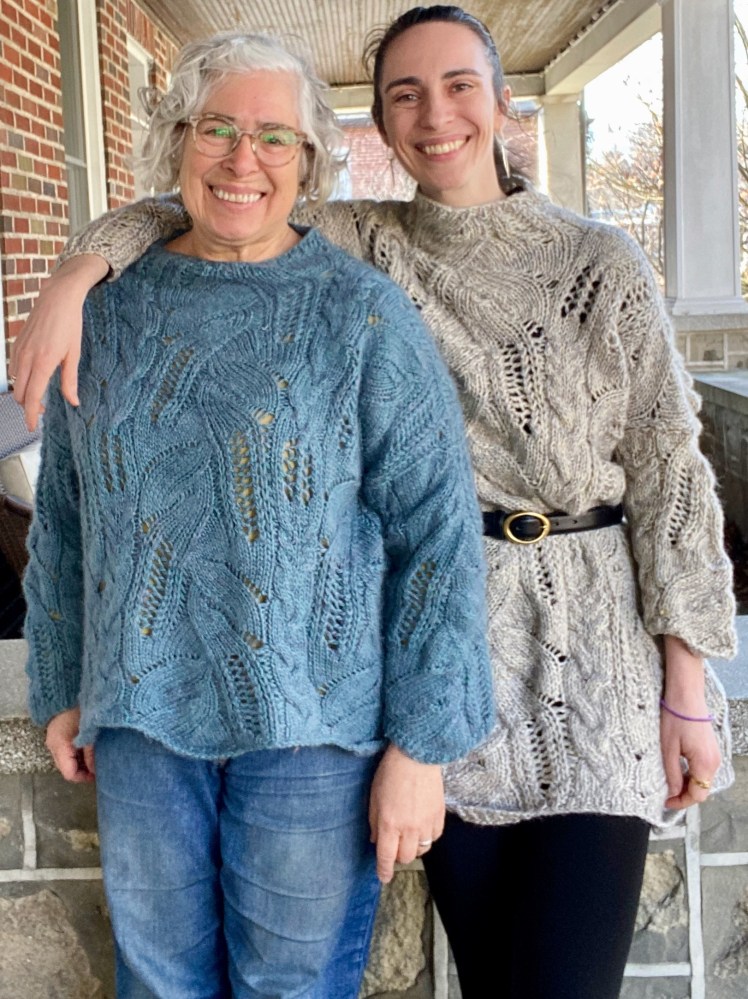

What beautiful smiles!
I love both sweaters and they look appropriately great on you both.
LikeLiked by 1 person
Thanks so much!!!
LikeLike
Could not have said it better than Pat. Bravo!
LikeLiked by 1 person
Thank you, Holly!!!
LikeLike
You did an amazing job interpreting the pattern in the first place, then reworking it to perfectly suit you! Congratulations on both of them, they’re a triumph.
LikeLiked by 1 person
Thank you, what a kind compliment!
LikeLiked by 1 person
Despite the crappiness of the pattern, you managed to seize its essential inspiration and make TWO great garments. Well done!
ps: “Professor Trelawney” – hilarious, and perfect.
LikeLike