


When my swatch of Natalia Moreva’s Coral Reef pattern first began telling me it wanted to become a summer top in Hawaiian shirt colors, I had to decide how I was going to shape the garment. Coral Reef is a stacked-stitch pattern whose stitch count triples on the increase rows and returns to its original count on the decrease rows. Normally I like to wear tops that are drapey at the bottom and decrease to an A-line at the bust, with the increases spaced within the fabric of my stitch pattern, but I lack the brain power to figure out how to work shaping increases and decreases into a fabric with an unstable stitch count. I might have opted for no shaping at all and made a front and back out of rectangles and dropped shoulders, but unshaped shoulders result in folds of fabric bunching up in the armpits, and that’s uncomfortable and not my best look. The solution I came up with was wedges: triangles to connect the front and back rectangles at the shoulders to create an angle compatible with the shape of my shoulders, and another pair of triangles from the armpits to the hem to get the A-line that suits me.
It’s a simple idea, very ethnic. Afghan, pre-burka, someone told me. Peruvian, others said. As usual for me, getting to simple was complicated. My first thought was that the wedges could be stranded, a flower motif knitted back and forth in two colors, maybe growing in size as the triangle widened. I discarded that idea because the stranding would add another layer of thickness to the fabric, and I wanted the top to be light enough for summer wear. I thought about attempting to improvise or adapt a stacked-stitch pattern that might enable me to add stitches to the sides of the stack motif and grow a triangle around it. I briefly played with the “tiny stacks” in Natalia Moreva’s Flames pattern, but once I’d done the stacked increases, I couldn’t figure out how decrease them away in the space I was trying to create.
Finally I settled for a mosaic stitch pattern with a 6-stitch repeat from Barbara Walker’s A Treasury of Knitting Patterns and began to experiment with at the shaping of the wedge. When I’d gotten a little way into the triangle, I folded it in half and laid it against the shoulder line of a dropped-shoulder Eileen Fisher sweater I purchased to serve as a template for dropped-shoulder sweaters that I’m planning to make. I found I’d stumbled upon the right angle, so my swatch became the wedge that I mattress-stitched to the two edges of my stacked-stitch rectangles to form the shoulder and a square neck. I started with two stitches and added a stitch at either end every fourth row until I had six stitches, and then I began the mosaic stitch in the contrast color, adding another motif every timeI had room for it, ending with a total of 36 stitches. The stitch pattern consists of four garter rows, and I did a pair of increases once every row repeat, that is, once every four garter ridges. In theory, anyway. There was some imprecision, which I fretted about but not enough to rip out my work and start all over. I used the same calculations for the side wedges, which also were not completely precise. This was knitting, not astrophysics or even carpentry, where a millimeter’s inaccuracy is a disaster. In knitting, minor inaccuracy will work out in the wash, literally. I was depending on the miracle of blocking to make up for my inexactness.
Here’s a series of progress photos that I posted on my Ravelry group, The Interior of My Brain. The general reaction was polite skepticism.

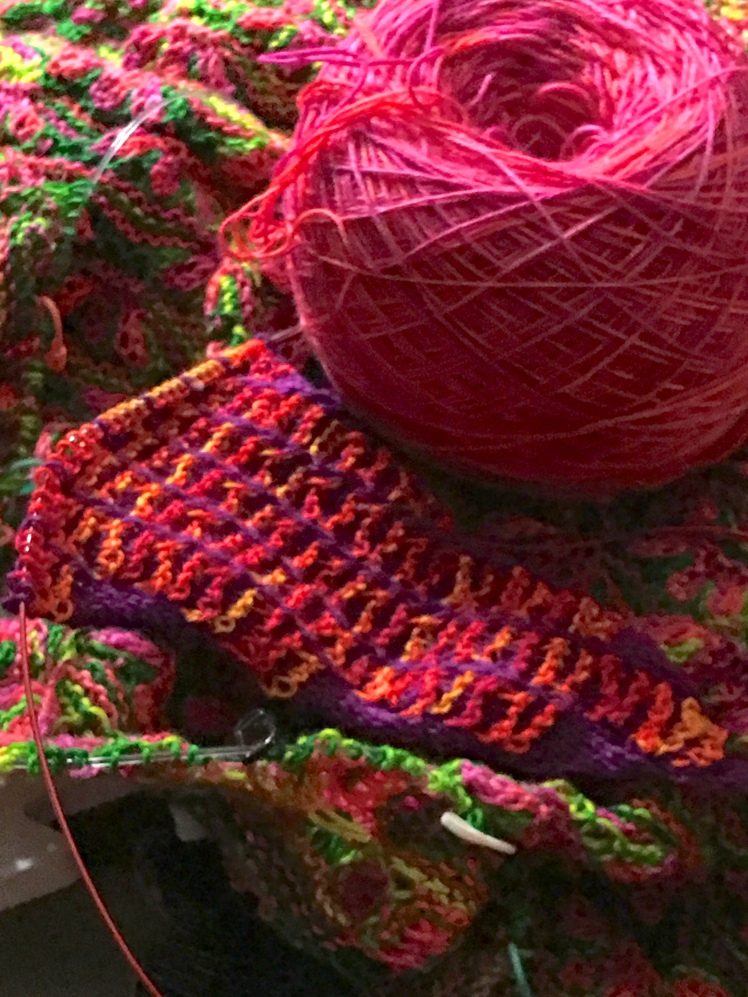
One rectangle finished, the second in progress. Unblocked, the pink and green show little contrast in places where the value is similar.

I was hoping that Xandy Peters’ Petal Cowl pattern might work as a border edging. It didn’t. Back to my original idea of Coral Reef motifs stacked on top of each other with the hope of getting a scalloped edge.

It wasn’t the stitch pattern of my dreams, but I wanted to finish this damn sweater sometime before the next snowfall, so I settled for the zipper-shaped mosaic pattern because I could put shaping increases at the sides. Nevertheless, the shaping looks uneven and lumpy. Not auspicious.
But at least the colors worked, and I discovered why when I looked at them in low light. It’s because the purple and the yellow-orange-dark pink multi are higher-value versions of the component colors of the pink multi in the stacked-stitch pattern.

This is a 4-stitch stacked pattern that a Ravelry friend developed for a workshop she was teaching on stacked stitches. I test-knit her pattern after I finished the garment, and heartily wish that I had learned it before I settled for the mosaic stitch pattern. This would have been perfect.
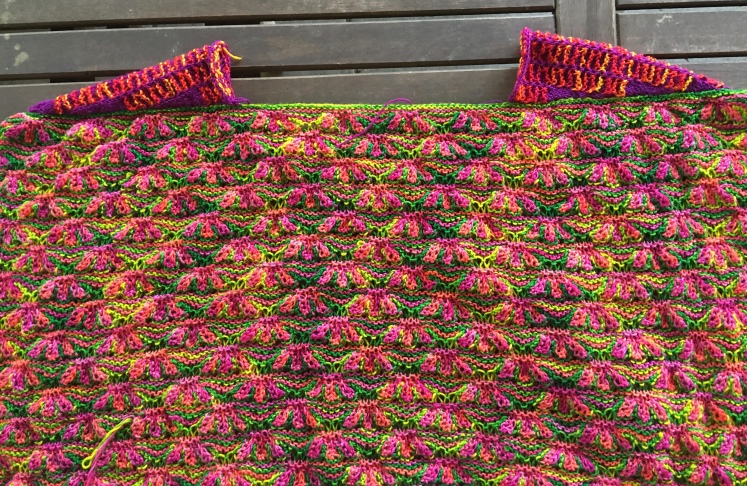

Here I’ve sewn in the shoulder wedges. At the bottom of forum posts on Ravelry, there are reaction buttons: educational/interesting/funny/agree/disagree/love. For these pictures, I got a small number of polite “loves” and a perplexing “funny.” Funny? How? It seemed out of character for anyone in my group to be derisive, because everyone is nice to each other there. I decided to interpret that as a non-native speaker of English using “funny” as the adjective for “fun.”


Now I have the side wedges knitted and roughly put into position with fabric clamps. I got another “funny”, undermining the theory that maybe someone had just fat-fingered that button previously in an attempt to hit the “interesting” button. At this point I’m starting to wonder if that derisive button might be accurate. The wedge is definitely looking longer than the fabric it’s supposed to fit into, and abracadabra finessing with the mattress stitching and blocking might not be magical enough to get a smooth join.

The shoulder and side wedges have been sewn in; a folded, mitered hem has been knit into the square neckline and set off with a green fold line; and the first armhole has a misshapen Coral Reef repeat as a border. The side wedges look very, very lumpy. I gamely tell my group that I have faith that it will all work out in the end.
As soon as I finish the second armhole, I try it on. You can see the relief on my face when I see that even though it’s not blocked and still lacks the bottom edging, it actually looks pretty good on me.

And I wasn’t the only one who was relieved! I got a slew of comments congratulating me on rescuing this one from certain disaster, all said in the very nicest and most flattering way possible… but I know how to read! No offense taken!

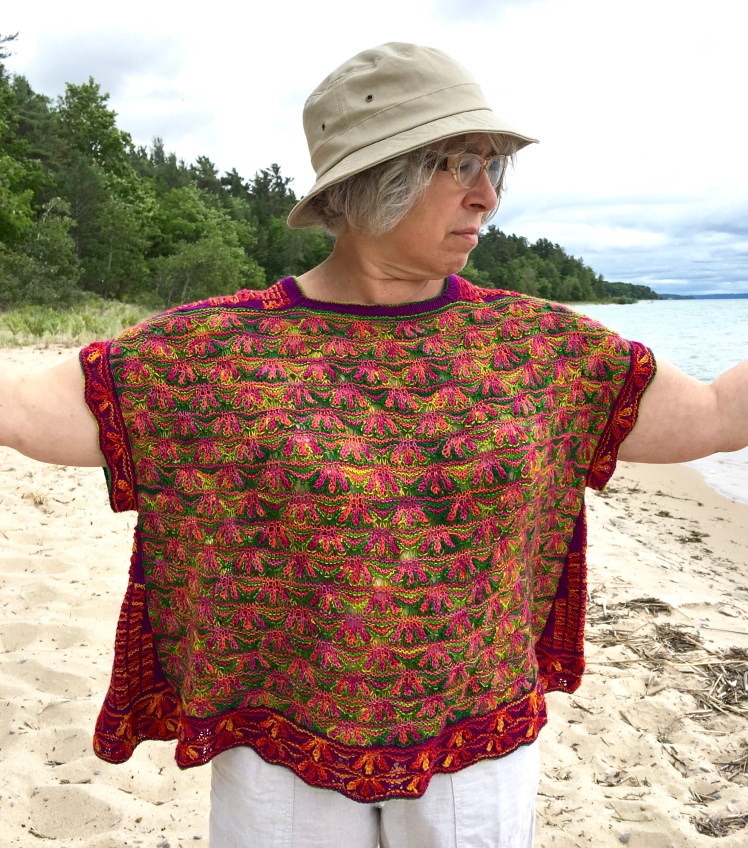

Now it’s finished and blocked, and for the most part my inaccuracies really did come out in the wash. The photo in the middle might possibly hint at a bit of lumpiness in the seaming of one of the side wedges, but I’m not terribly troubled by it.

Color inspirations! The name of the project is “Azaleas in Baltimore,” after considering and rejecting “Hawaiian Shirt” and “Pink Flamingos”.

Holy cow, woman, you blow me away! What an exciting, daring adventure! Yes it turned out great, looks nice and very wearable. I can’t get over your color combinations and engineering smarts. What yarns did you use? Fantastico! I’m experimenting with knitting a stranded square in the round, starting at the outside and decreasing. But my corners look awful so am still fiddling. Thinking about a rectangular stranded scarf knit in the round, but all in one piece, no steeks. Start from inside and increase? Don’t know yet. We shall see what unfolds.
LikeLike
Thank you, Celeste! The yarn is all Wollmeise lacegarn. How are decreasing your stranded square? Are you mitering them? Slip 2 knitwise, knit 1, pass slipped stitches over knitted stitch makes a tidy square.
LikeLike
No, the pattern says SSK on the right side of the marker, then K2tog on the left side. The floats in back are too long and there’s too much space in the middle. Would I just do this on either side of the marker, or get rid of the marker? Thanks for your help, I think this is a cool idea. I like the thought of knitting a flat stranded item in the round.
LikeLike
The thought of knitting a flat stranded item is nice but the execution of it is my idea of not-fun, since I have a personal loathing of sock needles! Although it could be done on two circs… So you’re using a pattern and not loving the corner decreases? If you mitered the corners the way I suggested, you would need to designate a center stitch. The way your pattern does it, you don’t need a center stitch. You would get rid of the marker if you did your double decreases with a center stitch. Was that gibberish?
LikeLike
Oh, I remember that from years ago. I’m going to rip this out and use that technique. Thanks so much!
LikeLike
Fascinating to follow your thought processes Abby!
LikeLike
It’s gorgeous. Fun, not funny. I enjoyed your account, especially your explanation of why the colors work.
Nancy
LikeLike
Thanks so much, Nancy!
LikeLike
No problem, sister. I’m proud to share DNA with the artist.
LikeLike
Likewise I’m sure!
LikeLike